by Riley Apr 24,2025
In the expansive world of *Monster Hunter Wilds*, victory isn't solely determined by brute strength. With the right blend of speed and strategic positioning, even the most formidable monsters can be overcome. This is where the Dual Blades shine, offering players a swift and versatile approach to combat. Here’s how to master the use of Dual Blades in *Monster Hunter Wilds*.
The Dual Blades are renowned for their rapid strikes and versatility, allowing hunters to deliver multiple hits in quick succession. Mastering both the standard and Demon Mode will prepare you for any scenario you encounter on the battlefield.
| Command | Move | Description |
|---|---|---|
| Triangle/Y | Double Slash/Circle Slash | A basic combo starter. Press Triangle/Y to perform a Double Slash, and follow up with Triangle/Y again to perform Circle Slash. |
| Circle/B | Lunging Strike/Roundslash | A slashing attack that advances in the direction of the analog stick. Press the command again for a Roundslash. |
| R2/RT | Demon Mode | Entering Demon Mode will boost the attack, movement speed, and evasion of hunters. It also grants immunity to knockbacks. |
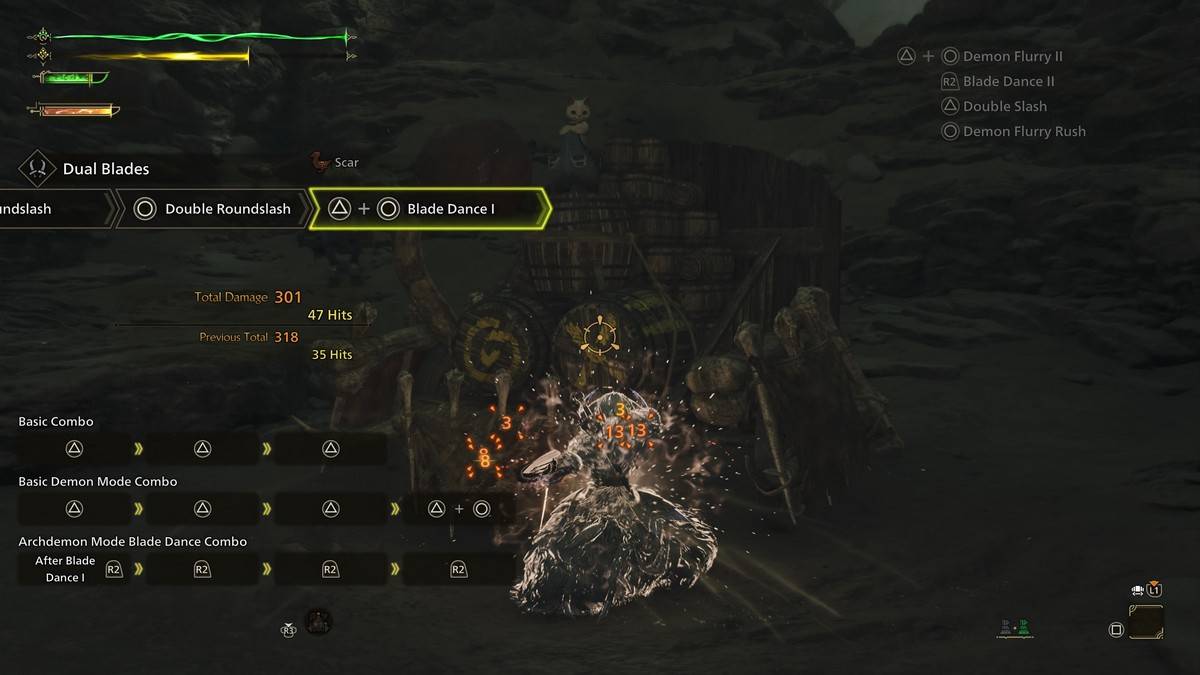
| Triangle/Y + Circle/B (In Demon Mode) | Blade Dance I, II, III | In Demon Mode, these powerful attacks can be chained together and will consume the Demon Gauge. |
| Triangle/Y + Circle/B (In Archdemon Mode) | Demon Flurry I, II | A series of attacks that can only be unleashed in Archdemon Mode and consumes the Demon Gauge. Use the analog stick to control the direction. |
| Cross/A (During Demon/Archdemon Mode) | Demon Dodge | In the respective modes, pressing the button will initiate a dodge that is faster than normal. A Perfect Evade will let players attack while dodging, and provide a short-term buff. |
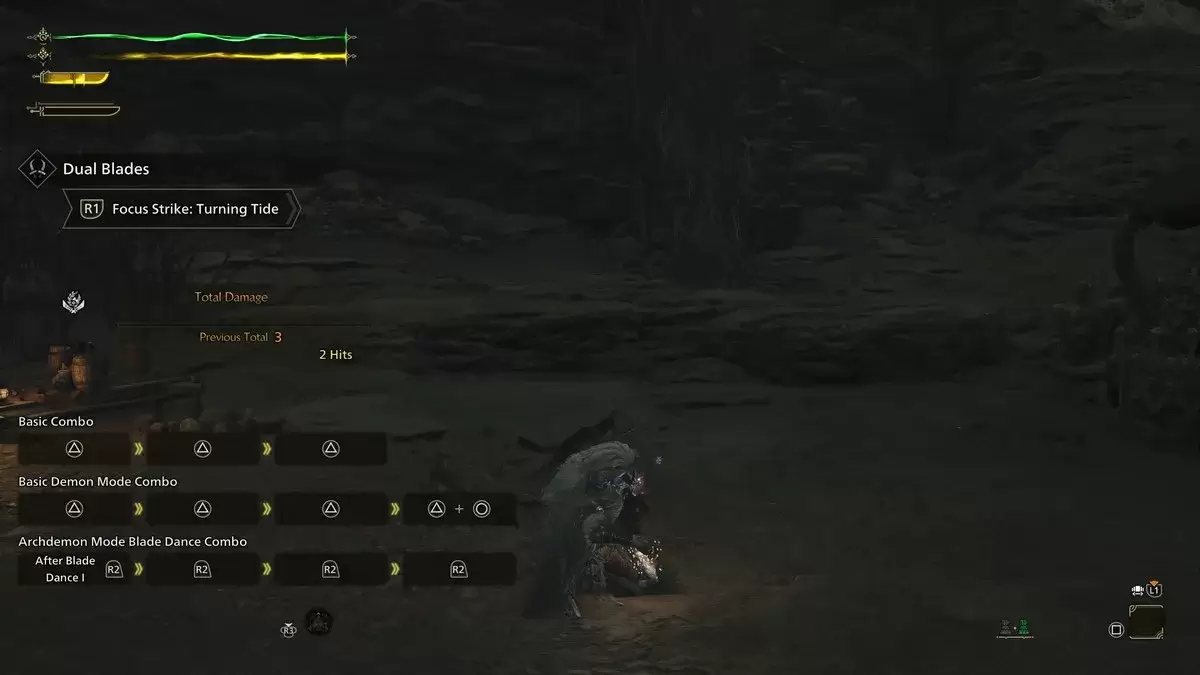
| L2/LT + R1/RB | Focus Strike: Turning Tide | A slashing attack effective against wounds, hitting a monster’s wound will perform a Midair Spinning Blade Dance. This attack spans the length of the monster and can destroy multiple wounds. |
The Dual Blades feature a unique gauge mechanic that allows players to enter Demon Mode, enhancing attack, movement speed, and evasion while providing knockback immunity. While active, Demon Mode consumes stamina, ending either when stamina runs out or upon manual cancellation. By successfully landing attacks in Demon Mode, the Demon Gauge fills up, transitioning to Archdemon Mode upon reaching its maximum. In Archdemon Mode, the gauge depletes over time and can be consumed by certain attacks, enabling hunters to execute powerful boosted attacks.
Both modes can be utilized simultaneously, and when mounted on a monster, the Demon Gauge stops depleting, providing strategic advantages as you plan your next move.
Following a successful Perfect Evade, hunters can enter an empowered state known as Demon Dodge. This state boosts both regular and elemental damage, allowing attacks during the dodge. Demon Dodge provides a 12-second damage buff, with subsequent dodges dealing damage as you spin forward.
Dual Blades combos are intricately tied to Demon and Archdemon Modes, emphasizing the importance of chaining attacks for maximum damage output.
The basic combo involves chaining three Triangle/Y attacks: Double Slash, Double Slash Return Stroke, and Circle Slash. This sequence offers reliable damage in various hunting scenarios. Alternatively, the Circle/B Demon Flurry Rush – Spinning Slash – Double Roundslash combo rapidly fills the Demon Gauge.
In Demon Mode, the basic combo becomes more potent and faster. Start with Demon Fangs, followed by Twofold Demon Slash, then Sixfold Demon Slash, and conclude with Triangle/Y + Circle/B for Demon Flurry I.
Once the Demon Gauge is full, transition into Archdemon Mode for swift and concentrated attacks. Begin with Blade Dance (Triangle/Y + Circle/B) in Demon Mode, then press R2/RT four times for Demon Flurry I into Blade Dance II, and finish with Demon Flurry II and Blade Dance III. This seamless switch between modes delivers significant damage to your target.
Mastering the Dual Blades involves fluid transitions between Demon and Archdemon Modes to maximize damage potential.
Initiate combat with the basic Demon Flurry Rush combo (Circle/B + Circle/B + Circle/B), then seamlessly transition into a full Demon or Archdemon Mode combo with three sets of Triangle/Y + Circle/B. This approach efficiently fills and utilizes the Demon Gauge for quick damage, a tactic that sets Dual Blades apart from weapons like the Great Sword.
Since Demon Mode relies on stamina, maintaining a high stamina level is crucial for prolonged engagements. While exiting Demon Mode to recover is an option, using Focus Strike on wounded monsters not only stops stamina drain but also helps fill the Demon Gauge, allowing you to resume aggressive attacks.
With no blocking capabilities, dodging is your primary defense mechanism. The Dual Blades offer superior mobility, allowing you to dodge out of most attacks and combos. Patience is key; wait for the right moment to strike rather than committing too early.
The rapid attacks of the Dual Blades can quickly degrade sharpness. Utilizing the Speed Sharpening skill in your build can minimize downtime, ensuring you're back in the fray swiftly.
These tips and techniques will help you harness the full potential of the Dual Blades in *Monster Hunter Wilds*. For more strategies and guides, be sure to check out The Escapist.
*Monster Hunter Wilds is available now on PlayStation, Xbox, and PC.*
Zenless Zone Zero Update Cycle Leak Hints at Future Content cadence
All Mavuika Materials, Kit, and Constellations in Genshin Impact
Counterfeit Bank Simulator: Minting Solution for Economic Crises
Marvel Rivals: Season 1 Dracula Explained
Albion Online launches Paths to Glory update with new content, boosted spawn rates, and more
Roblox: Anime Auras RNG Codes (January 2025)
Best Xbox Game Pass Games For Kids (January 2025)
Solo Leveling: Global Tournament Draws Near
Dirt Bike Motocross MX Bikes
Download
Lucky Surprise
Download
Transport Cruise Ship Games
Download
Piano Tiles - Vocal & Love Music
Download
Twisted Memoies
Download
he Seeds of Seduction: The Stepmother
Download
Modern Command Mayhem
Download
Spider Rope Action Game
Download
Learning 123 Numbers For Kids
Download Category