by Sadie Apr 07,2025
In the world of 7 Days To Die, players have a variety of mission types to tackle, ranging from the straightforward, like buried treasure missions, to the incredibly challenging. As you advance through the trader tiers, you'll unlock increasingly difficult missions, with infested missions standing out as some of the toughest. These missions involve storming a building teeming with undead enemies and eliminating them all.
While demanding, infested missions offer excellent opportunities for gaining XP, farming loot, and securing valuable, sometimes rare, rewards. This guide will walk you through everything you need to know about successfully completing infested missions in 7 Days To Die.
 To embark on any mission, you'll need to visit a trader. On a standard map, you can find five different traders: Rekt, Jen, Bob, Hugh, and Joe. The choice of trader doesn't significantly impact your mission, but the mission's location and tier do. Higher-tier missions are more challenging, and the biome where the mission occurs can affect enemy difficulty. For instance, missions in the forest are less likely to feature many ferals compared to those in the Wasteland.
Infested missions become available once you've unlocked tier 2 missions. To reach this level, you must complete 10 tier 1 missions. Infested clear missions are notably tougher than standard clear missions, featuring more zombies, including tougher types like radiated zombies, cops, and ferals. Tier 6 infested clear missions are the most challenging in the game, but by the time you access them, you should be well-equipped to handle them. Regardless of the tier, the goal remains the same: eliminate all enemies within a designated area.
 Upon reaching the mission's point of interest (POI), you'll need to activate it by interacting with the marker in front of the building or area. Once activated, you cannot leave the area without failing the mission. If you die during the mission, you'll respawn outside the mission area, resulting in failure.
Each location in the game has a preferred path for players, marked by torches, lanterns, or other lighting. Inside each POI, there are trigger points that activate events like floor collapses or zombie hordes when crossed. To avoid these, take alternative routes through the POI.
A useful tip for navigating dangerous locations is to carry building blocks. These can help you escape traps or climb buildings to surprise zombies. In any clear mission, zombies appear as red dots on your screen, with larger dots indicating closer proximity. This helps you track and avoid being overwhelmed.
When it comes to killing zombies, aim for the head, their weak point. However, be aware of zombies with special abilities:
Zombie Type
Abilities
How To Handle Them
Cops
Spit toxic vomit and explode when injured
Watch for their head-throwing back before spitting. Seek cover and maintain distance to avoid their blast zone.
Spiders
Jump across large distances
Listen for their screeching sound before they jump. Quickly aim for headshots when they're near.
Screamers
Scream to summon other zombies
Prioritize killing them to prevent being overrun by additional zombies.
Demolition Zombies
Have a glowing explosive package taped to their chest
Avoid hitting their chest to prevent the explosive from beeping. If it does, run far away.
In the final room of an infested clear mission, you'll find top-tier loot containers. Be cautious, as this room often contains the largest number of zombies. Ensure you're fully healed, your weapons are durable and reloaded, and you know your escape route before entering. Always be aware of your surroundings; if things get too dangerous, you need to exit quickly.
After clearing all zombies, your mission objective will update, requiring you to return to the trader to claim your reward. Don't forget to collect all valuable loot from the final room, including the infested cache, which contains additional high-quality items like ammo and magazines.
 Upon returning to the trader, you can choose a reward, which is randomly determined. The quality and rarity of available rewards depend on several factors:
Your game stage increases naturally as you play, and your loot stage can be boosted with skills like Lucky Looter and the treasure hunter's mod. Higher mission tiers offer better rewards.
To maximize your rewards, invest points in the A Daring Adventurer perk. This increases the Dukes you earn from missions and, at rank 4, allows you to select two rewards instead of one. This perk is essential for mission enthusiasts, as the extra Dukes and the ability to choose two rewards, especially rare ones like solar cells, crucibles, or legendary parts, can be incredibly beneficial.
After claiming your rewards, consider selling any unwanted items to the trader. Each Duke earned from sales grants 1XP, and selling in bulk can quickly accumulate thousands of XP.
Zenless Zone Zero Update Cycle Leak Hints at Future Content cadence
All Mavuika Materials, Kit, and Constellations in Genshin Impact
Counterfeit Bank Simulator: Minting Solution for Economic Crises
Roblox: Anime Auras RNG Codes (January 2025)
Marvel Rivals: Season 1 Dracula Explained
Albion Online launches Paths to Glory update with new content, boosted spawn rates, and more
Best Xbox Game Pass Games For Kids (January 2025)
Solo Leveling: Global Tournament Draws Near
Liam Hemsworth's Geralt debuts in 'Witcher' S5 set pics
Mar 31,2026

Crunchyroll Releases "White Day: A Labyrinth Named School" Worldwide
Mar 31,2026
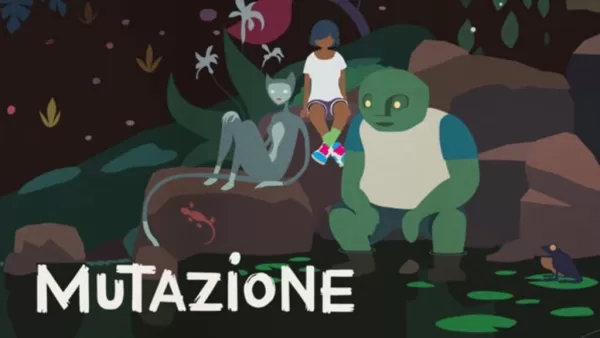
Hand-Illustrated Mutant Soap Opera Adventure Game Mutazione Lands on Android
Mar 29,2026
Video Game Consoles Are Selling for 12% More in the U.S. This Year Than Last Year
Mar 28,2026

Monster Hunter Wilds: Pre-Hunt Cooking Guide
Mar 25,2026
 Category