by Nicholas Apr 22,2025
После эпического путешествия через бесчисленные квесты и подземелья в римейке Dragon Quest 3 ваше приключение завершается грозной Цитаделью Зомы. Это последнее подземелье является окончательным испытанием ваших навыков, бросая вам вызов использовать каждую стратегию и тактику, которую вы освоили на протяжении всей игры. Это самая требовательная проблема в основной сюжетной линии римейка DQ3. В этом комплексном руководстве мы проведем вас через каждый этаж Цитадели Зомы, подробно описывая путь, который нужно идти, и сокровища, которые вы можете найти.
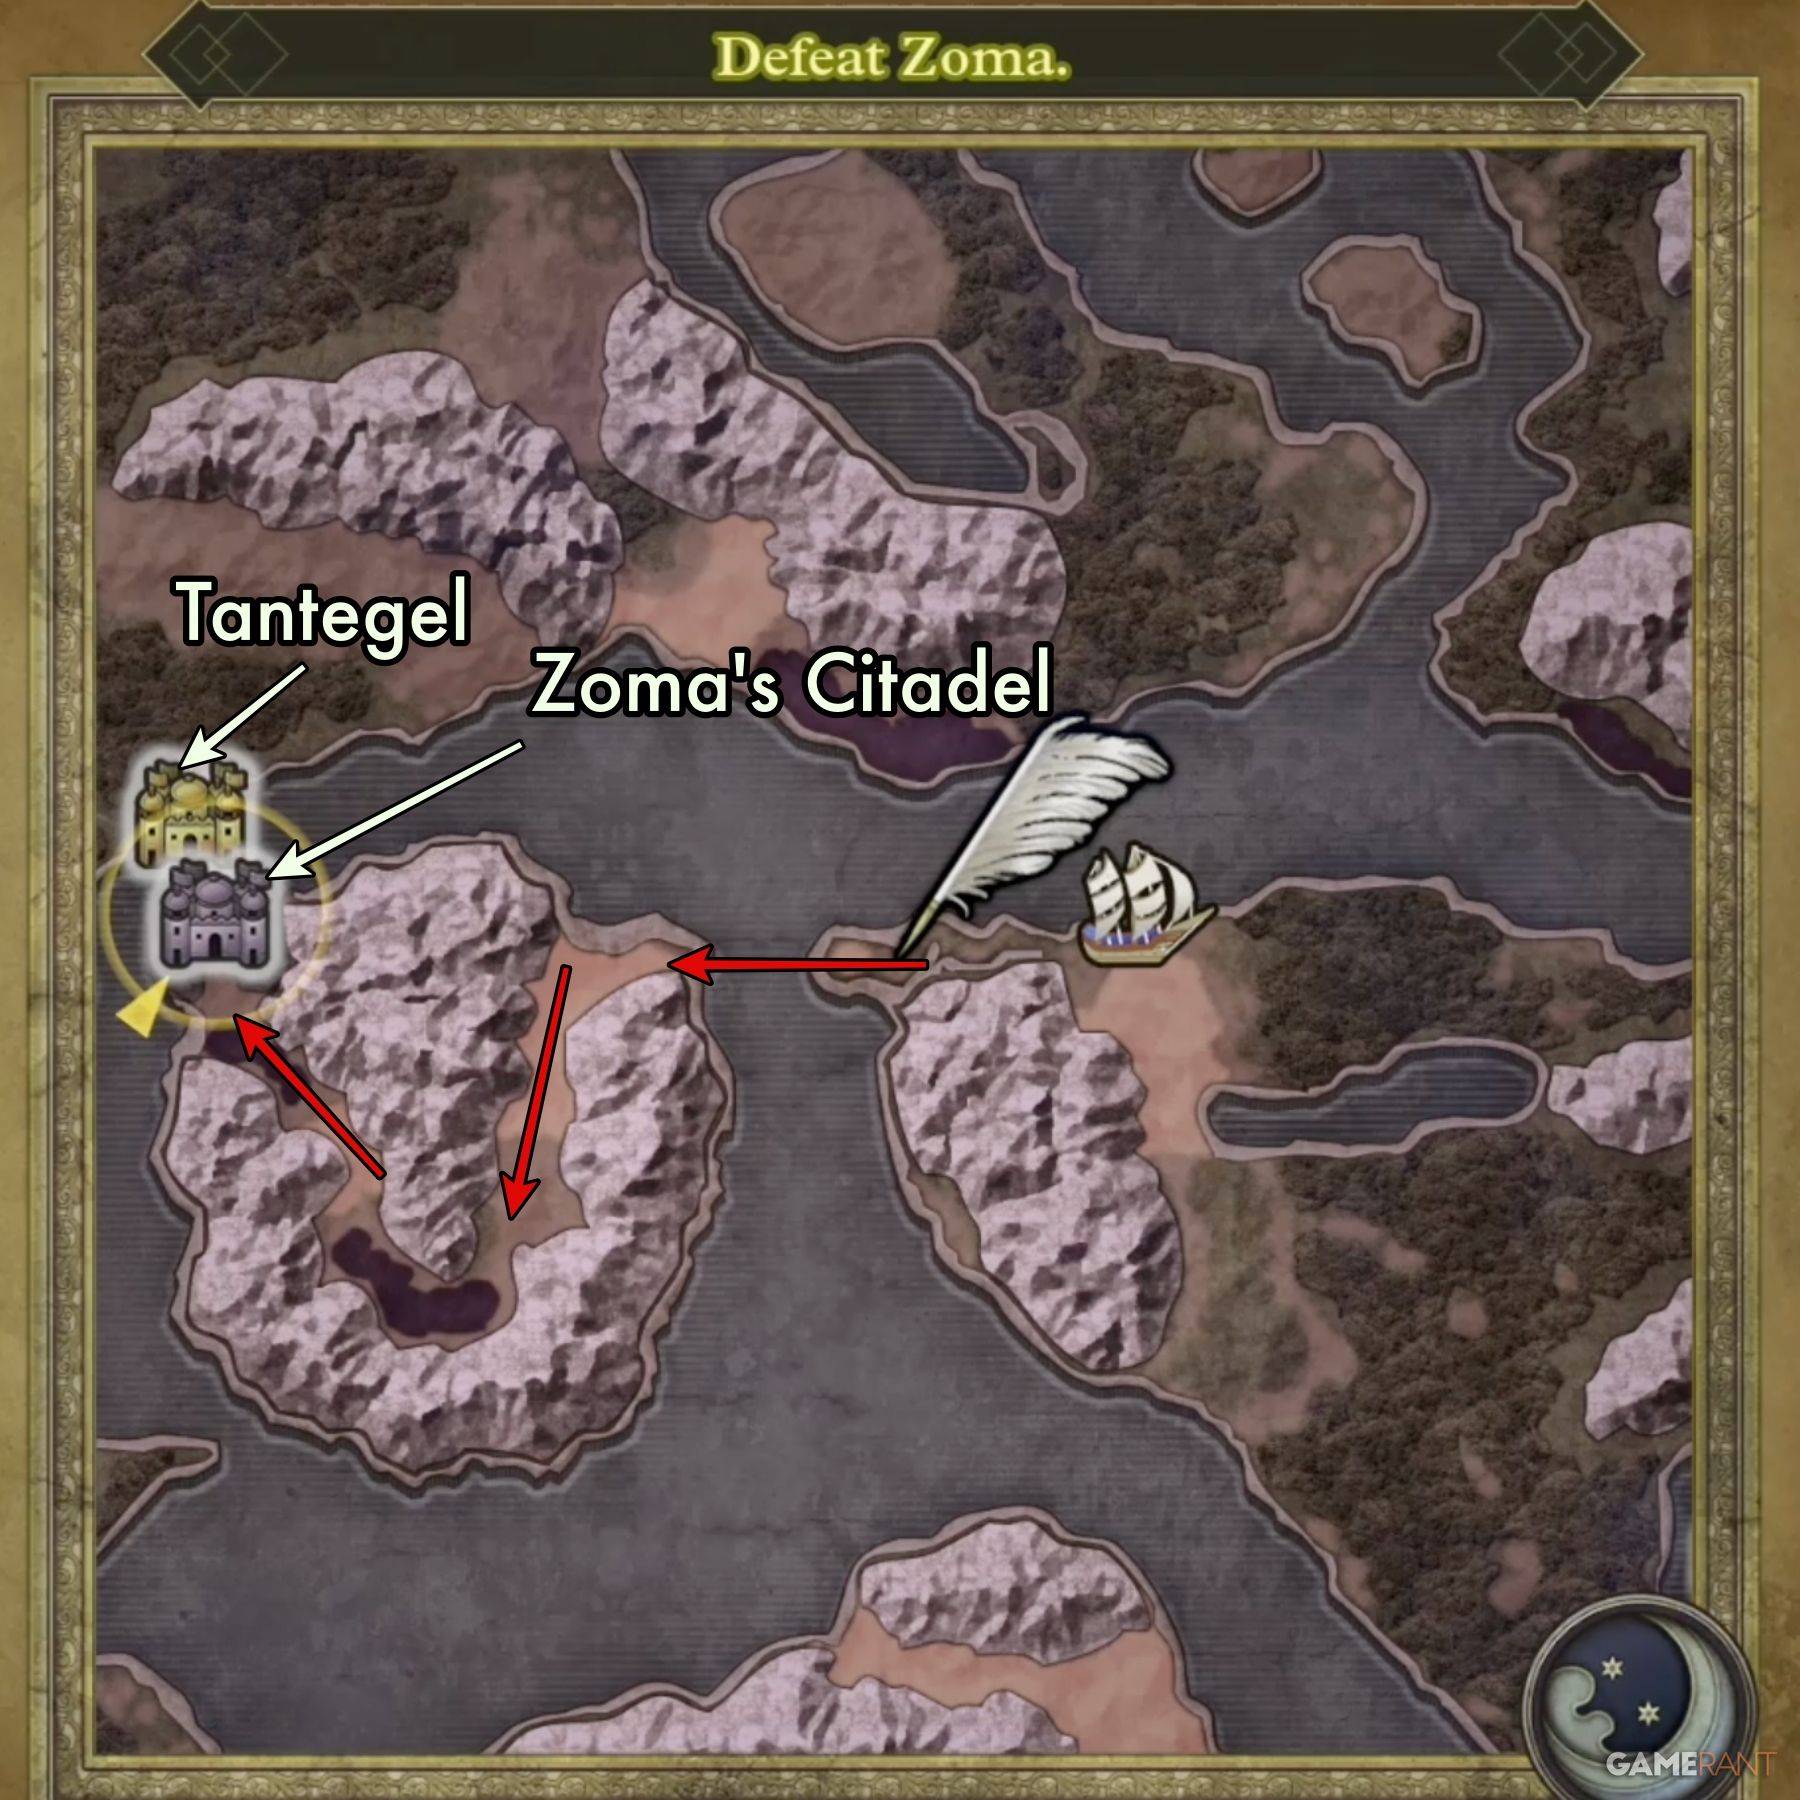 После победы над архидом Барамоса в римейке DQIII, вы окажетесь в вечно темном мире Алефгарда. Цитадель Зомы является вашим конечным пунктом назначения на этой новой карте. Чтобы добраться до него, вам нужно будет собрать каплю радуги, важный предмет в римейке DQ3.
Капля радуги состоит из следующих предметов:
После того, как вы собрали все три предмета, вы можете создать Rainbow Drop, что позволит вам сформировать радужный мост, ведущий к Цитадели Зомы.
 ### 1f Главный путь:
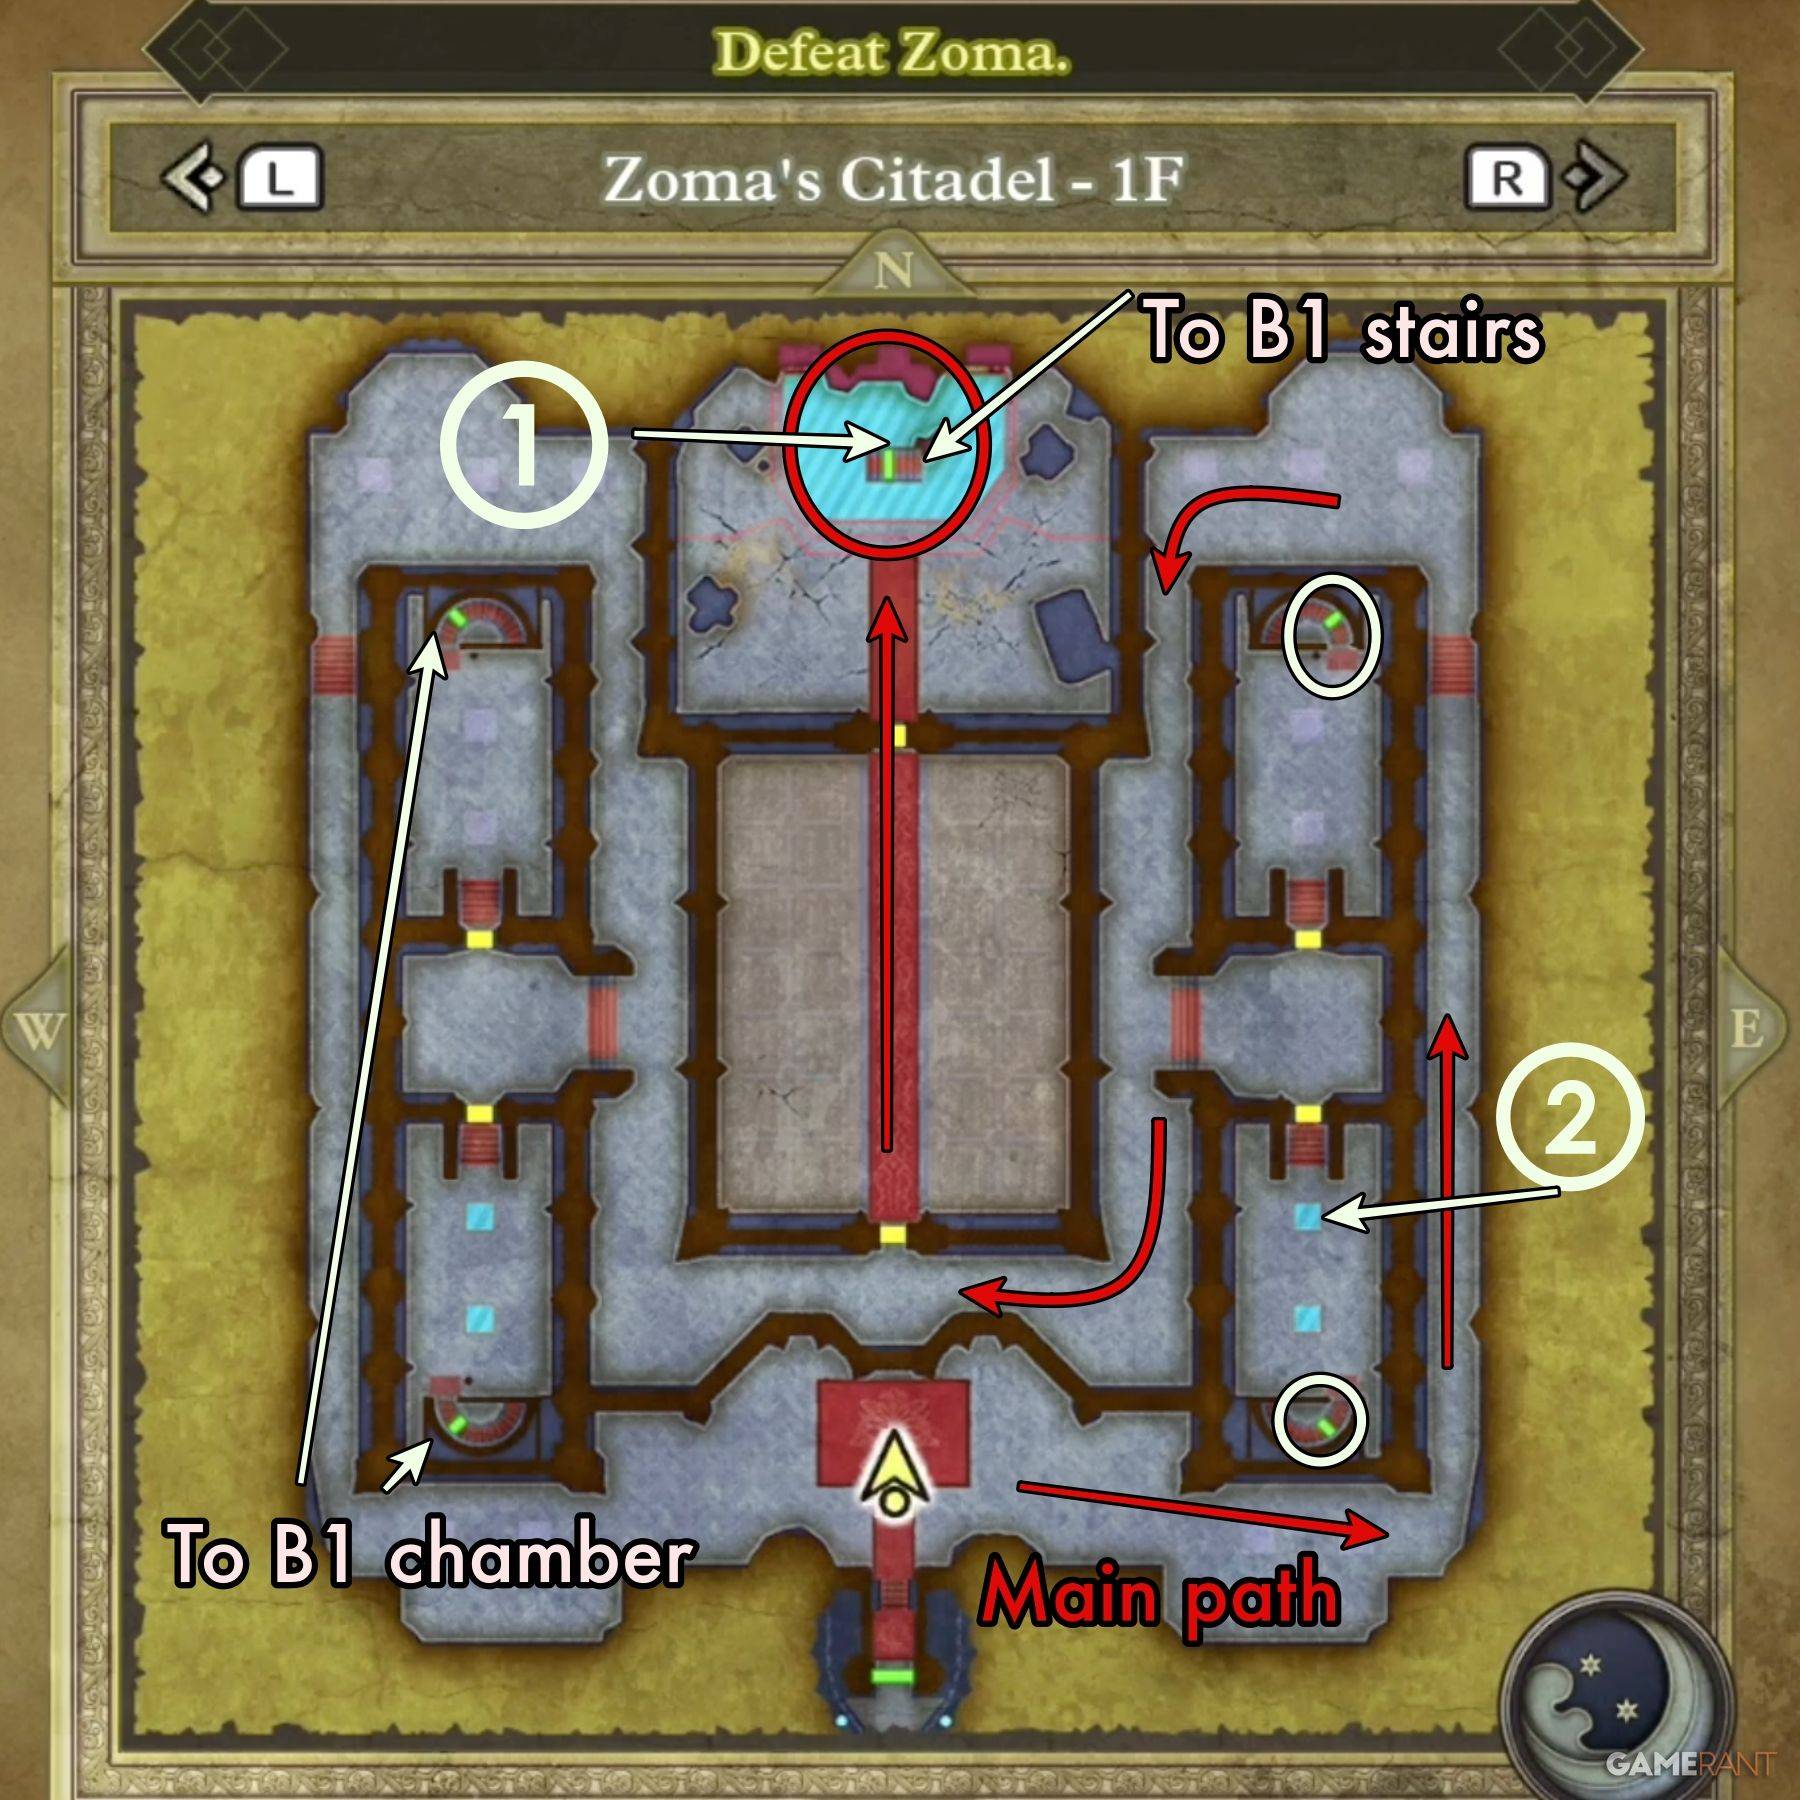
Ваша цель на первом этаже Цитадели Зомы - добраться до трона, расположенного возле центра северной стены, что переместится, чтобы представить скрытый проход. Перейдите вверх и вокруг восточной или западной стороны камеры, затем отправляйтесь обратно к двери центральной камеры. Обратитесь к карте выше для точного маршрута. Не пропустите сокровища, спрятанные в некоторых боковых камерах, подробно описанные ниже.
Войдя в центральную камеру, вы столкнетесь с вариантами живой статуи. Эти враги не имеют определенных слабостей и могут быть довольно грозными. Подойдите к ним, как будто боевой бой, и вы должны справиться с просто отлично.
 ### B1 Основной путь и сокровище B1:
Выйдя по основному пути под троном, приводит непосредственно к B2. Однако, если вы выберете какие -либо из четырех наборов лестниц в маленьких камерах на 1F, вы окажетесь в изолированной камере B1. Единственная цель посещения этого уровня - претендовать на сундук с сокровищами вдоль северной стены:
 ### B2 Главный путь:
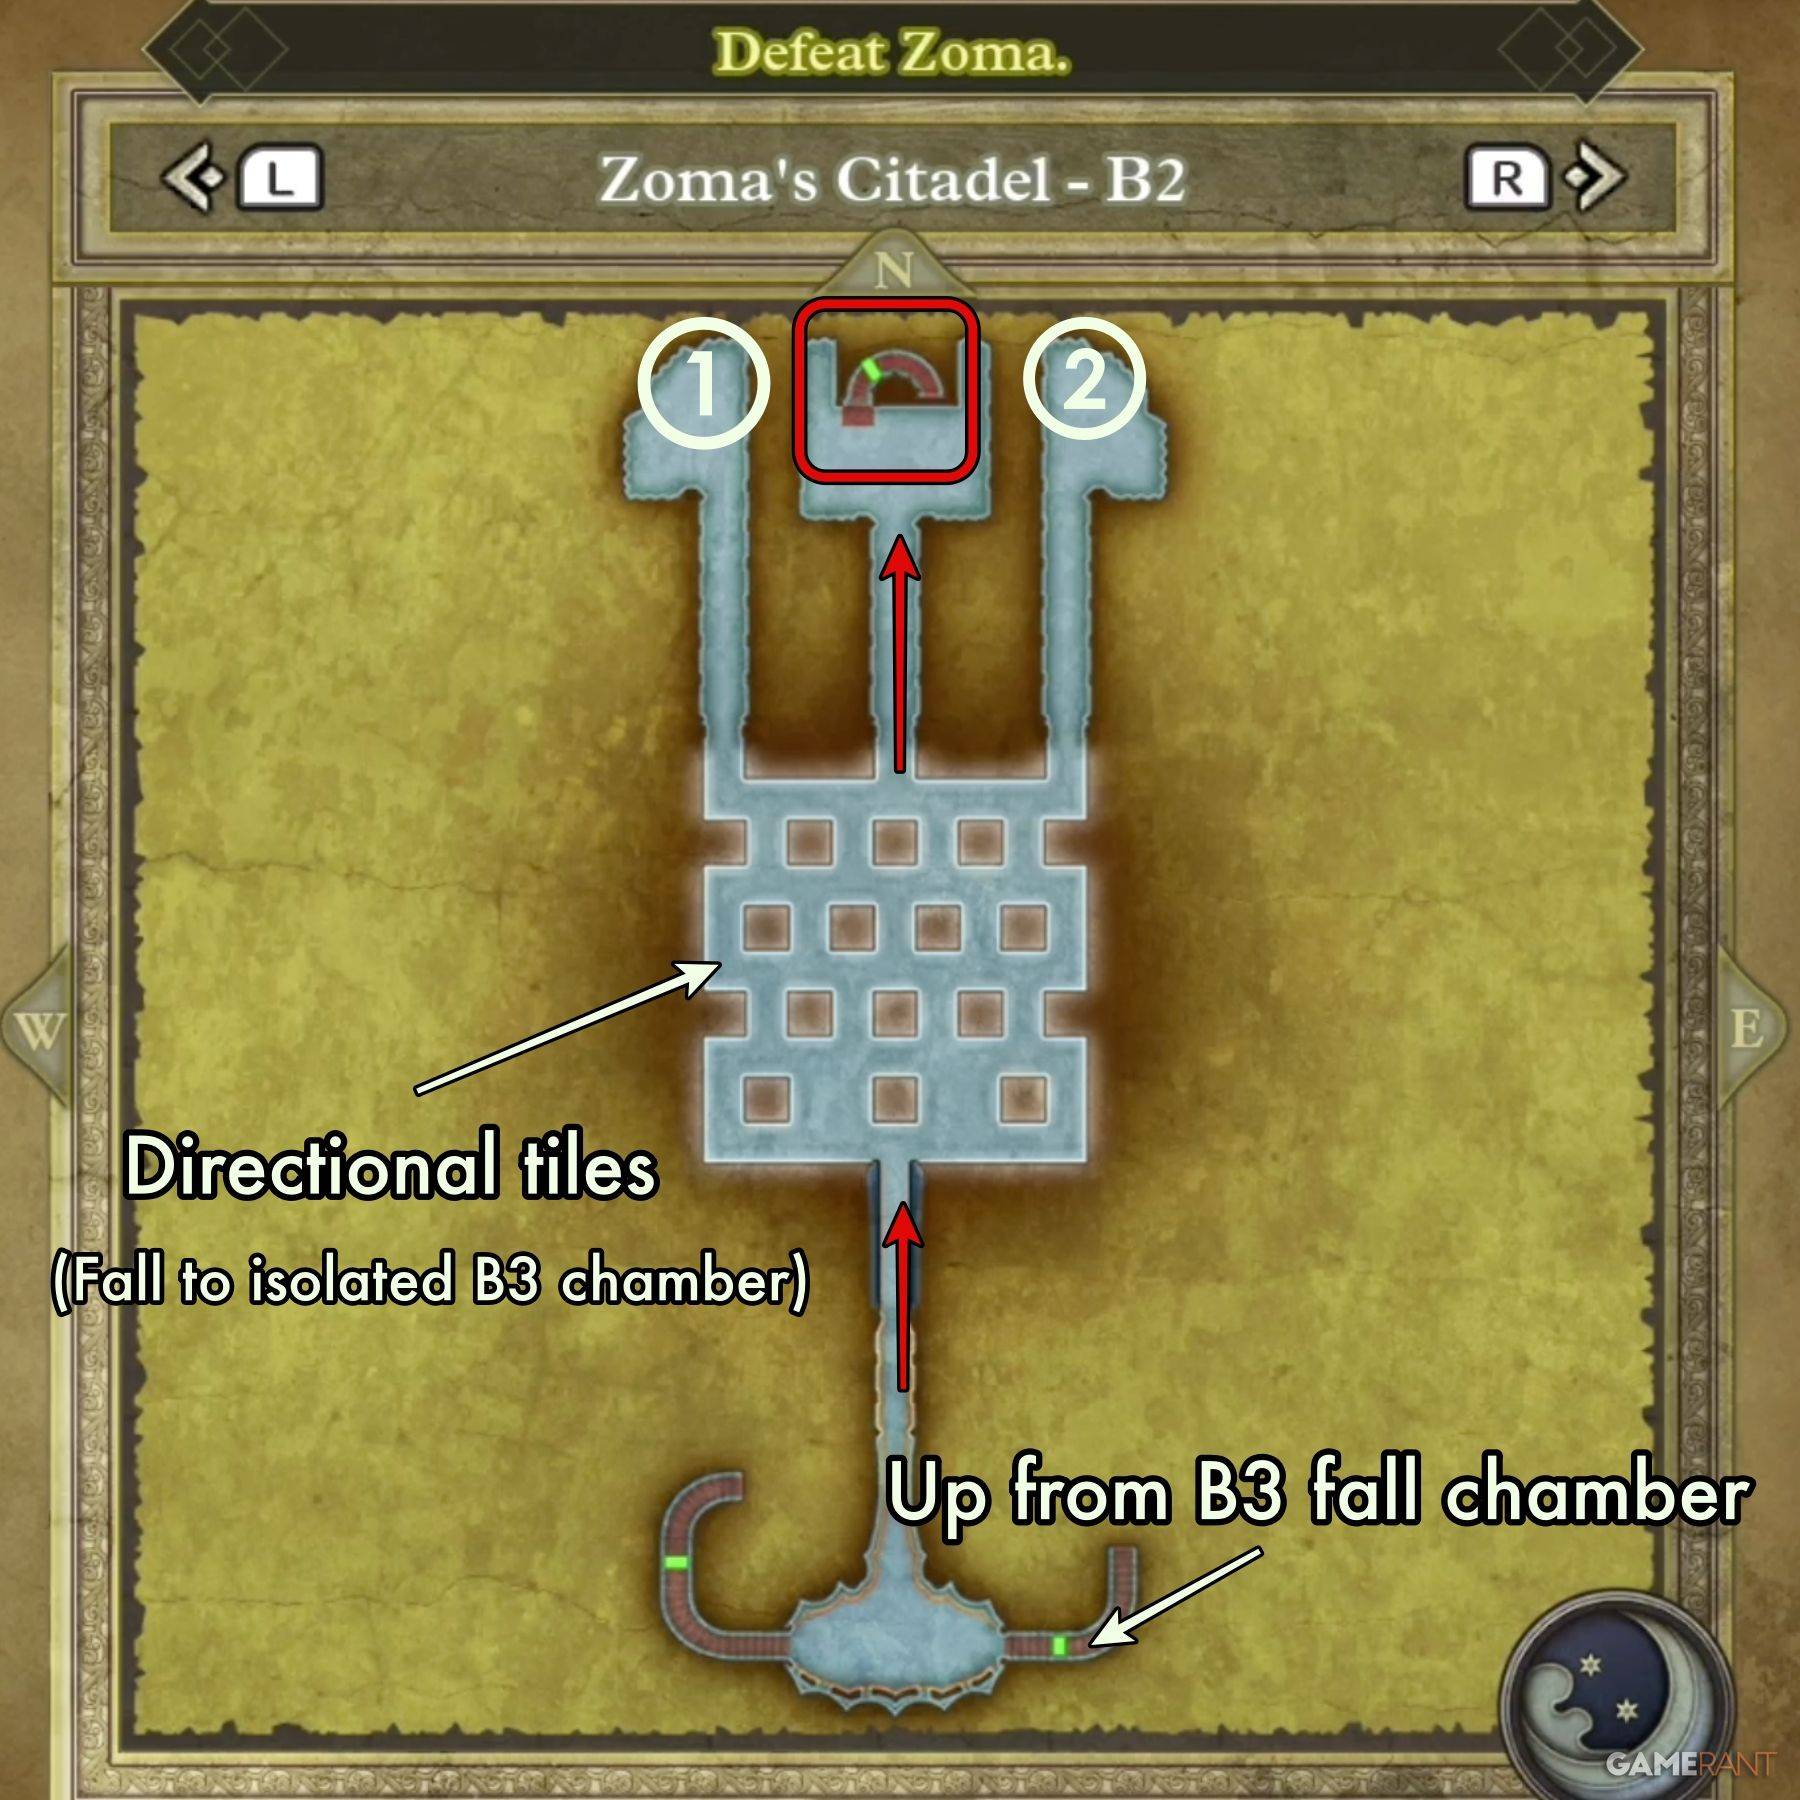
Спускаясь с B1, вы прибудете в B2. Здесь вы должны перемещаться по направленной плитки в центральной части, чтобы достичь пути прямо напротив входа и спуститься по лестнице. Эти плитки могут быть довольно сложными, поэтому мы посвятили раздел, чтобы помочь вам освоить их.
Направленные плитки на уровне B2 могут сначала казаться сбивающей с толку, но есть образец, чтобы следовать. Если вы боретесь, рассмотрите возможность повторного посещения башни Рубиса, чтобы практиковать. На северо -западном углу третьего этажа вы найдете аналогичные плитки, предназначенные для практики.
Плитка оснащена алмазом, указывающей на восток и запад, с цветами, которые часто меняются. Обратите пристальное внимание на эти цвета, чтобы определить ваши входы.
Для движения Северного или Юга рассмотрим половинки алмаза как левые и правые кнопки на D-Pad:
Для движения Восточного или Запада относитесь к бриллианту как стрелы, указывающие в каждом направлении. Сосредоточьтесь исключительно на апельсиновой стрелке:
 ### B3 Основной путь:
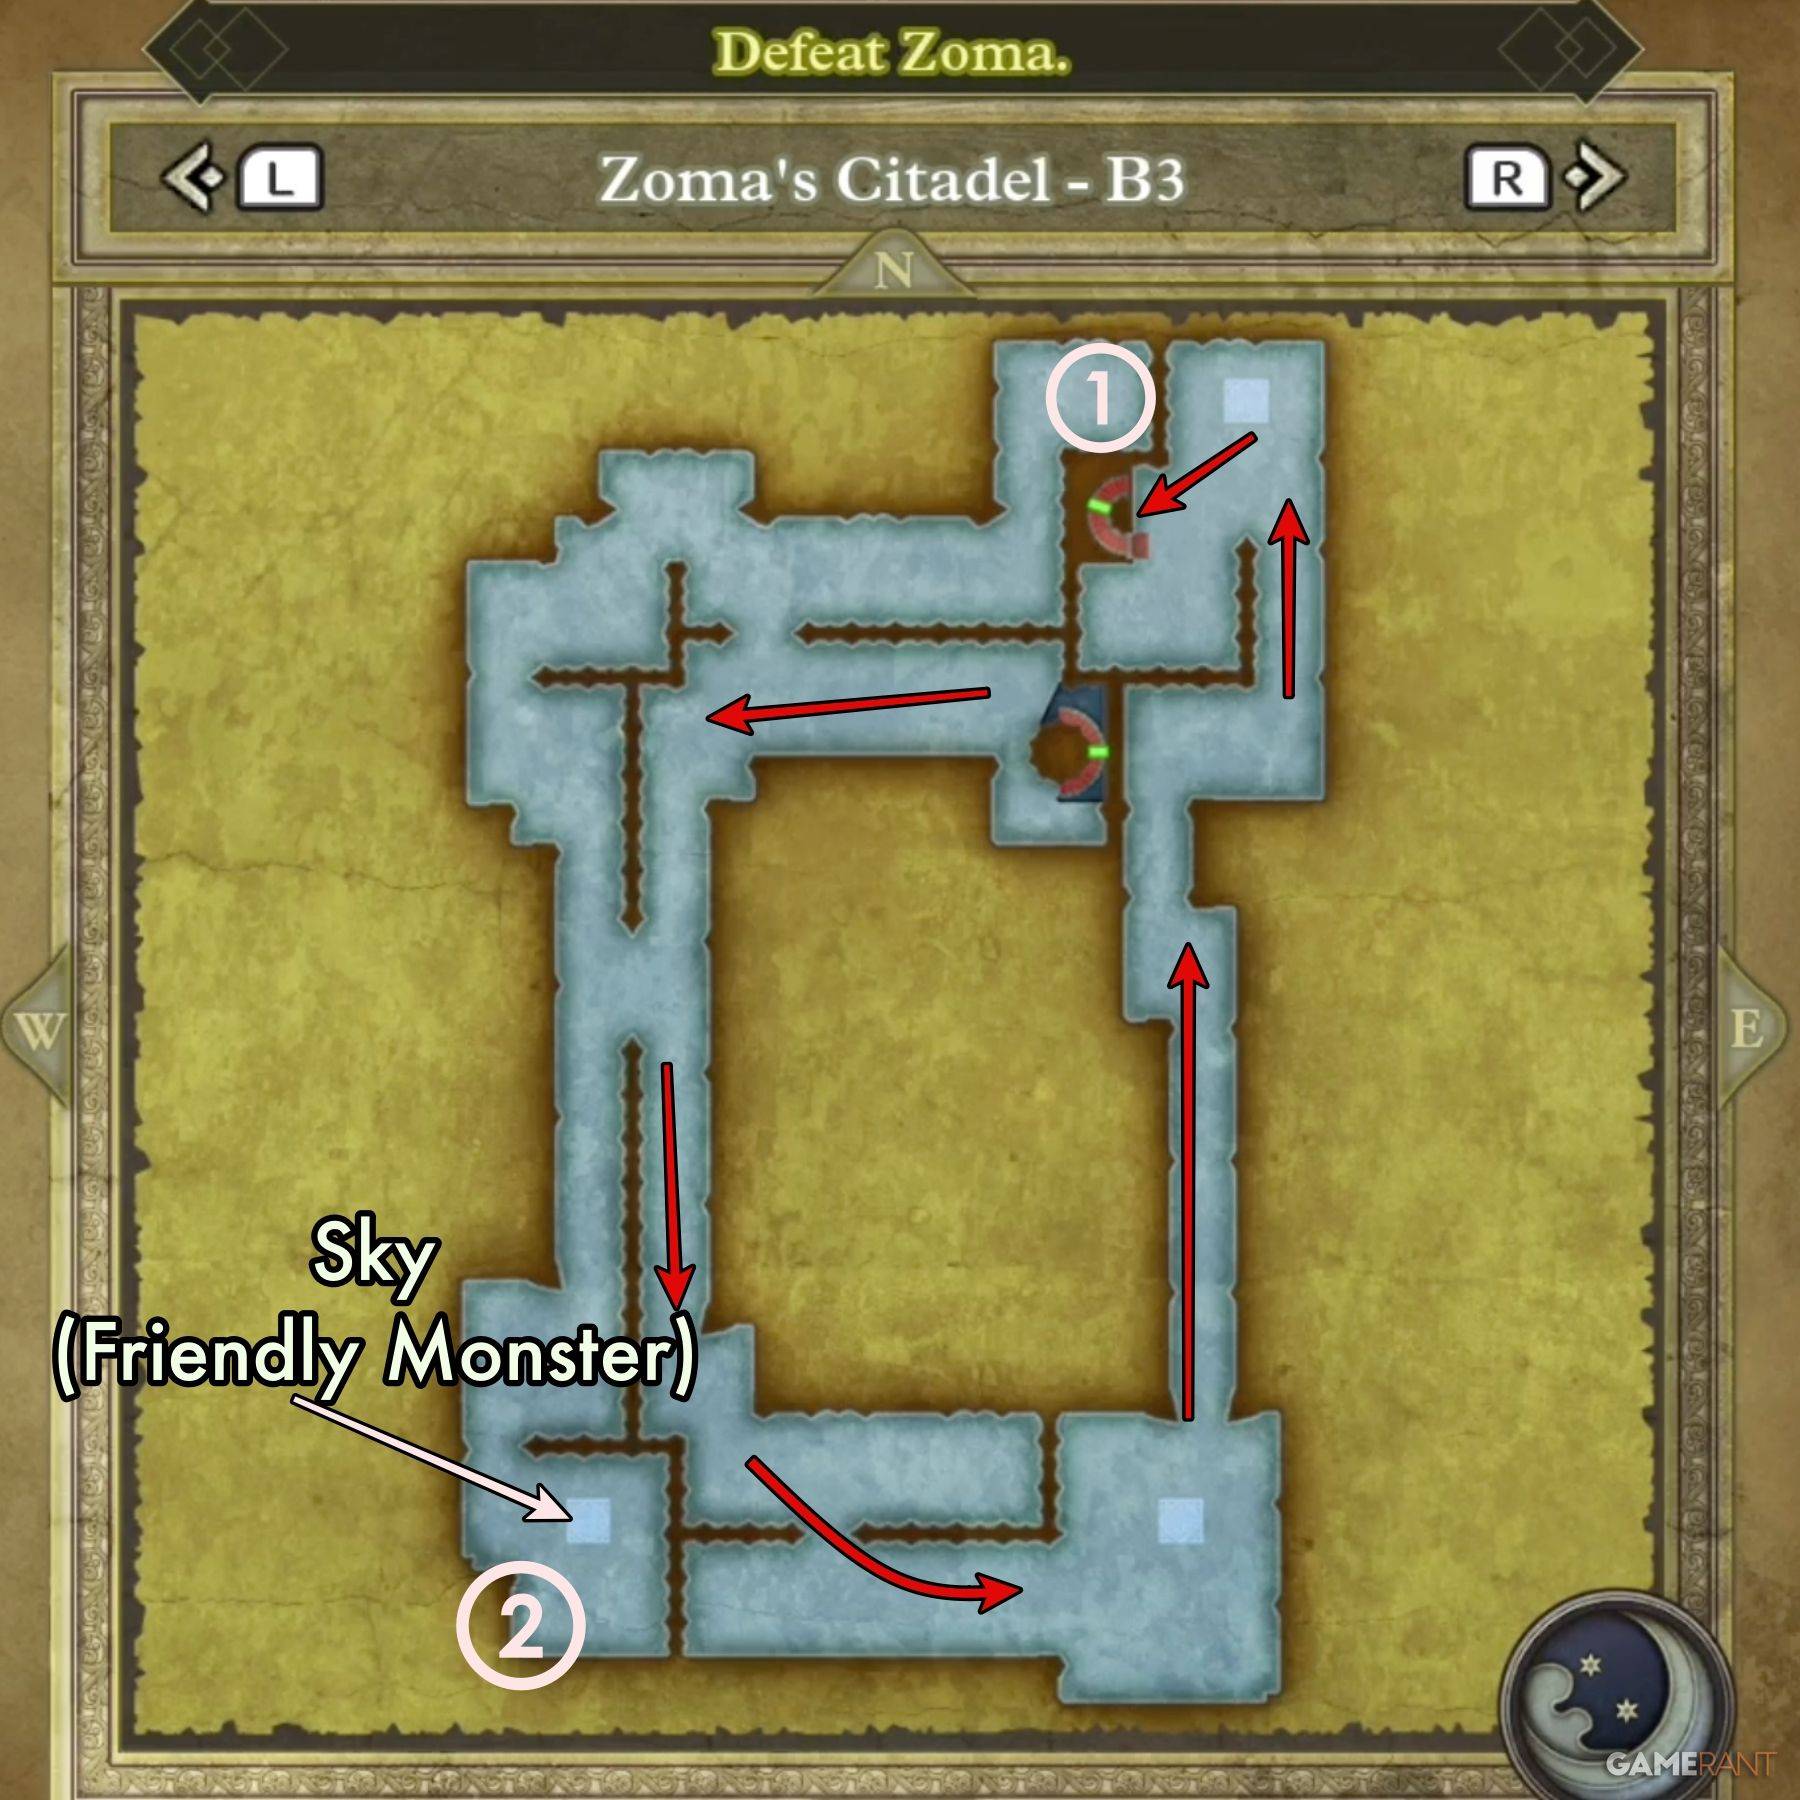
Навигация по третьему уровню подвала является простым, так как основной маршрут окружает внешний край квадратной камеры. Небольшой обход к юго -западному углу приведет вас к небу, парящему пятном и одному из дружелюбных монстров DQIII Ремейк.
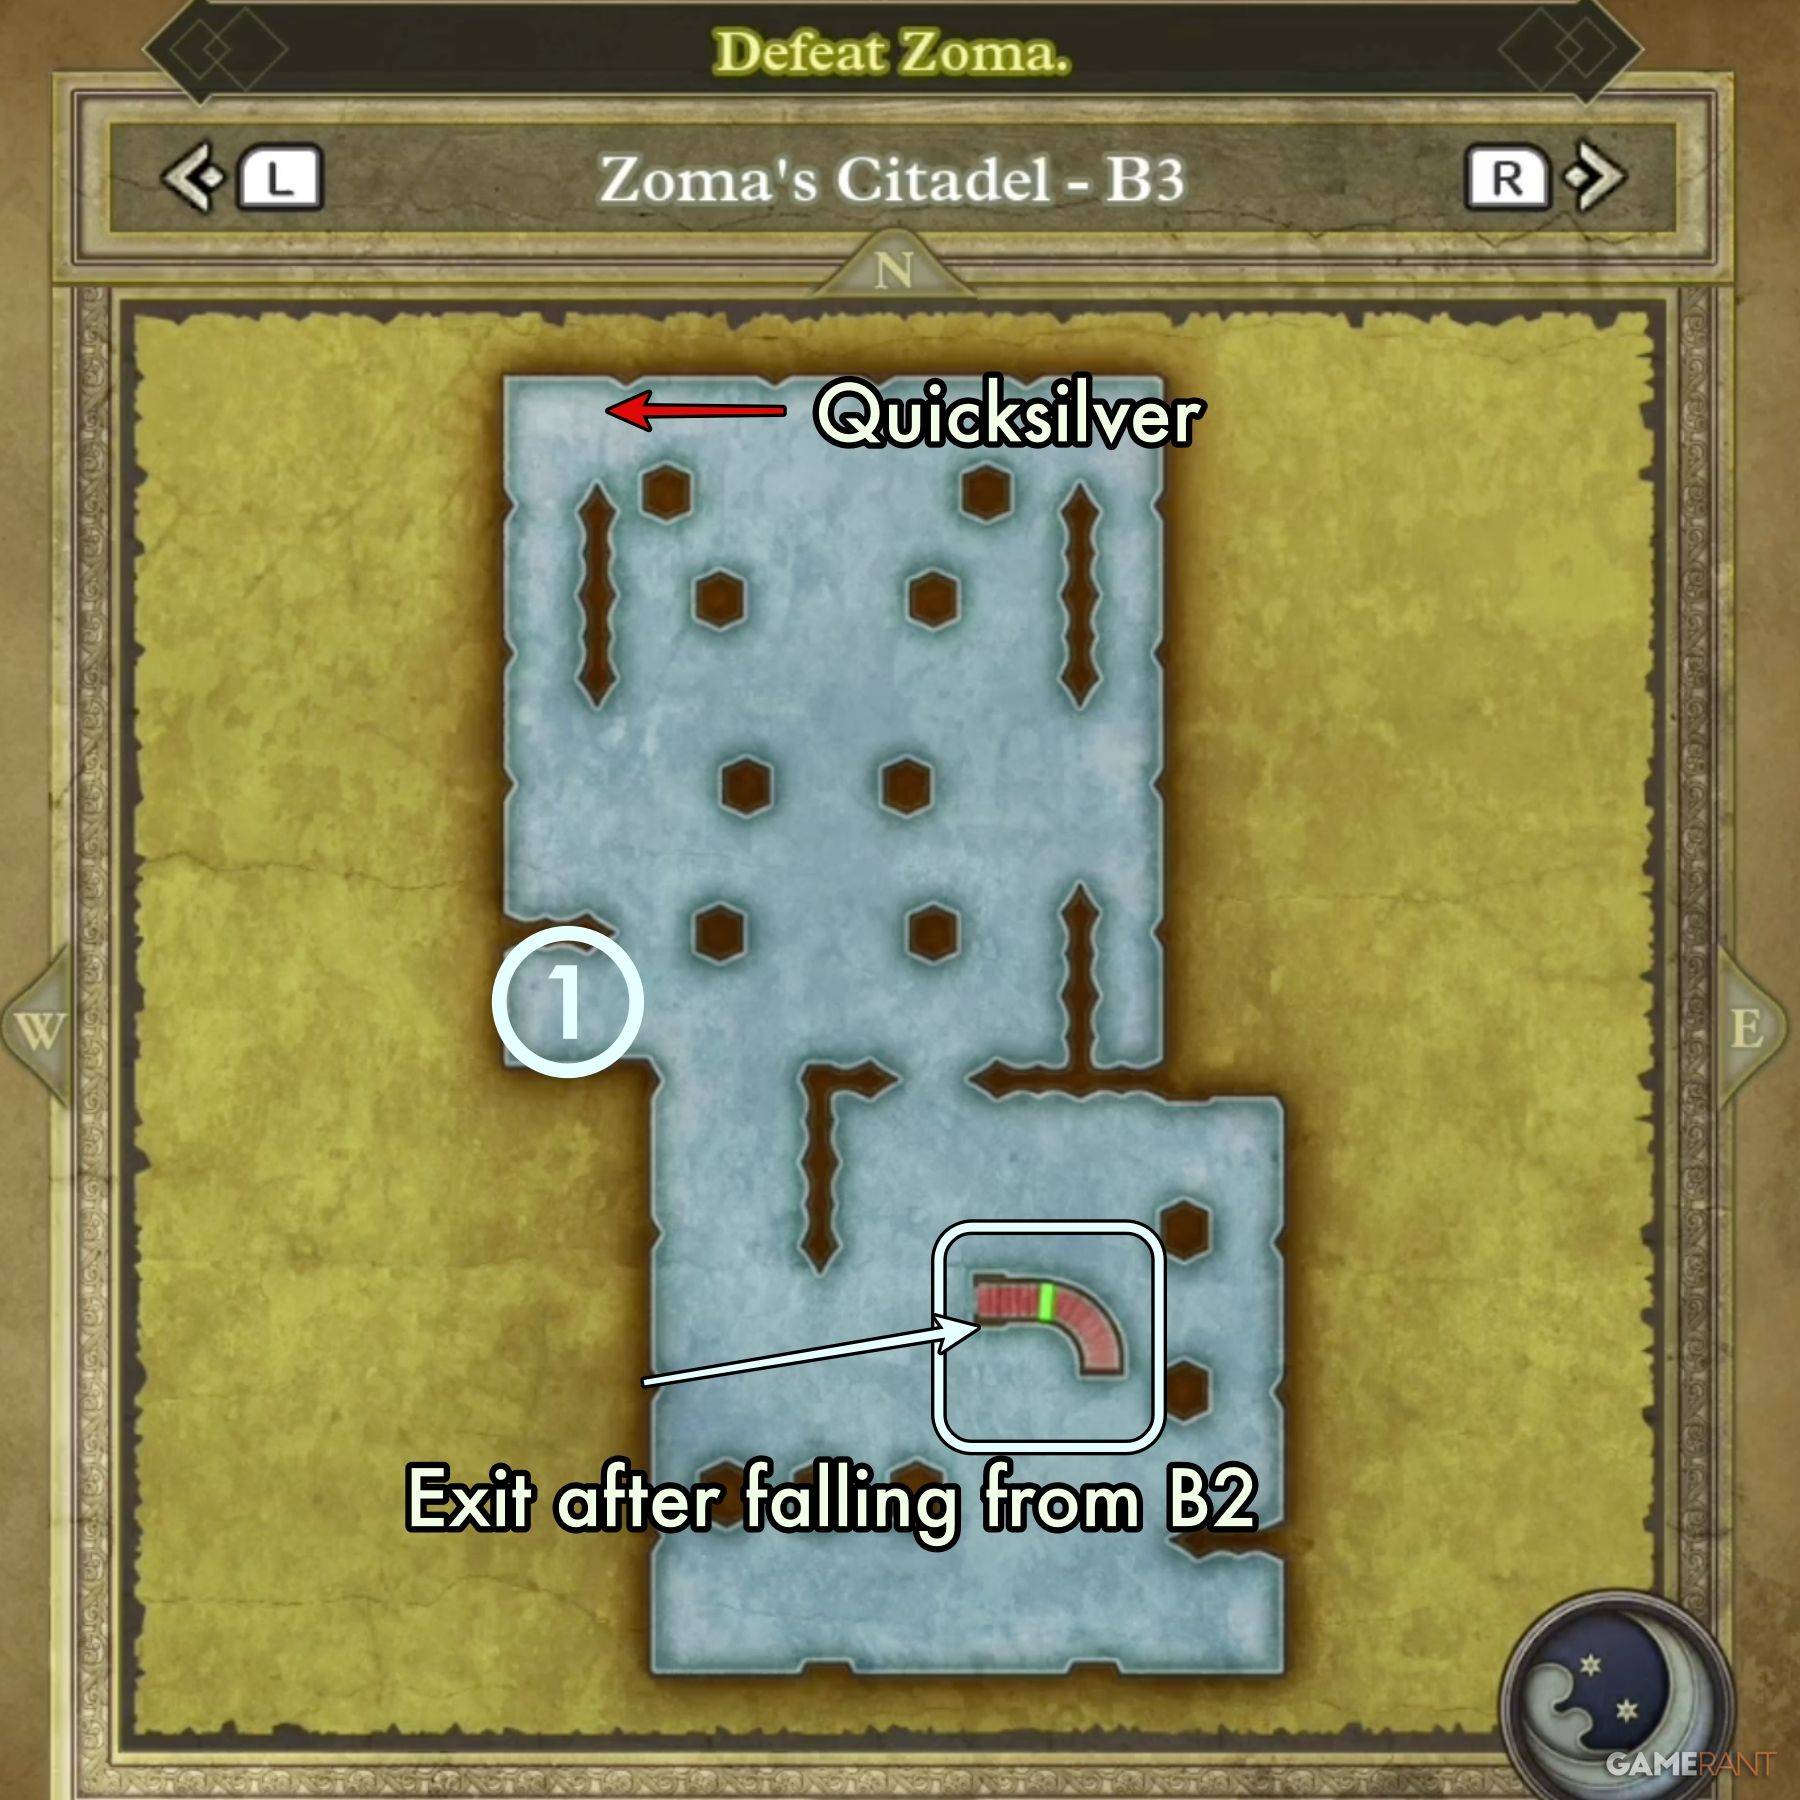 Если вы попадете в одно из отверстий при пересечении направленных плиток на B2, вы окажетесь в этой изолированной части B3. Здесь вы найдете дружелюбную жидкую металлическую слизь в северо -западном углу. Выйдите по единственной лестнице на восточной стороне комнаты.
Главная камера:
Изолированная камера:
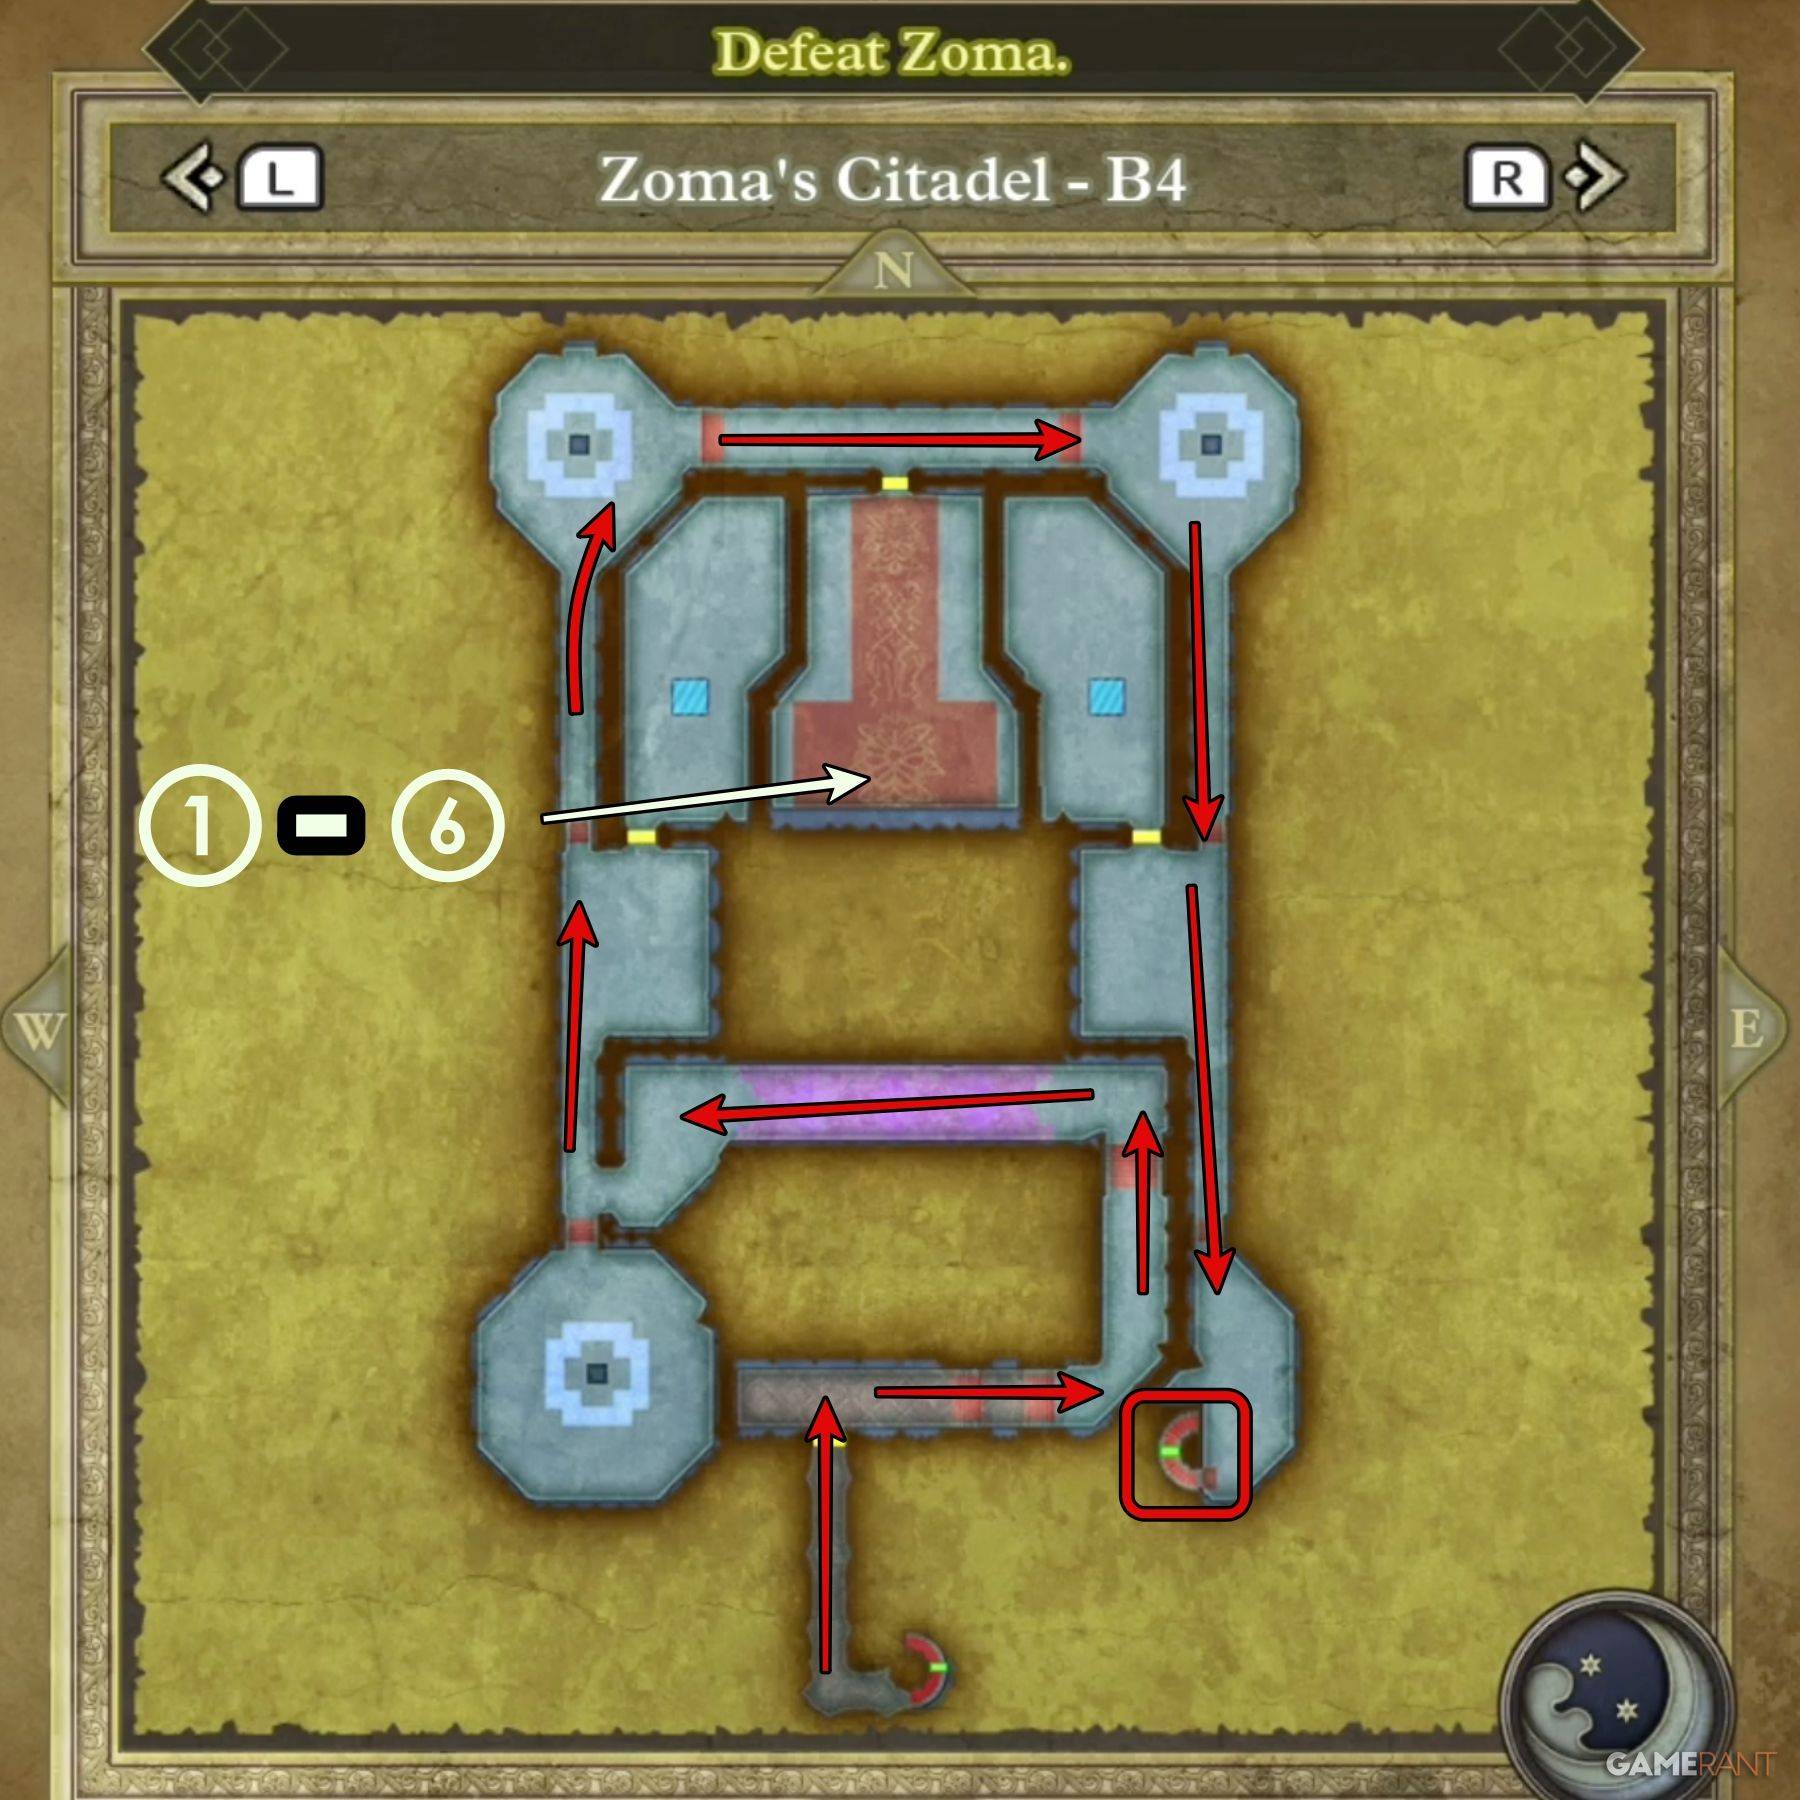 ### B4 Основной путь:
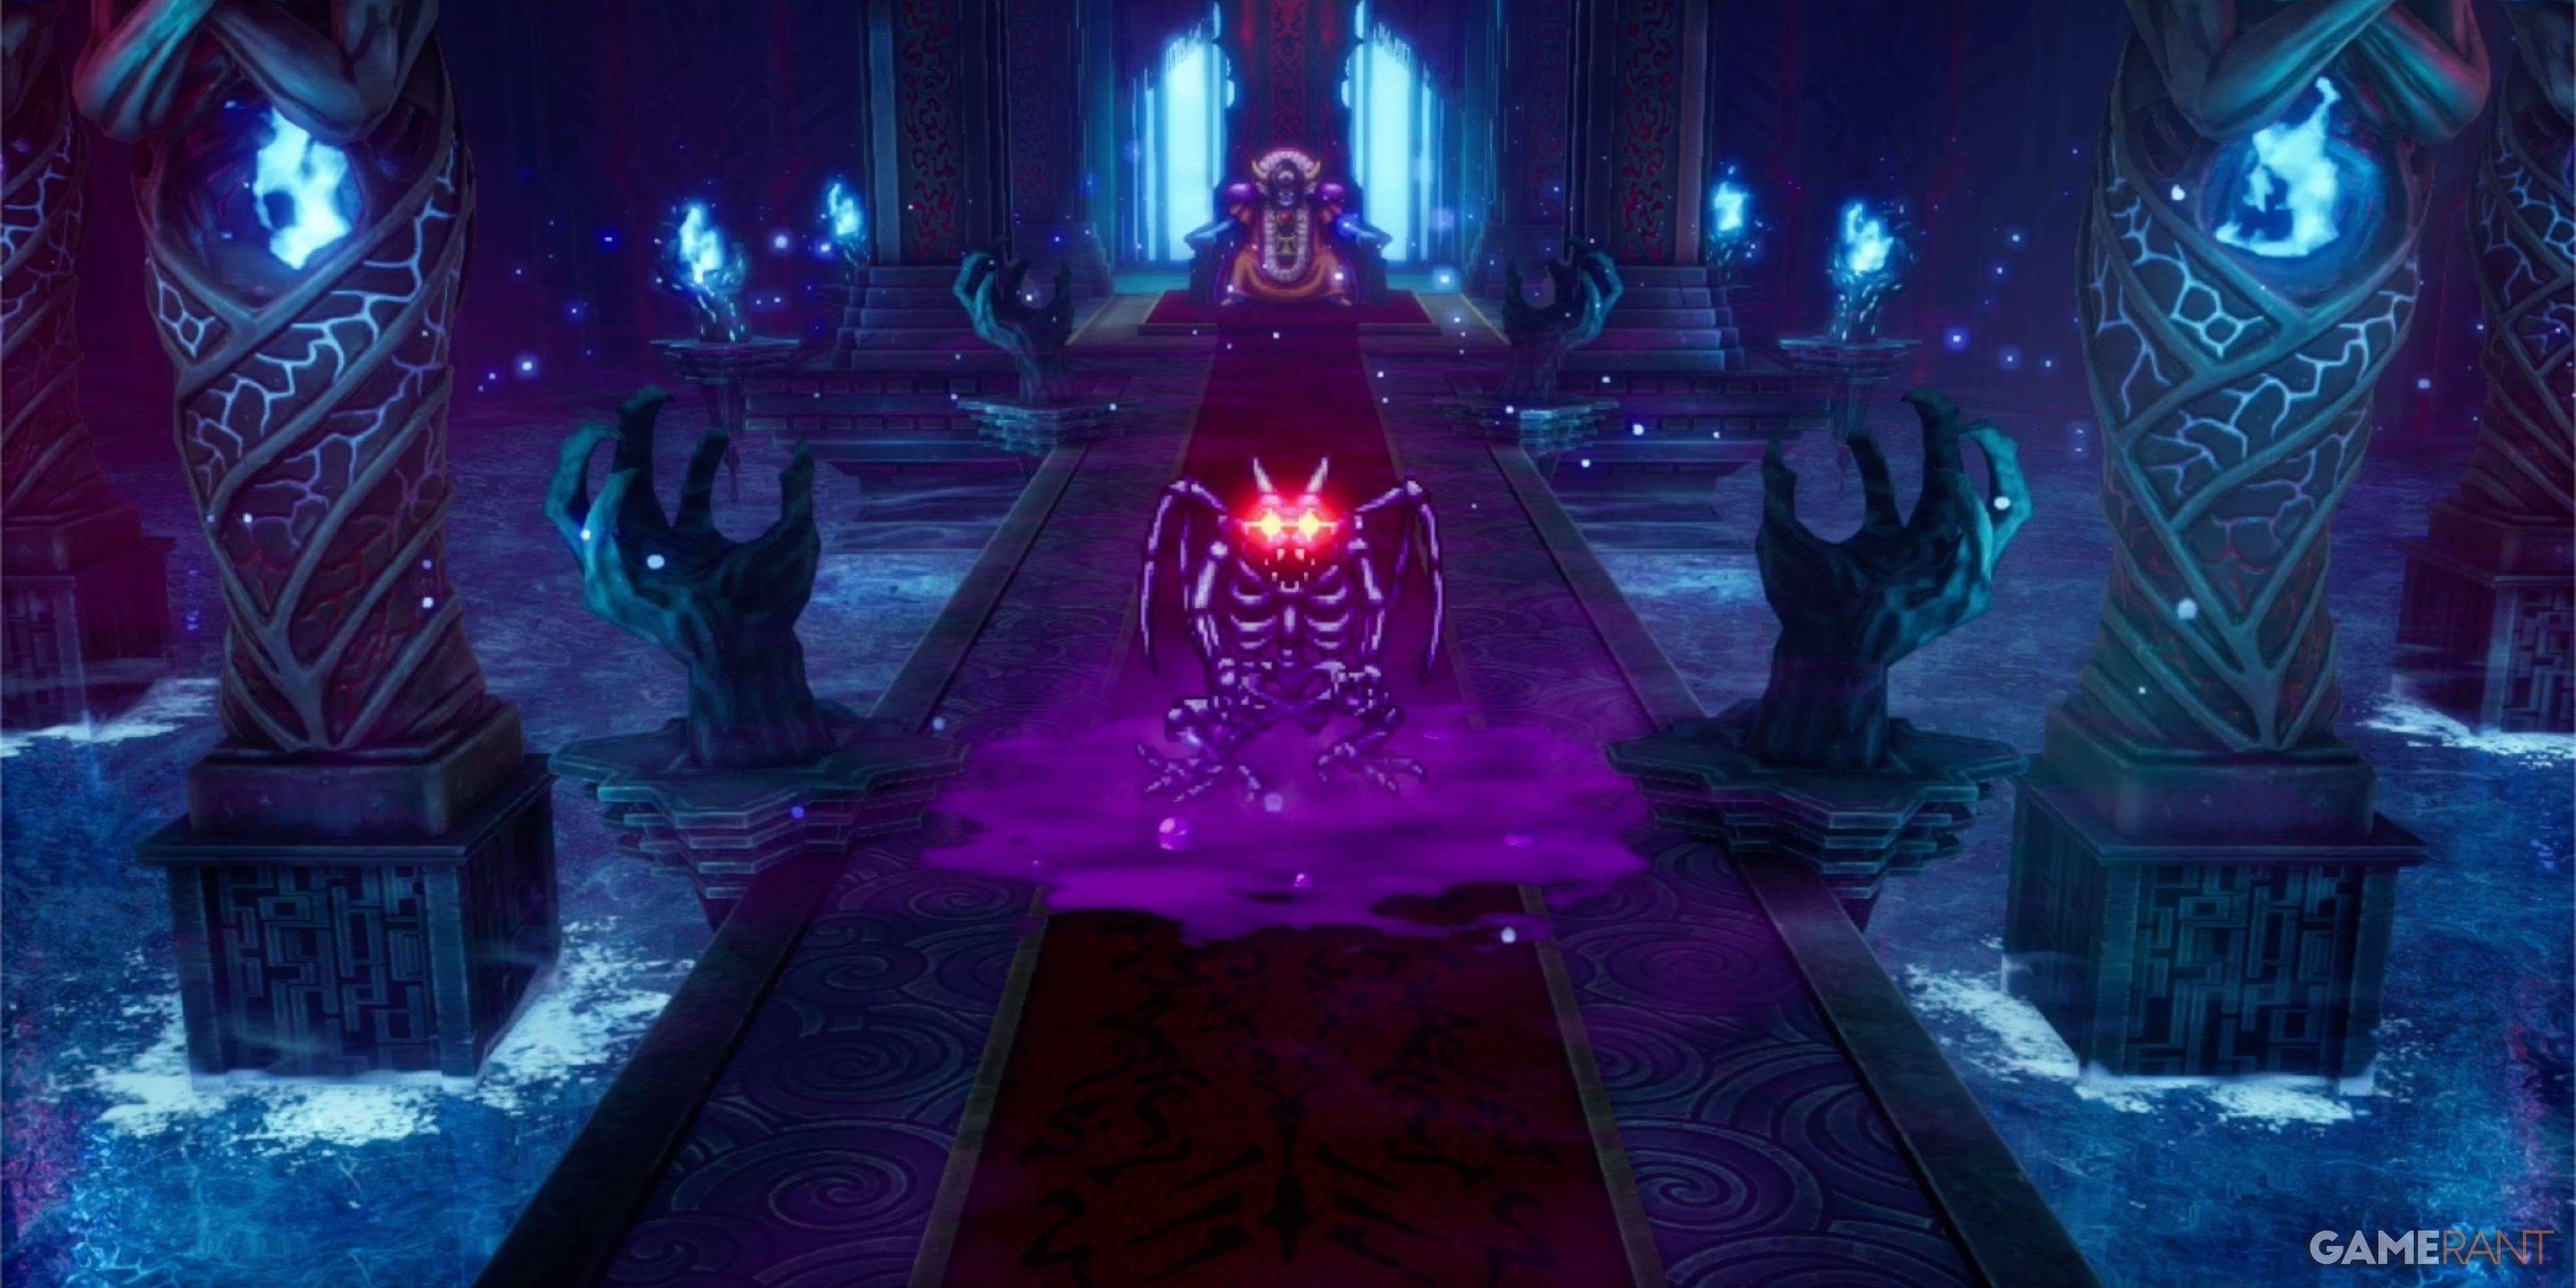
Четвертый уровень подвалов - ваша последняя остановка, прежде чем противостоять Зоме. Начните справа в центре южной части, перейдите вверх и вокруг него, затем отправляйтесь обратно в юго -восточный угол, чтобы добраться до выхода.
Не пропустите специальную кат -сцену, которая играет, когда вы впервые входите в B4; Стоит посмотреть в полном объеме.
В одной камере вы найдете шесть сундуков, расположенных справа налево:
 Прежде чем столкнуться с Зомой, вам нужно будет ориентироваться в рукавице боссов: король Гидра, душа Барамоса и кости Барамоса. К счастью, у вас будет время использовать предметы из вашей сумки между каждым боем, что позволит вам эффективно управлять своими ресурсами.
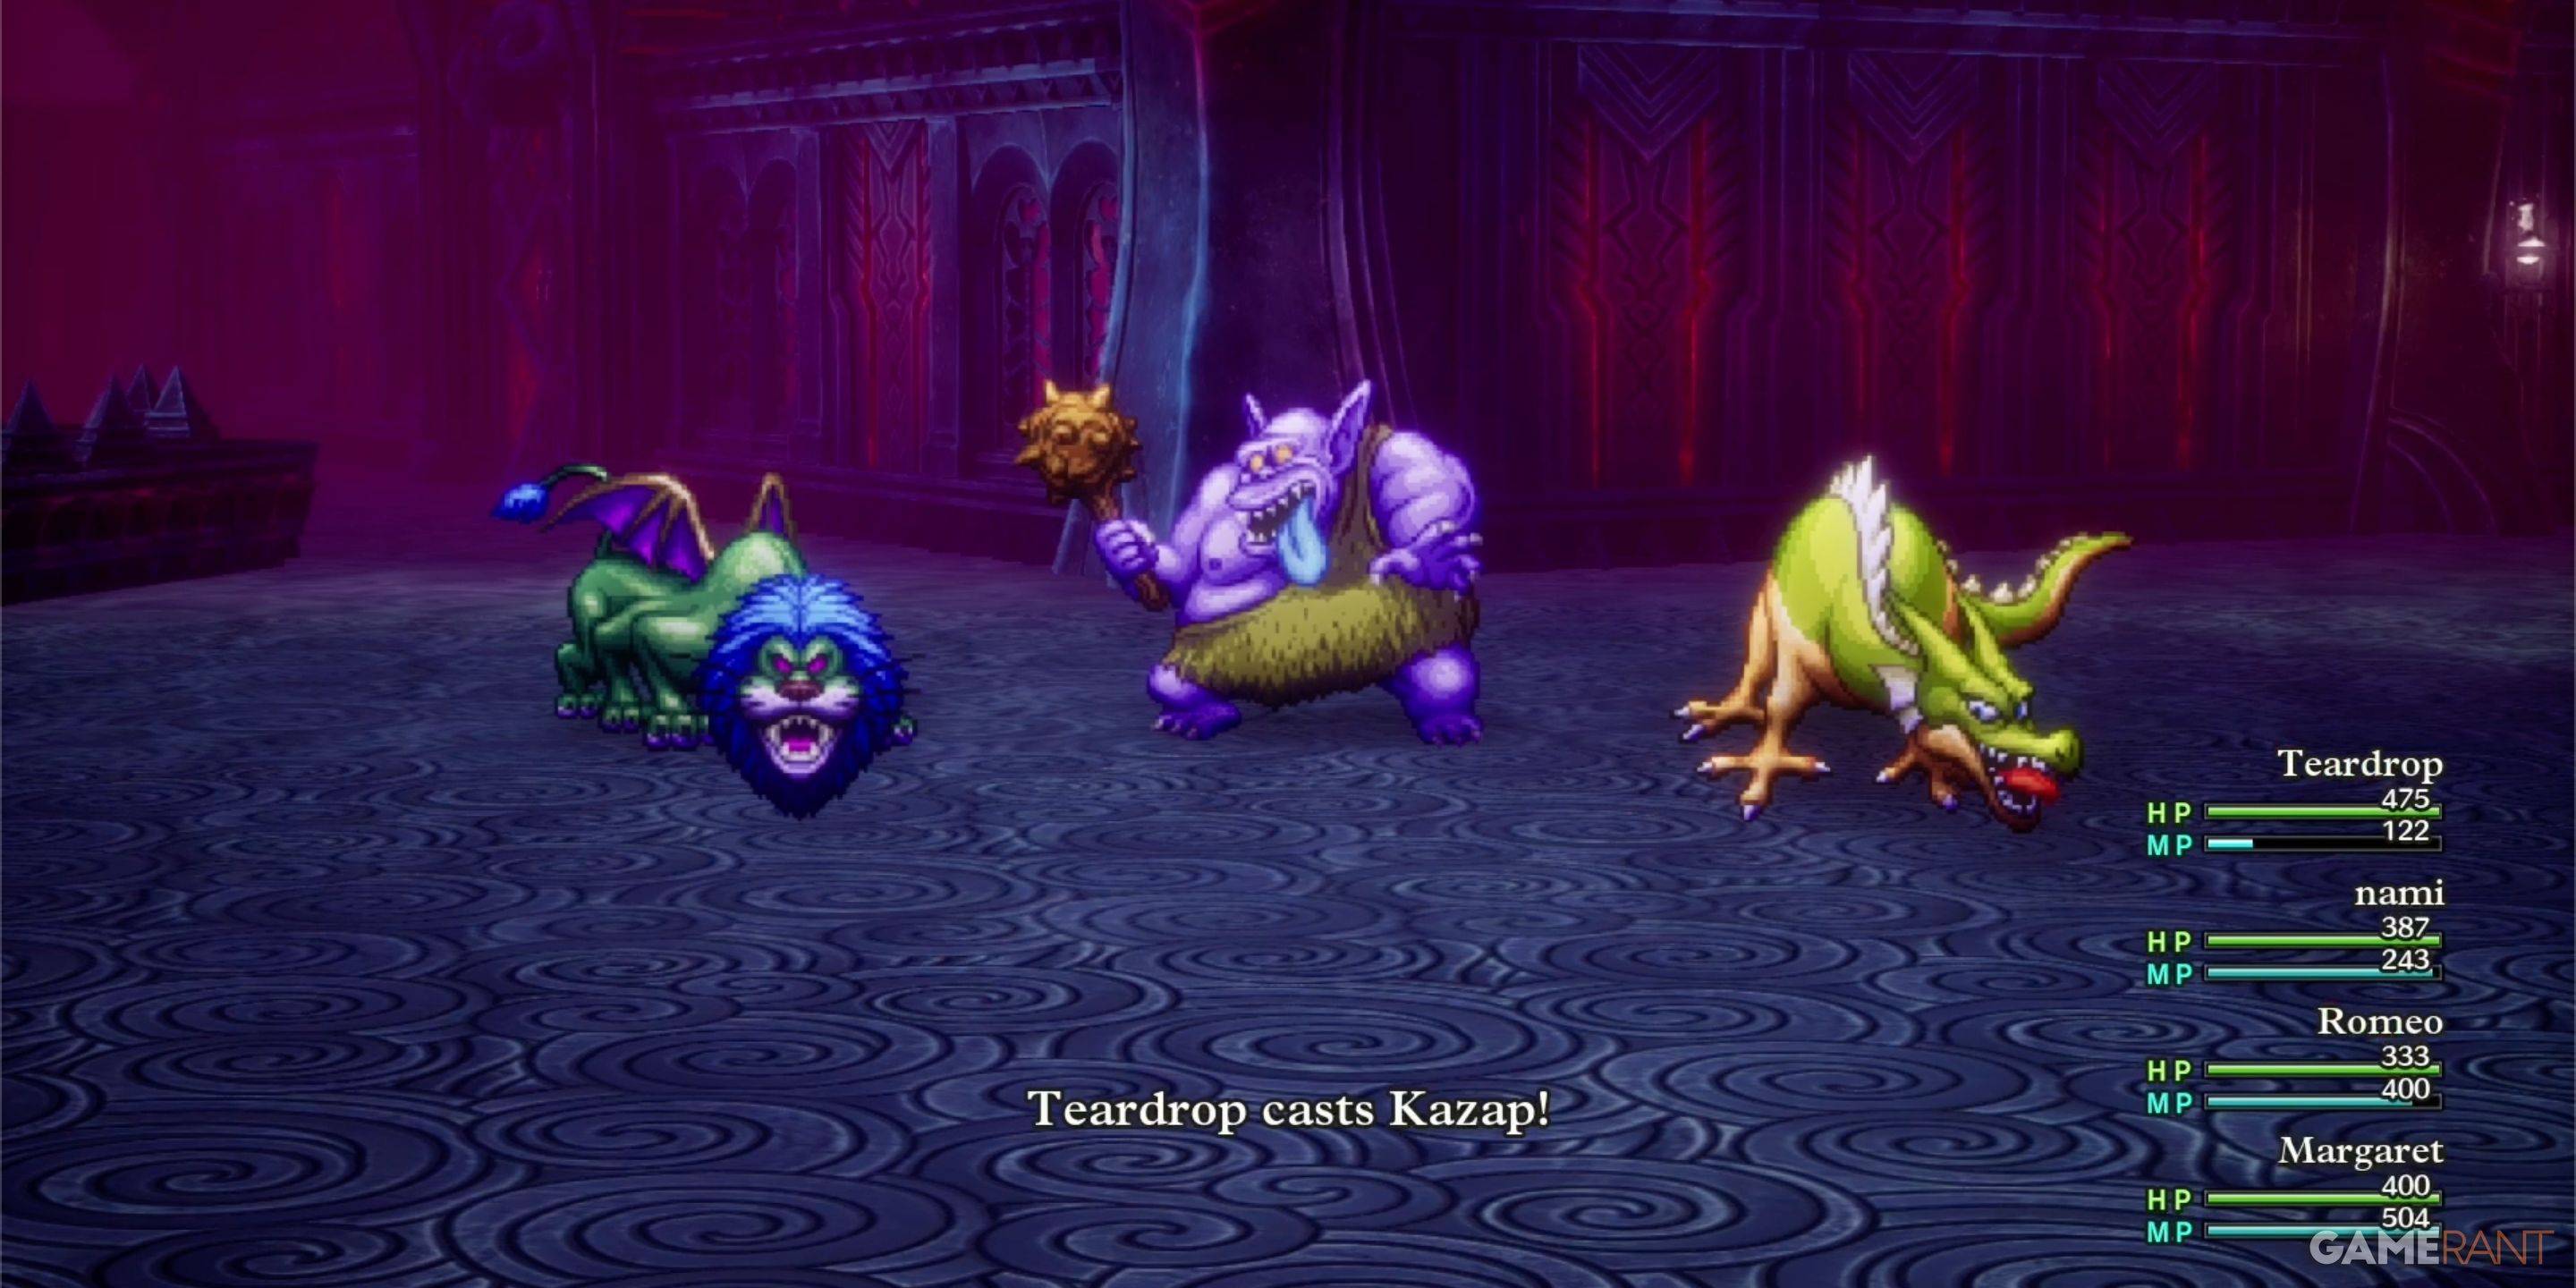
 Сравнимый с главным боссом низкого уровня, король Гидра не имеет никаких слабых сторон красного цвета, но заклинание Казапа оказалось очень эффективным, набрав более 400 повреждений за ход. Агрессивность является ключевой здесь, так как король Гидра заживает более 100 л.с. каждый раунд. Используя стандартную стратегию босса, мы победили ее в одной попытке, не потеряв каких -либо членов партии. Мудрец, посвященный исцелению, может быть полезным, но любой стратегии, которая работала для других жестких боссов.
 Уже столкнувшись с душой Барамоса в башне Рубисса, вы должны быть знакомы со стратегией. Это очень слаба, чтобы повредить, поэтому герой сосредоточился на использовании Казапа.
 Подобно его мясистому аналогу, кости Барамоса уязвимы к повреждению ZAP. Мы быстро победили его, используя казап и комбо монстра Wrangler's Wild Side/Monster. Будьте осторожны, так как кости попадают сильнее, чем душа Барамоса, но с правильным управлением здоровьем этот бой должен ощущаться как продолжение предыдущего.
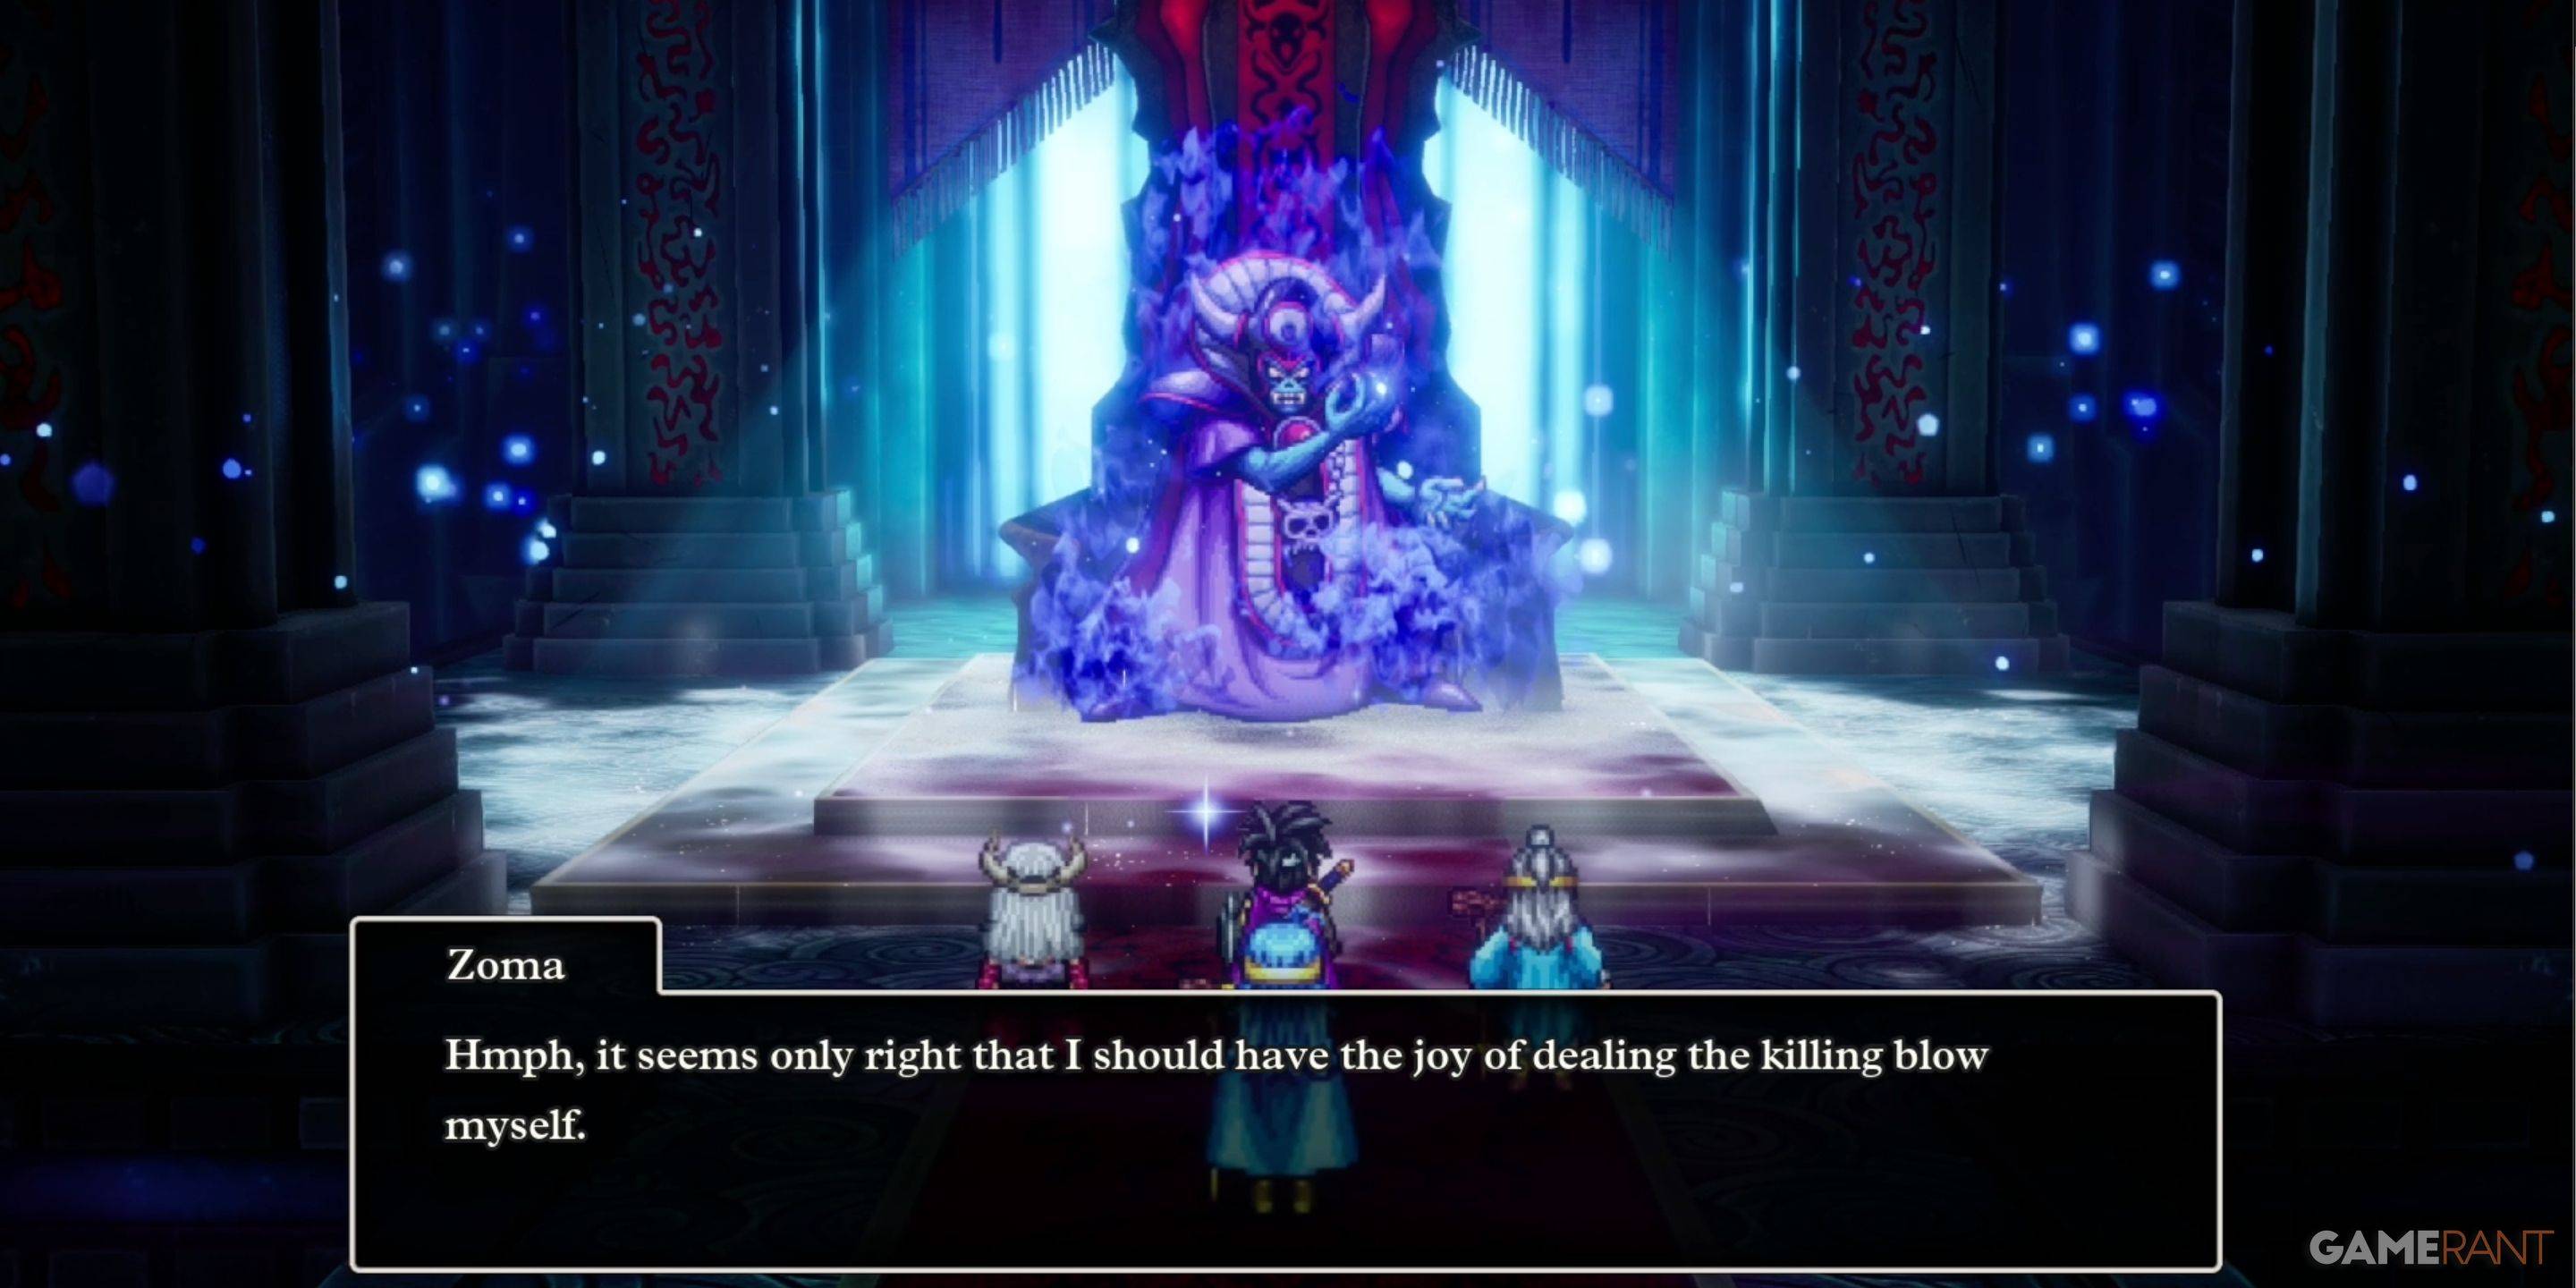
Зома является последним боссом основной истории, и битва так же сложная, как и следовало ожидать. Избегайте чрезмерного агрессивного; Эта борьба требует стратегии и терпения, чтобы гарантировать, что все четыре участника партии выживают.
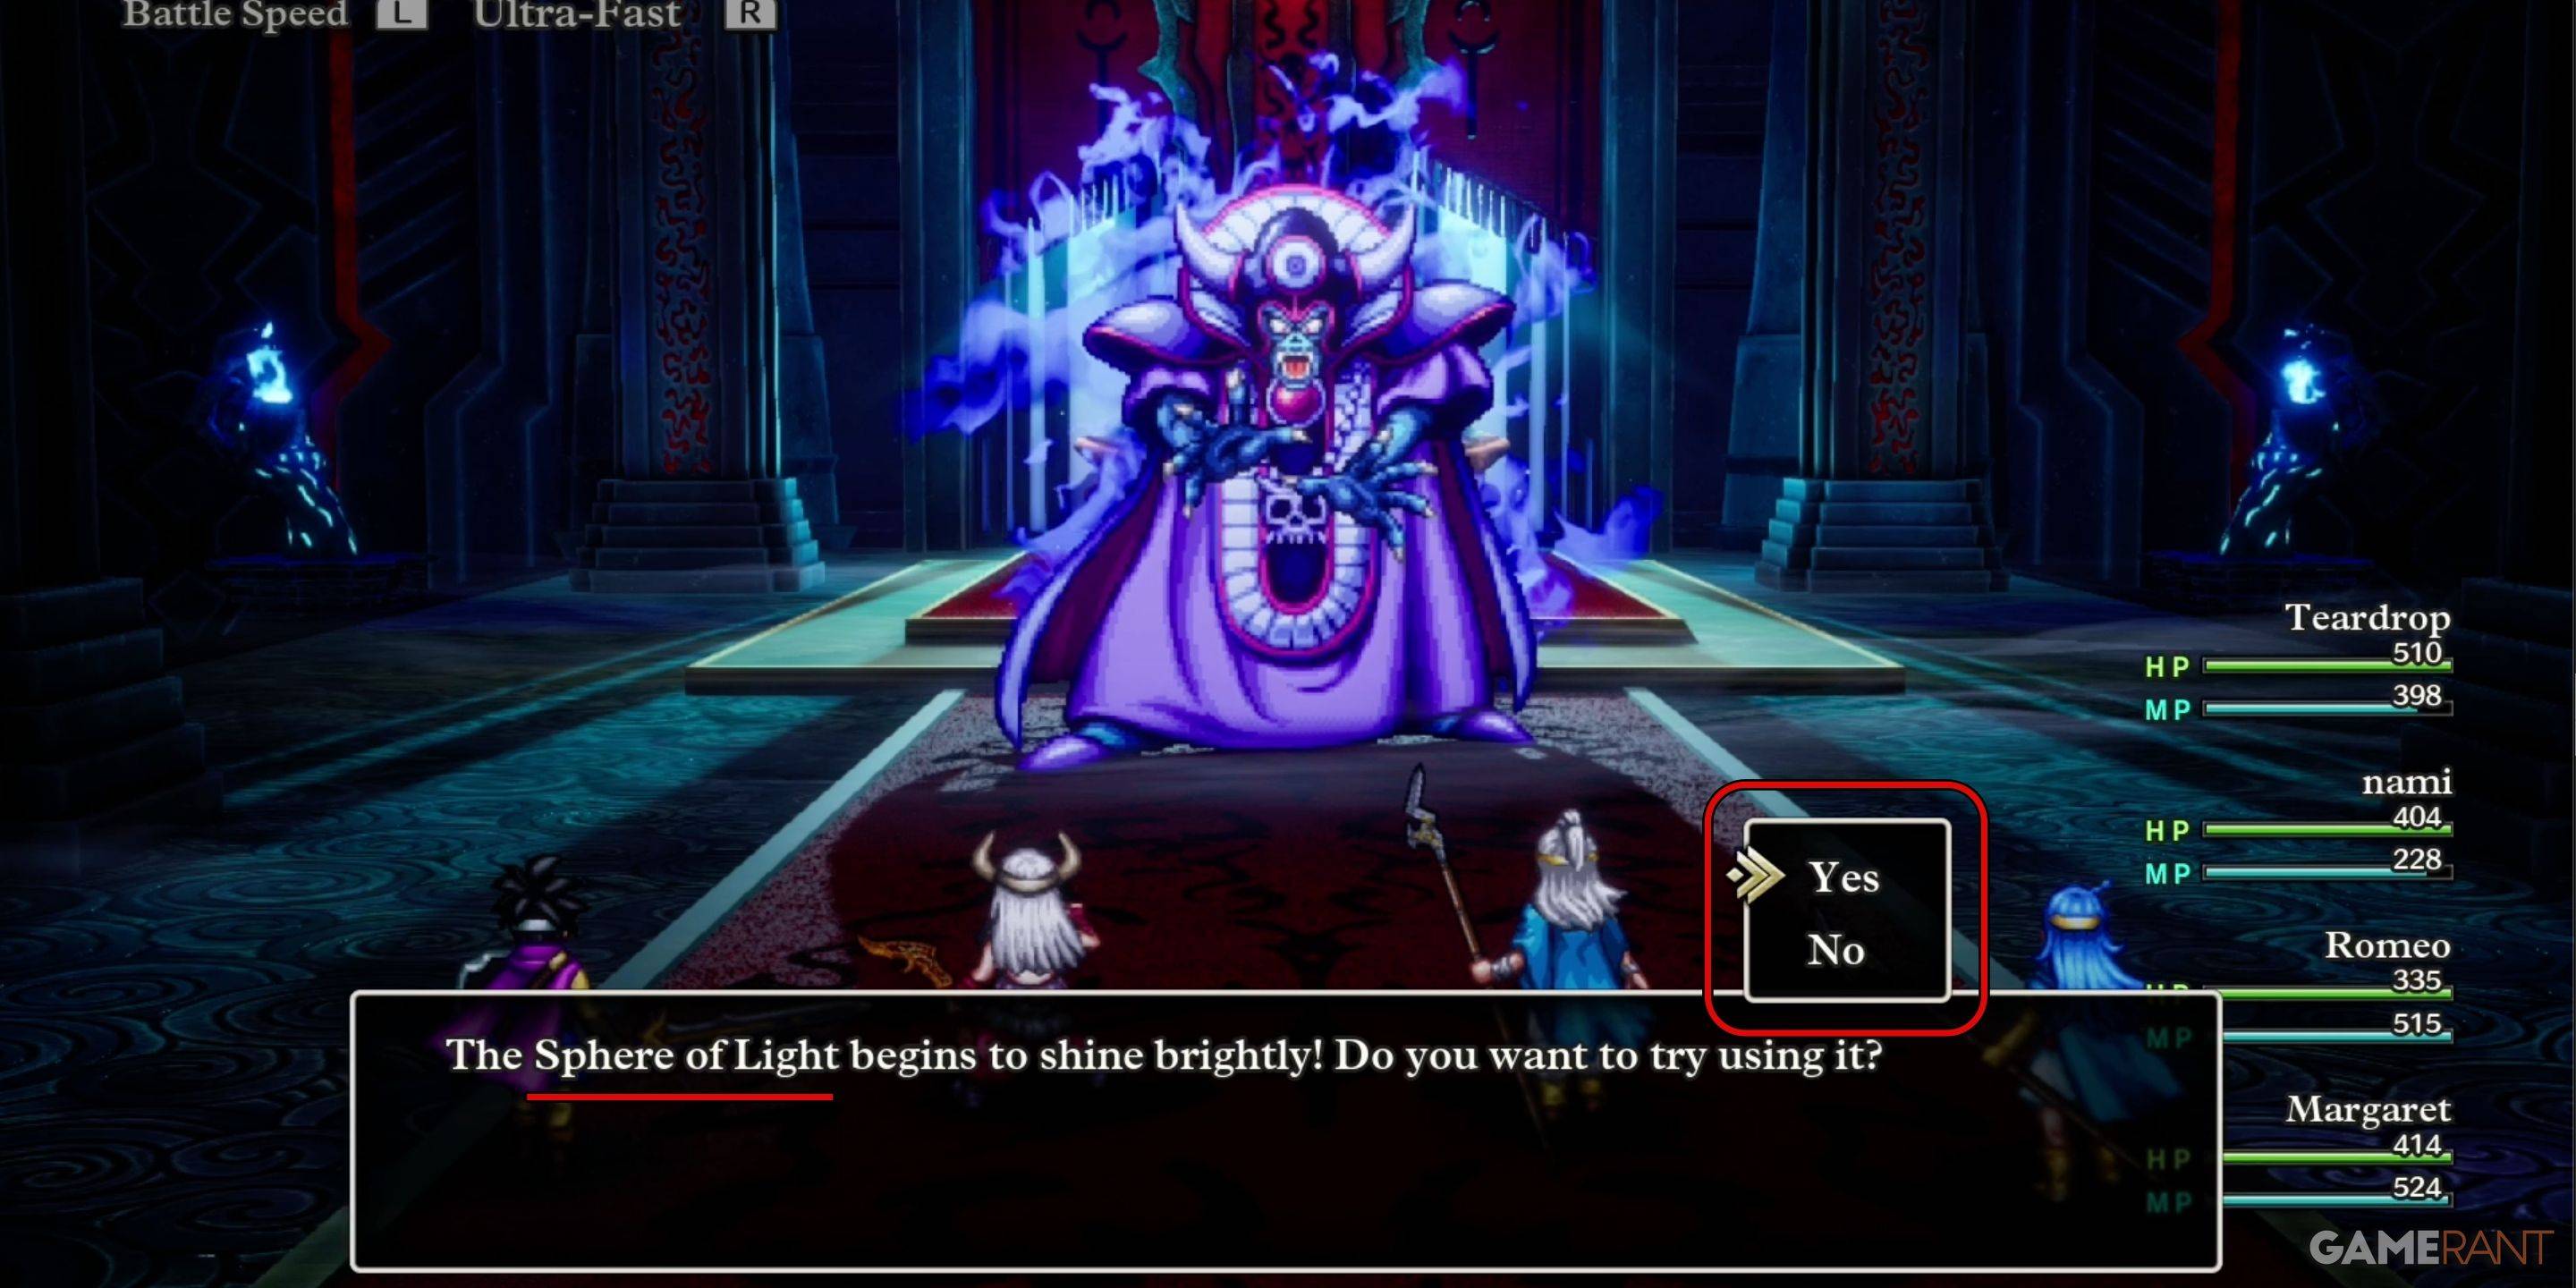 В начале, сохраните свой MP, так как Zoma начинается с волшебного барьера, который снижает эффективность магических атак. Подождите, пока подсказка, указывающая, что сфера света будет готова к использованию, и выберите «Да», чтобы удалить барьер, что делает Зому уязвимой для магии.
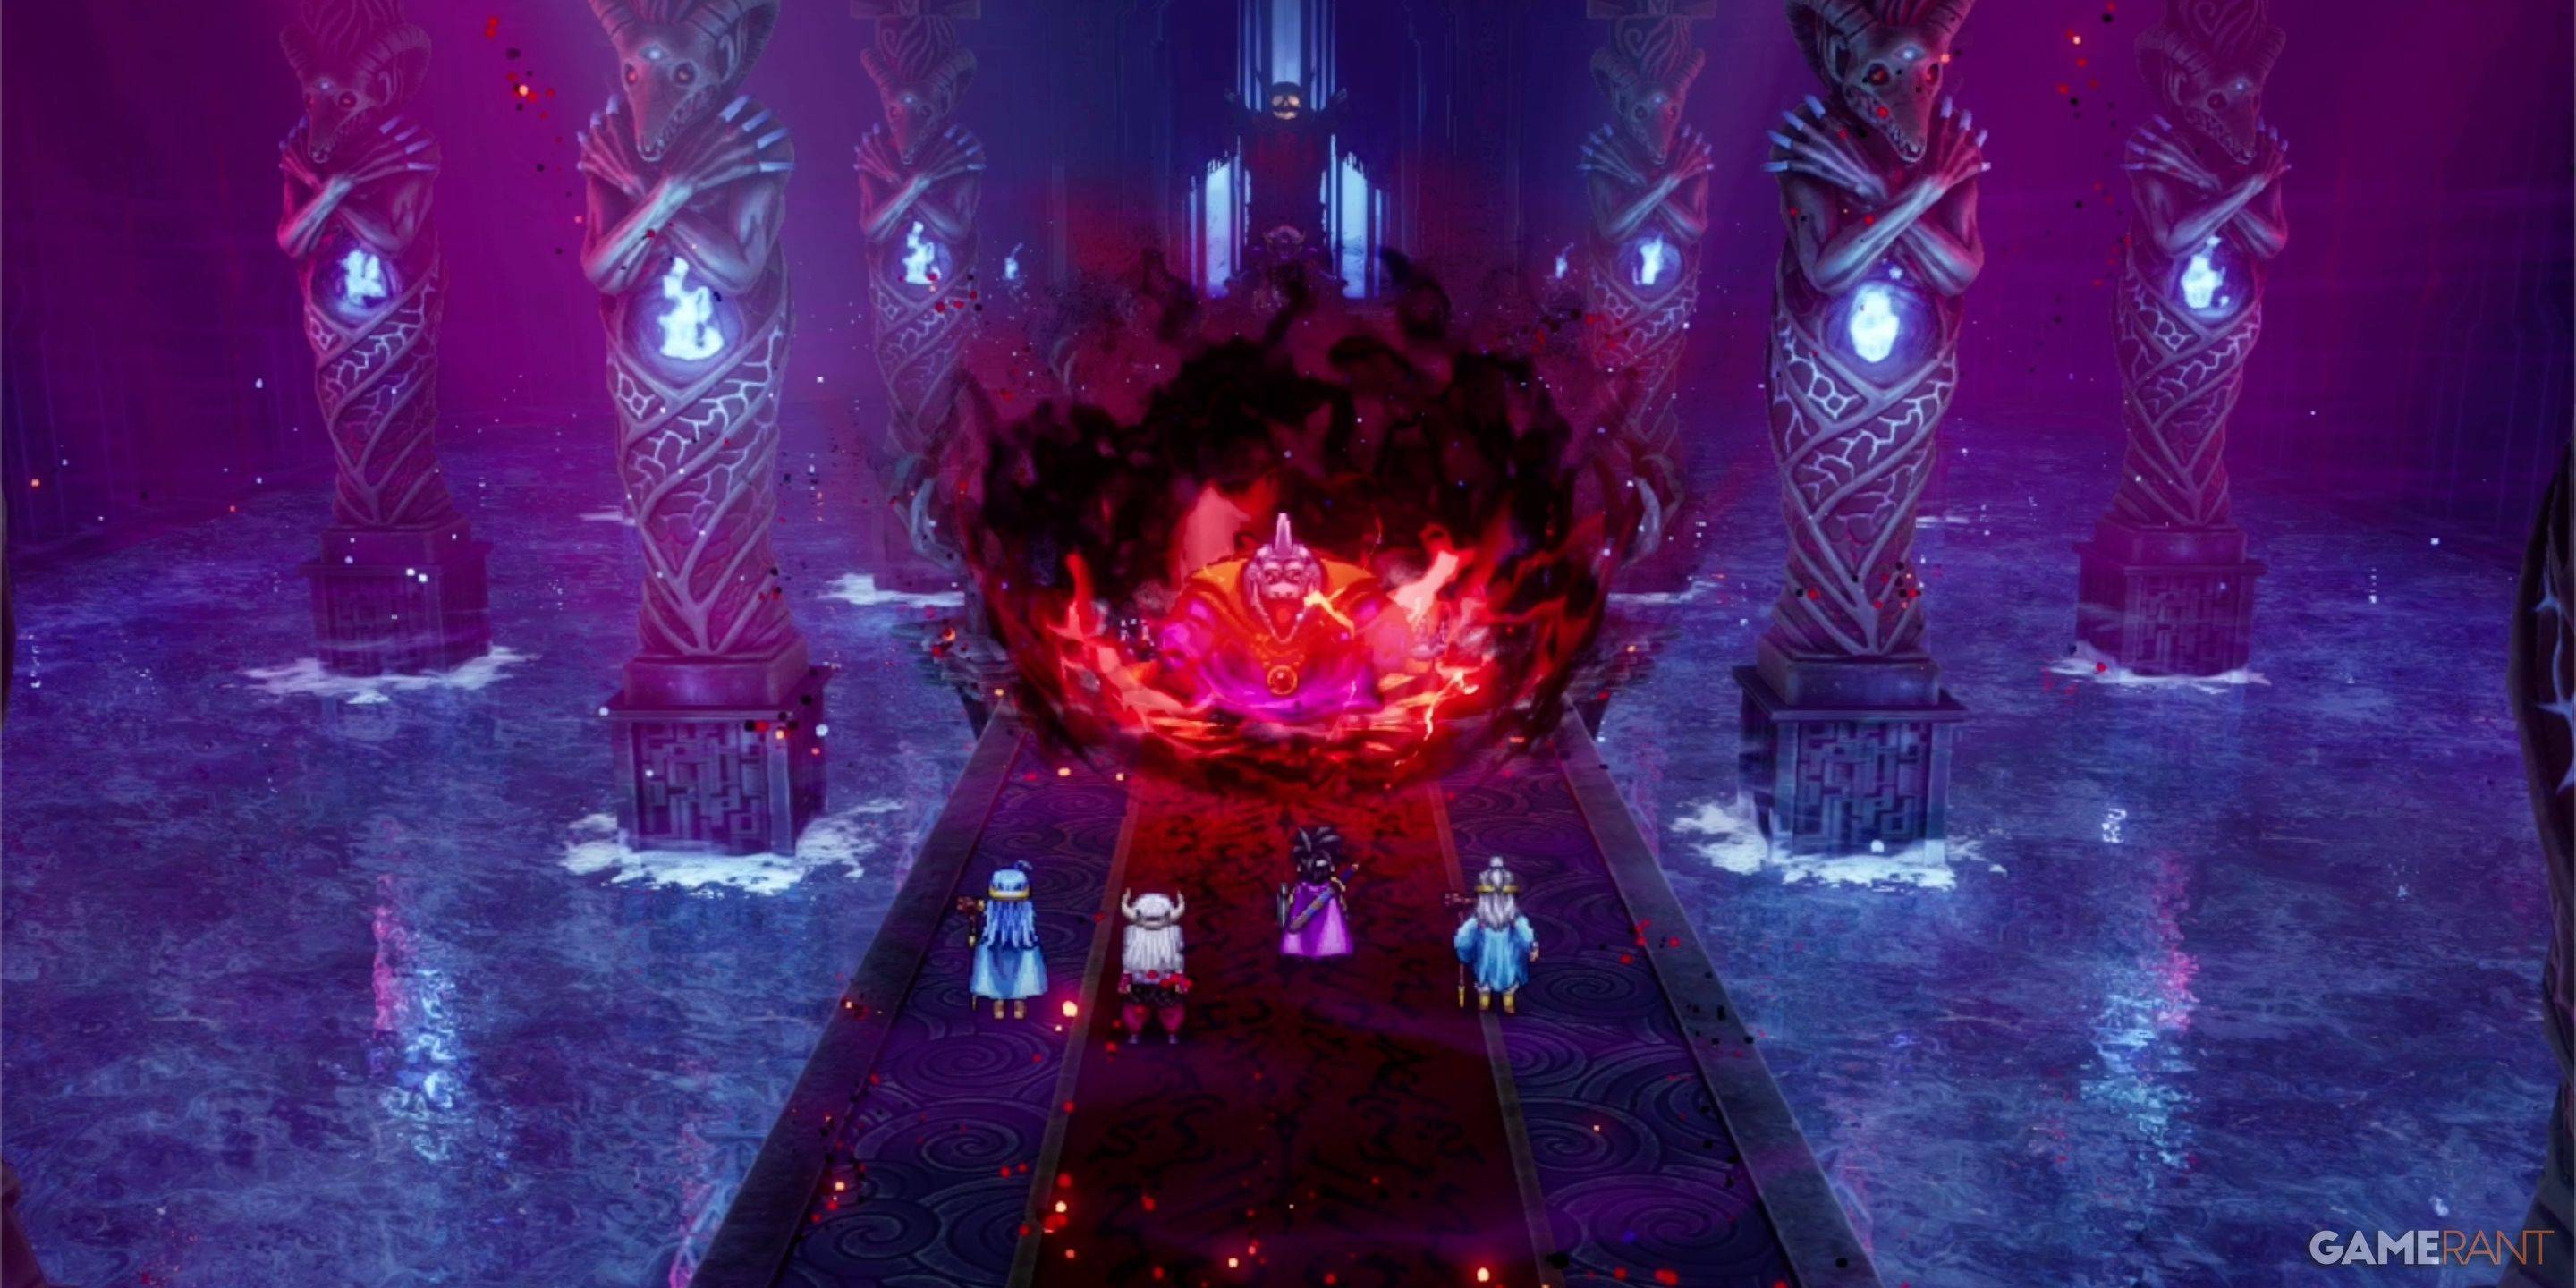
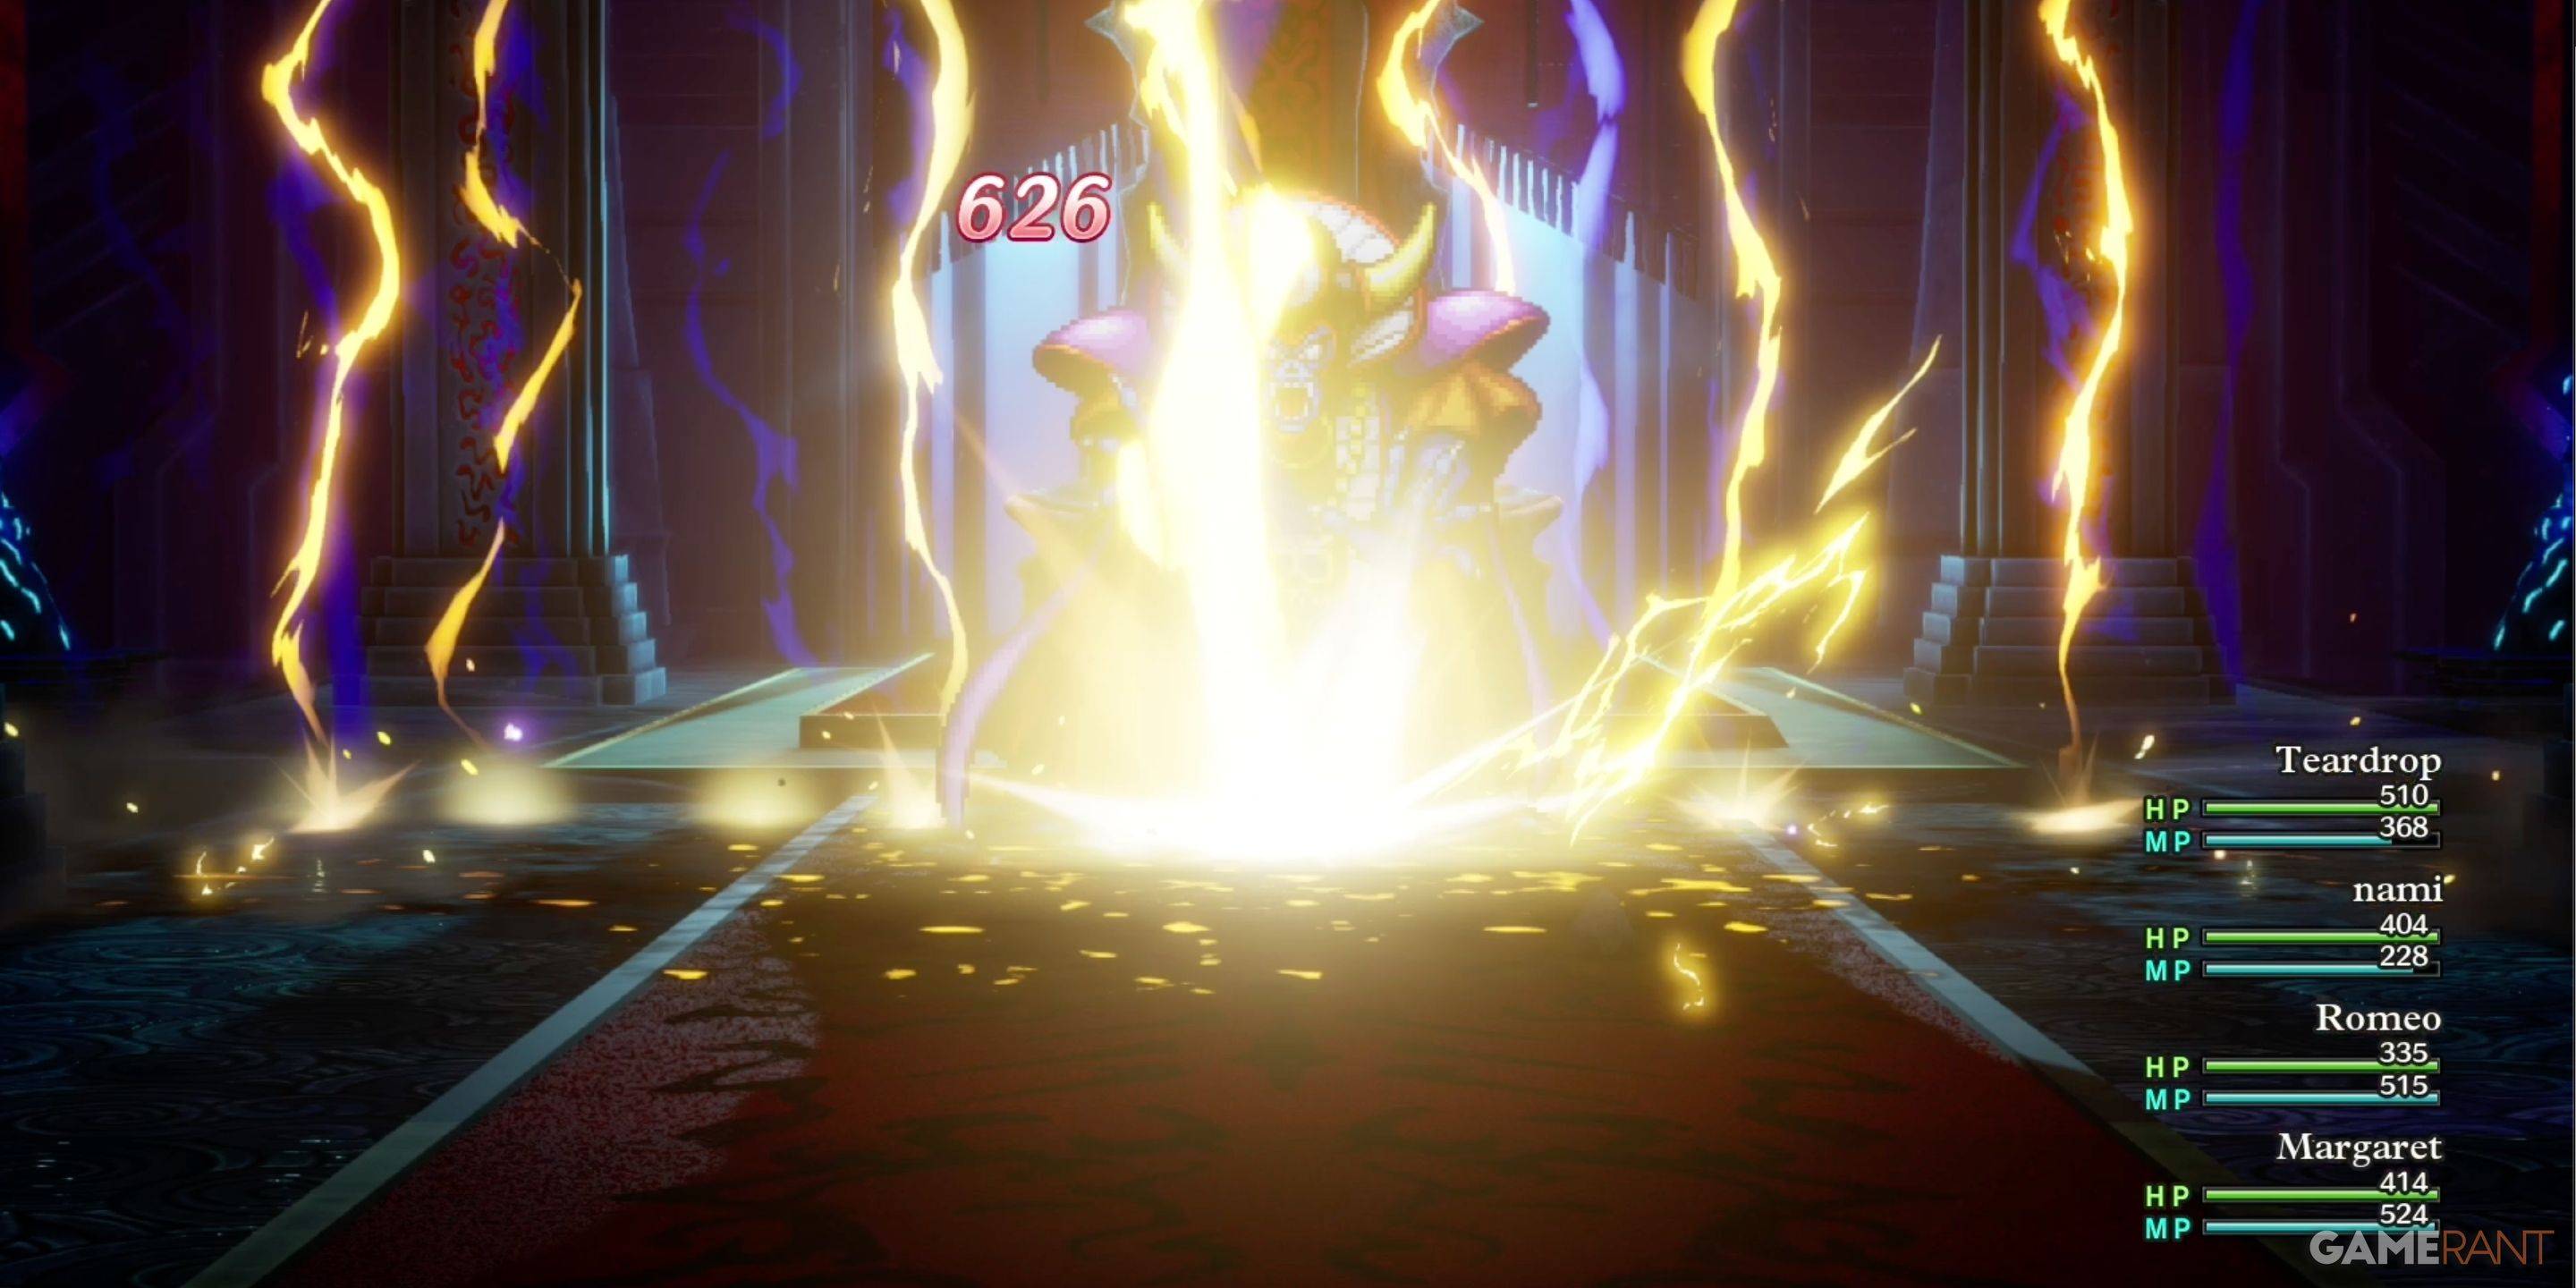 После того, как барьер выйдет из строя, Зома слабает атаки ZAP. Наше заклинание Казапа нанесло более 650 урона за удар. Комбинация Kazap и Monster Wrangler очень эффективна, что позволяет двум другим членам сосредоточиться на исцелении и возрождении. Будьте готовы возродить членов партии несколько раз. Баффы, дебюфы и оборудование, которые отражают ущерб, могут иметь решающее значение. Ключ в том, чтобы взять это медленно, внимательно управлять своим HP, и вы в конечном итоге победите.
| Имя монстра | Слабость |
|---|---|
| Дракон зомби | Никто |
| Безумный | Никто |
| Отличный тролль | Zap |
| Зеленый дракон | Никто |
| Hocus-покер | Никто |
| Гидра | Никто |
| Адский змей | Никто |
| Армия с одной человек | Zap |
| Парящий пятно | Zap |
| Троблуоводу | Zap |
Zenless ZEN ZEN ZERO UPDAT
Симулятор фальшивого банка: решение проблем с экономическим кризисом
Все материалы, комплекты и созвездия Мавуики в Genshin Impact
Marvel Rivals: объяснение Дракулы в первом сезоне
Albion Online запускает обновление «Пути к славе» с новым контентом, повышенной частотой появления и многим другим.
Roblox: коды RNG аниме (январь 2025 г.)
Лучшие Xbox Game Pass игры для детей (январь 2025 г.)
Одиночное повышение уровня: приближается глобальный турнир
As of recent reports, video game consoles have indeed seen price increases in the U.S., with some models selling approximately 12% higher this year compared to last year. This rise is primarily attributed to several key factors: Inflation and Rising Costs: The broader economic environment, including ongoing inflation, has driven up the cost of materials, shipping, and manufacturing. Components like semiconductors, plastics, and packaging have become more expensive, contributing to higher retail prices. Supply Chain Adjustments: Although global supply chain issues have eased compared to 2021–2022, some lingering disruptions and increased logistics costs continue to affect pricing. Console Generational Transitions: The launch of the PlayStation 5 Pro and the anticipated release of next-gen hardware (such as the Xbox Series X|S updates or a new Xbox model) have led manufacturers to adjust pricing strategies. Newer versions with enhanced features often command higher prices. Premium Features and Bundling: Many consoles now come with upgraded hardware, larger storage, or exclusive bundles (e.g., digital editions with additional games or accessories), which justify the higher price points. Currency and Import Costs: Fluctuations in the U.S. dollar and increased import tariffs or fees for international components have also played a role in price hikes. It’s important to note that while some models have increased by around 12%, the average price rise varies by platform and model. For example: The PlayStation 5 Digital Edition and standard models saw price increases in 2023–2024. Xbox Series X and S prices have also risen slightly, though less dramatically than Sony’s models. Consumers may also observe that older models are being phased out or re-priced, and retailers are increasingly offering premium bundles that justify higher sticker prices. In summary, the 12% increase in console prices across the U.S. reflects a combination of inflation, supply chain dynamics, and strategic pricing in a competitive market—particularly as companies prepare for the next generation of gaming hardware.
Mar 28,2026
Welcome to Monster Hunter Wilds: Pre-Hunt Cooking Guide — your essential resource to maximize your survival and success before every expedition. Properly prepping your meals before heading into the wild isn’t just a luxury—it’s a game-changer. Here’s how to use cooking to your advantage and dominate the environment like a true Hunter. 🔥 Why Pre-Hunt Cooking Matters In Monster Hunter Wilds, cooking is more than just satisfying hunger. It: Boosts your stats (HP, Attack, Defense, etc.) Grants elemental resistance Enhances stamina and recovery Provides status effect immunity (e.g., paralysis, sleep) Increases item discovery and crafting efficiency 🎯 Pro Tip: Never skip pre-hunt cooking. Use every meal as a tactical advantage. 🍲 Pre-Hunt Cooking: The 5 Essential Meals 1. Hunter’s Stamina Boost (Base Meal) Ingredients: Firefruit (70% chance to find on Windward Cliffs) Melted Bitterroot (Found near Cursed Vale) Rotten Rumbler Meat (Found in Hunter’s Cache) Effect: +30% Stamina Recovery +20% Stamina Max When to Use: Before long hunts (e.g., against Apex monsters like the Rathalos Prime or Nergigante) When you’ll need sustained movement, dodging, and climbing 🌟 Bonus: Combine with a Stamina Shard (S) for +40% stamina recovery. 2. Vigor Elixir (HP & Defense) Ingredients: Glimmer Moss (Grows on shaded rocks near Elder's Grove) Thick Skinned Boney (Found in buried treasure chests) Wild Pepper (Harvested from the toxic swamps) Effect: +20% Max HP +15% Defense Resists status ailments (sleep, paralysis) When to Use: Against high-damage monsters (e.g., Bazelgeuse, Zinogre) When fighting in confined areas (e.g., Pteros in Caverns of the Forgotten) 💡 Tip: Add a Frostflame Fruit to gain resistance to ice damage. 3. Elemental Surge Broth (Attack + Elemental Power) Ingredients: Pyroflame Berry (Grows on lava fields near the Volcanic Rim) Lightning-Infused Fang (Dropped by Rathian variants) Slime Goo (Mined from glowing pools in Hollow Caves) Effect: +25% Attack +30% elemental damage (fire, lightning, ice, etc.) 10% chance to trigger elemental burst on hit When to Use: When hunting monsters with elemental weaknesses (e.g., Kushala Daora – heavy wind, weak to lightning) Before fights with elemental-based bosses (e.g., Seregios) ⚡ Pro Combo: Pair with a Chainflame Leaf to make your elemental attacks ignite on hit. 4. Frostbite Defense Stew (Cold Resistance) Ingredients: Frostvine (Found in glacial zones) Icicle Slime (Harvested from frozen crevices) Rusted Iron Shard (From fallen Hunter gear) Effect: +40% Cold Resistance Immunity to Frostbite status 15% faster recovery from freezing When to Use: Before hunting in icy biomes (e.g., Alatreon in the Northern Tundra) When fighting monsters like Alatreon (Blue form) or Seregios (White form) ❄️ Note: This stew also prevents your equipment from freezing (critical for mobility). 5. Nectar of the Wild (All-Around Buff) Ingredients: Wild Honey (From Hive of the Unseen) Lucky Petal (Found only during night hunts) Juicy Boid Meat (From wounded Boid near the cliffs) Effect: +15% Attack +15% Defense +10% Speed 10% chance to dodge attacks (passive) When to Use: Every pre-hunt meal if you’re unsure of the matchup Before any major expedition (e.g., new zone, rare monster) For beginners leveling up their gear 🌸 Legend Status: This meal grants +10% loot drop chance if brewed during a full moon (check the calendar in your Hunter’s Journal). 🧠 Advanced Cooking Tips Combine Meals for Synergy Eat Vigor Elixir + Frostbite Stew before facing Alatreon (Blue) Use Hunter’s Stamina Boost + Elemental Surge Broth for Rathalos Prime Use the Cooking Bench Wisely Craft ingredients before you go out (e.g., pre-harvest Glimmer Moss) Store meals in your Hunting Pouch for quick access Survival Mode Bonus In Survival Mode, eating a full meal before entering the arena grants +20% monster affinity (makes them more likely to target you) Environmental Edits Cooking in zones with elemental energy (e.g., volcanic vents) adds +10% buff to elemental meals 📌 Final Pre-Hunt Checklist ✅ Confirm which monster you’re hunting ✅ Select matching meal (e.g., ice for Alatreon, lightning for Zinogre) ✅ Add synergy ingredients (e.g., Frostflame Fruit, Chainflame Leaf) ✅ Eat at least 1 full meal before leaving base ✅ Store 2 backup meals in your pouch 🏁 Conclusion In Monster Hunter Wilds, you don’t just hunt monsters — you outsmart them with prep. A well-cooked meal isn’t just food — it’s your first weapon, your armor, and your edge. 🔥 Remember: No Hunter wins by accident. No Hunt is complete without a proper pre-hunt meal. Now go—prepare, hunt, and return stronger than ever. The Wilds await, Hunter. 🌍⚔️ 📘 Pro Tip: Save your most powerful meal for the Legendary Hunt or Final Battle: Your last bit of power could be the difference between victory and defeat. Want a printable meal recipe sheet or a hunting zone guide? Let me know and I’ll generate it for you!
Mar 25,2026
As of now, there is no official announcement from Meta (formerly Facebook) regarding a "Sequel" to Facebook that specifically aims to tackle recent controversies. However, Meta has been actively working on evolving its social media platforms—particularly Facebook and Instagram—amid ongoing scrutiny over issues like misinformation, algorithmic bias, mental health impacts, and data privacy. Here are a few key developments that may be interpreted as Meta’s response to recent controversies: Rebranding to Meta (2021): Meta’s rebrand from Facebook Inc. was a strategic move to shift focus from Facebook to the broader "metaverse" vision. While not a direct sequel, it signaled a pivot away from Facebook’s increasingly negative reputation and an attempt to reposition the company as a forward-looking tech innovator. Platform Updates to Combat Misinformation: In response to criticism over misinformation and harmful content, Meta has implemented several changes, including: Fact-checking partnerships. Reducing the reach of false content. Removing or limiting accounts involved in coordinated inauthentic behavior. Focus on Privacy and User Control: Following backlash over data collection practices (e.g., the 2021 privacy policy changes), Meta has introduced enhanced privacy settings and transparency tools, such as: "Why am I seeing this ad?" feature. More granular ad preference controls. Limiting third-party data sharing. Investment in AI and Content Moderation: Meta has invested heavily in AI to detect harmful content more efficiently. While controversial, these tools aim to address concerns about platform safety and content moderation. New Features and Experiments: "Reels" and "Stories" Enhancements: To compete with TikTok and keep users engaged, Meta has rolled out new features that aim to improve user experience and reduce time spent on potentially harmful content. "Meaningful Interactions" Algorithm Updates: Efforts to prioritize content that fosters genuine connections over outrage-driven or addictive content. In summary, while there is no actual "sequel" to Facebook in the traditional sense, Meta's evolving platform strategies—through rebranding, feature updates, and AI-driven moderation—can be viewed as a broader response to the controversies surrounding Facebook over the past few years. These efforts aim to rebuild trust, improve user well-being, and adapt to regulatory and social pressures. For the latest updates, always refer to official Meta blog posts or press releases.
Mar 24,2026

As of now, there is no official announcement confirming that Soshiro Hoshina, the character from Kaiju No. 8, will be joining the Kaiju No. 8 mobile game. The mobile game adaptation of Kaiju No. 8, developed by Bandai Namco, has featured several characters from the series, including the main protagonist, Kōki Hoshina (who is actually a different character from Soshiro), and other members of the Kaiju Countermeasures Special Security Agency (K.C.S.A.). Soshiro Hoshina is a minor character in the Kaiju No. 8 manga and anime, known for being a K.C.S.A. agent and a childhood friend of Kōki. While his inclusion would be a fan-favorite addition, any casting or character additions to the mobile game would be officially announced by Bandai Namco or the game’s developers. For the latest updates, it’s recommended to check the official Kaiju No. 8 website, Bandai Namco’s social media channels, or the in-game announcements. Keep an eye out for official news — if Soshiro Hoshina does join, it could be a major highlight for fans of the series!
Mar 18,2026
It seems like your message might be a fragment or a headline — "Of Unionize" or "Of Unionize" — and it's not quite complete. Could you please clarify what you'd like to know or discuss? For example: Are you asking about the process of unionizing? Do you want to know how to start a union at your workplace? Are you interested in the history of labor unions? Or did you mean to write something like "Why Workers Should Unionize"? Let me know so I can help you effectively!
Mar 16,2026
 Категория