by Nicholas Apr 22,2025
After an epic journey through the myriad quests and dungeons in Dragon Quest 3 Remake, your adventure culminates in the formidable Zoma's Citadel. This final dungeon is the ultimate test of your skills, challenging you to utilize every strategy and tactic you've mastered throughout the game. It's the most demanding challenge in the main storyline of DQ3 Remake. In this comprehensive guide, we'll walk you through every floor of Zoma's Citadel, detailing the path to take and the treasures you can find.
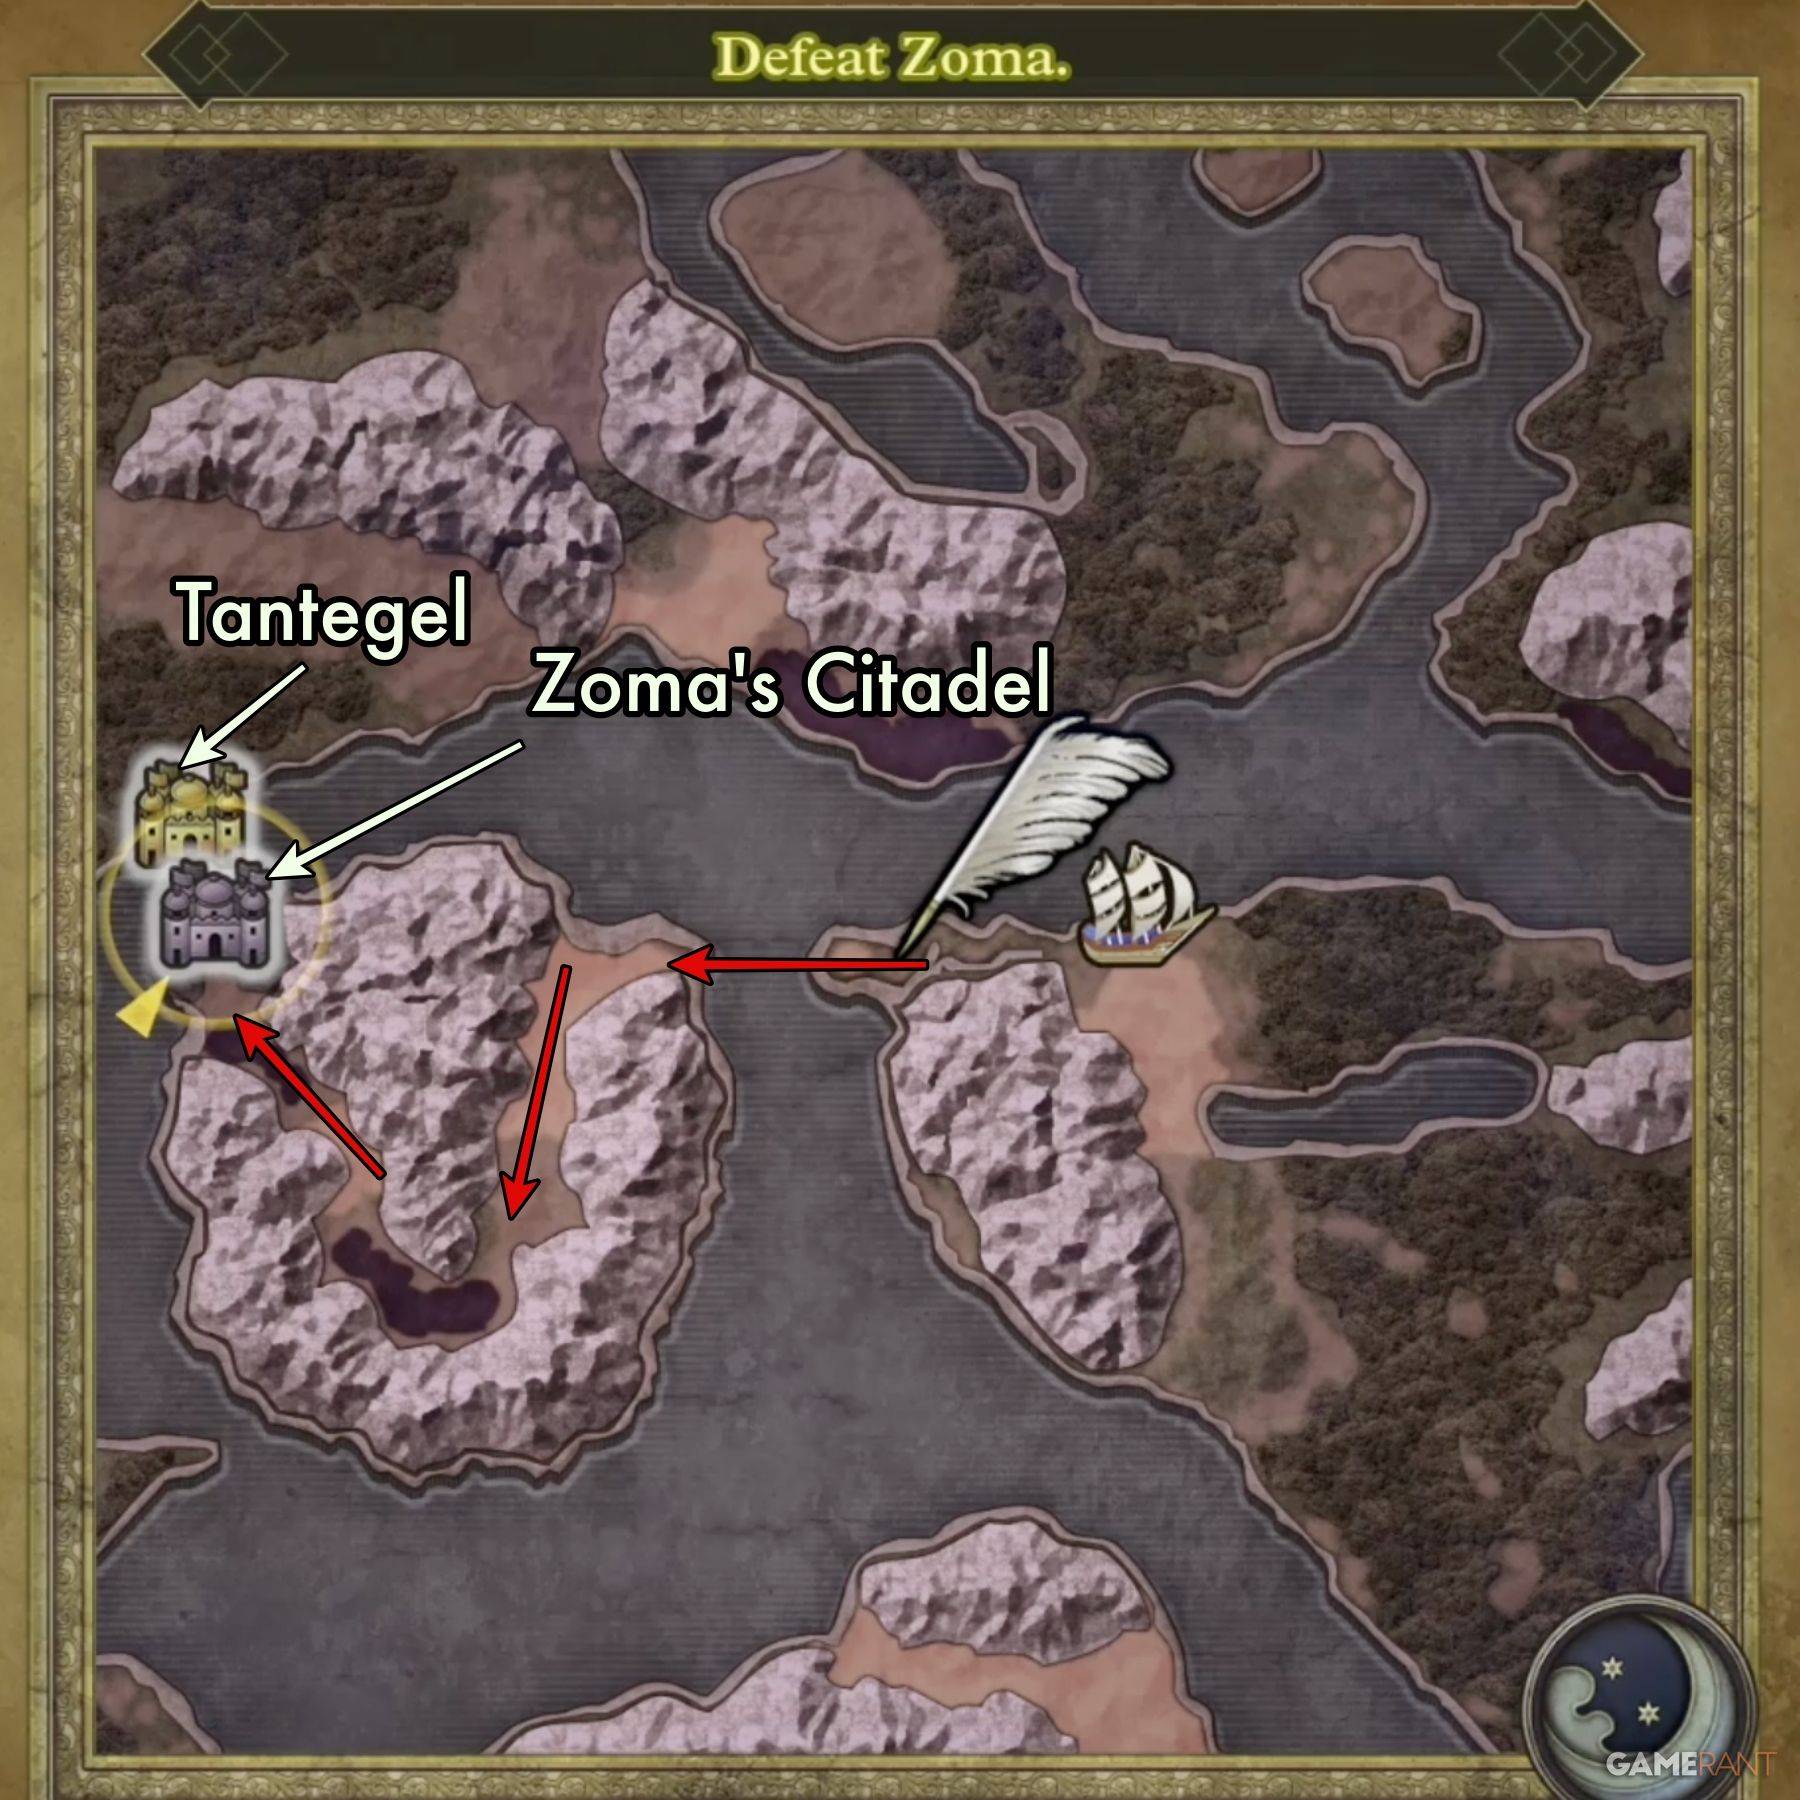 After triumphing over the Archfiend Baramos in DQIII Remake, you'll find yourself in the perpetually dark world of Alefgard. Zoma's Citadel stands as your ultimate destination on this new map. To reach it, you'll need to assemble the Rainbow Drop, a crucial item in DQ3 Remake.
The Rainbow Drop is composed of the following items:
Once you've gathered all three items, you can create the Rainbow Drop, which will enable you to form the Rainbow Bridge leading to Zoma's Citadel.
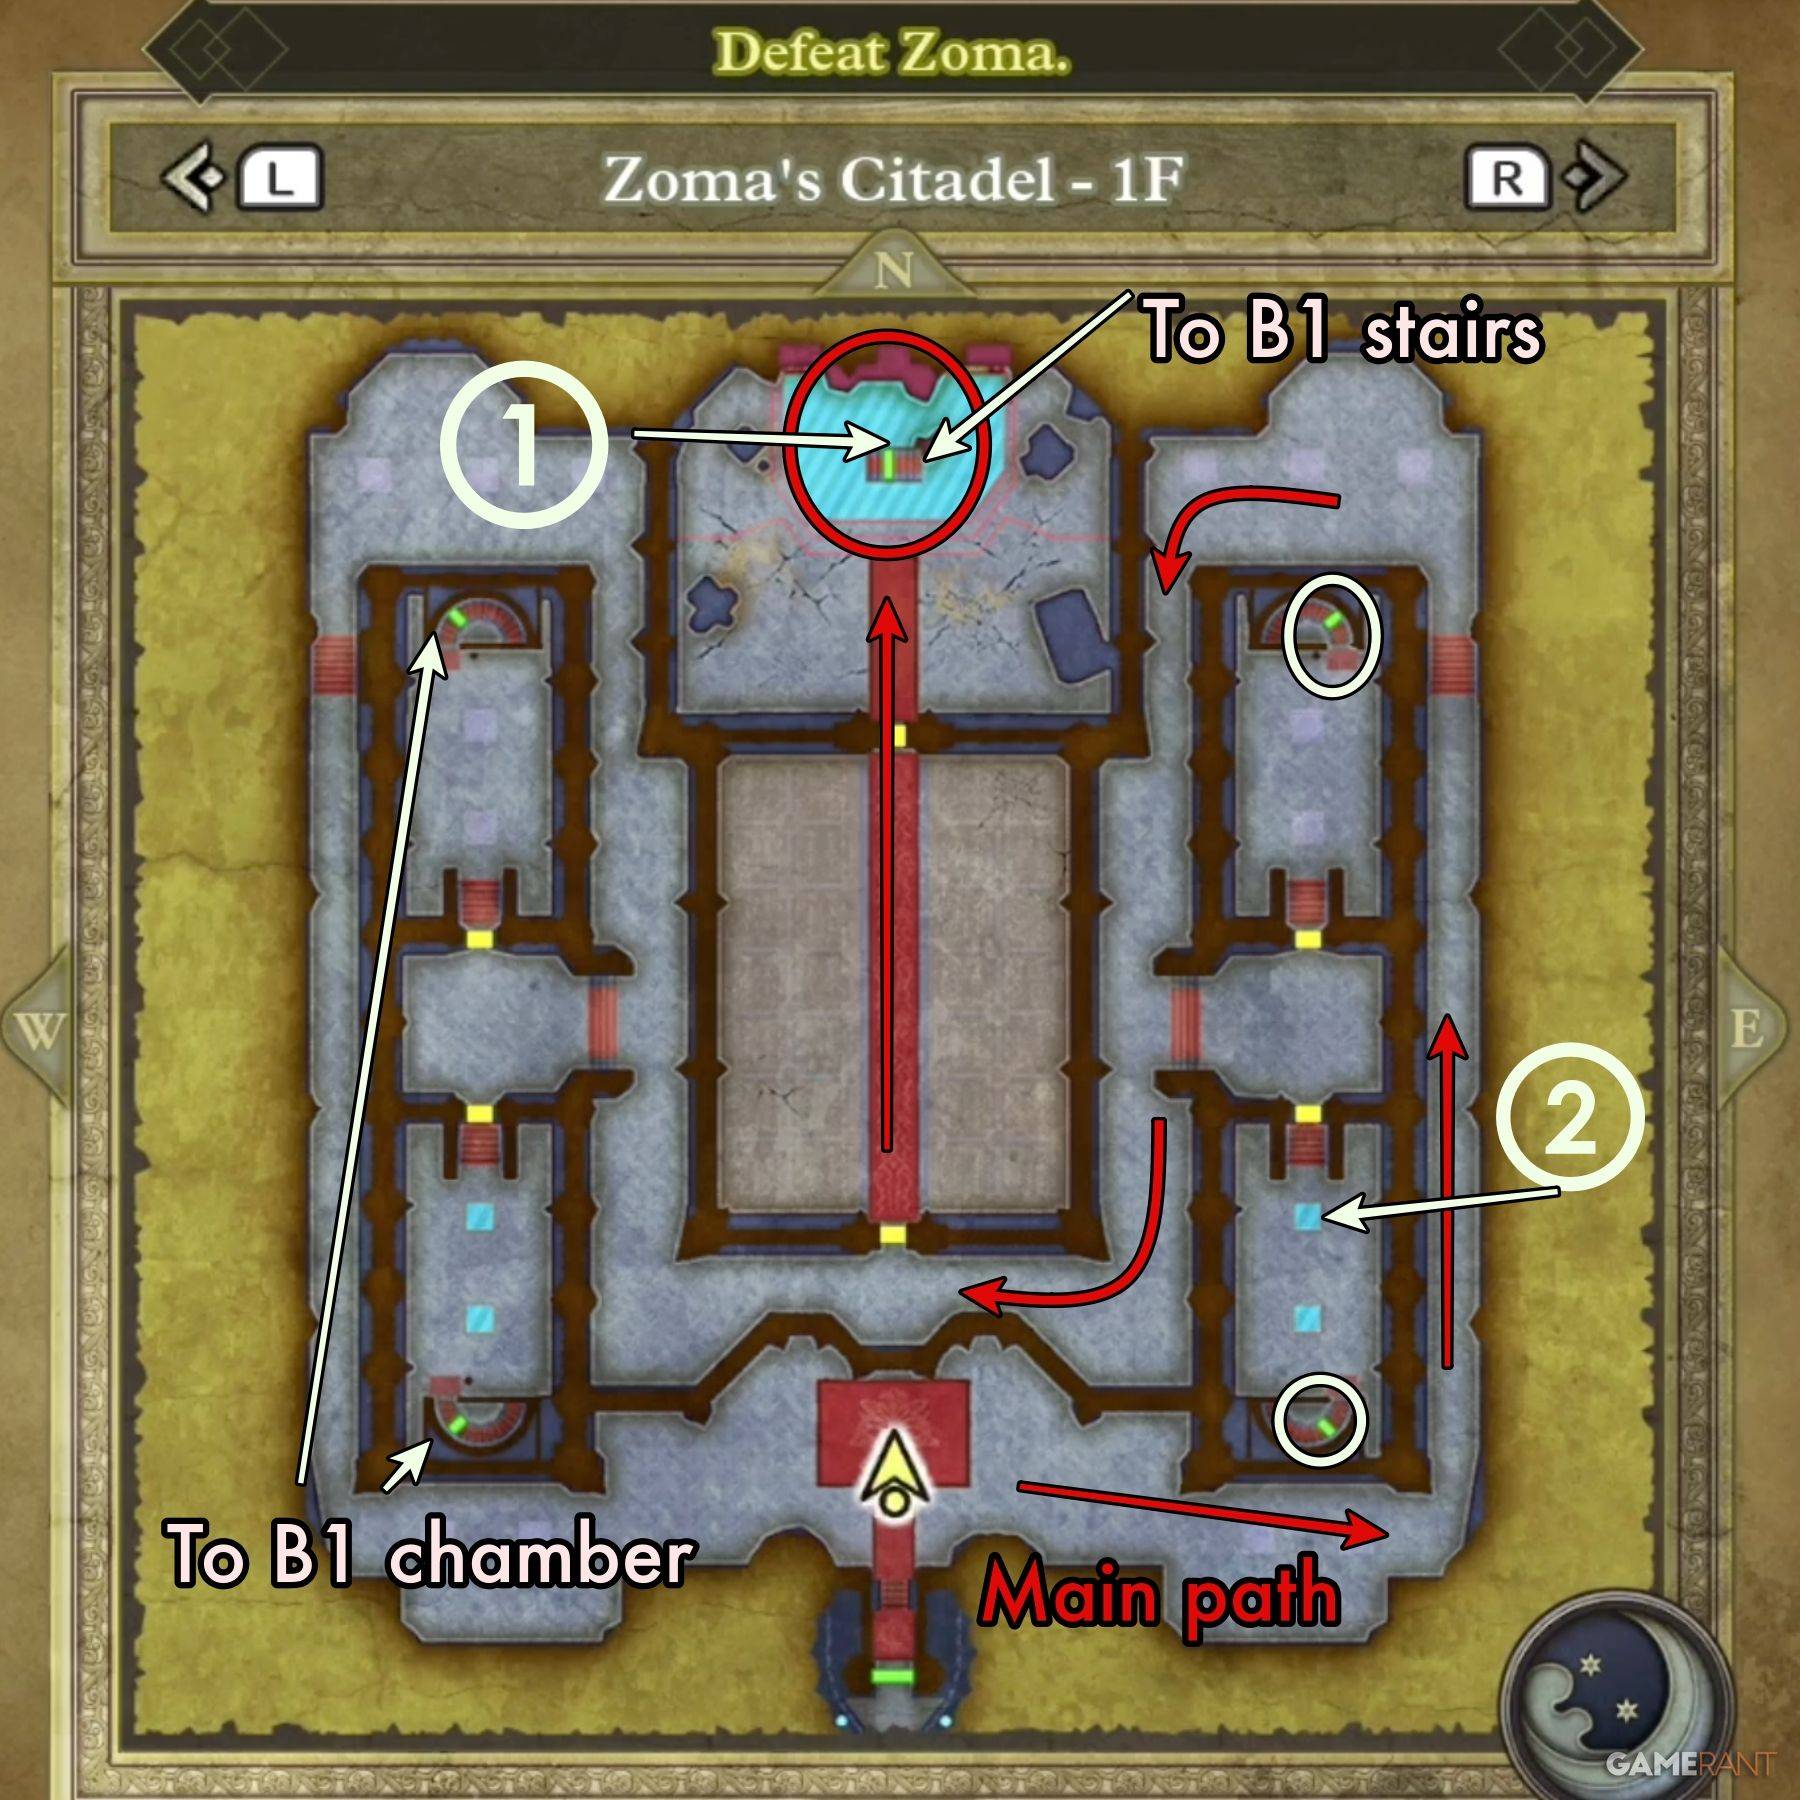 ### 1F Main Path:
Your objective on the first floor of Zoma's Citadel is to reach the throne positioned near the center of the northern wall, which will shift to unveil a hidden passage. Navigate up and around either the east or west side of the chamber, then loop back down to the door of the central chamber. Refer to the map above for the precise route. Don't miss the treasures hidden in some of the side chambers, detailed below.
Upon entering the central chamber, you'll encounter a barrage of Living Statue variants. These enemies have no specific weaknesses and can be quite formidable. Approach them as you would a boss fight, and you should manage just fine.
 ### B1 Main Path and B1 Treasure:
Taking the main path under the throne leads directly to B2. However, if you opt for any of the four stair sets in the small chambers on 1F, you'll find yourself in an isolated B1 chamber. The sole purpose of visiting this level is to claim the treasure chest along the northern wall:
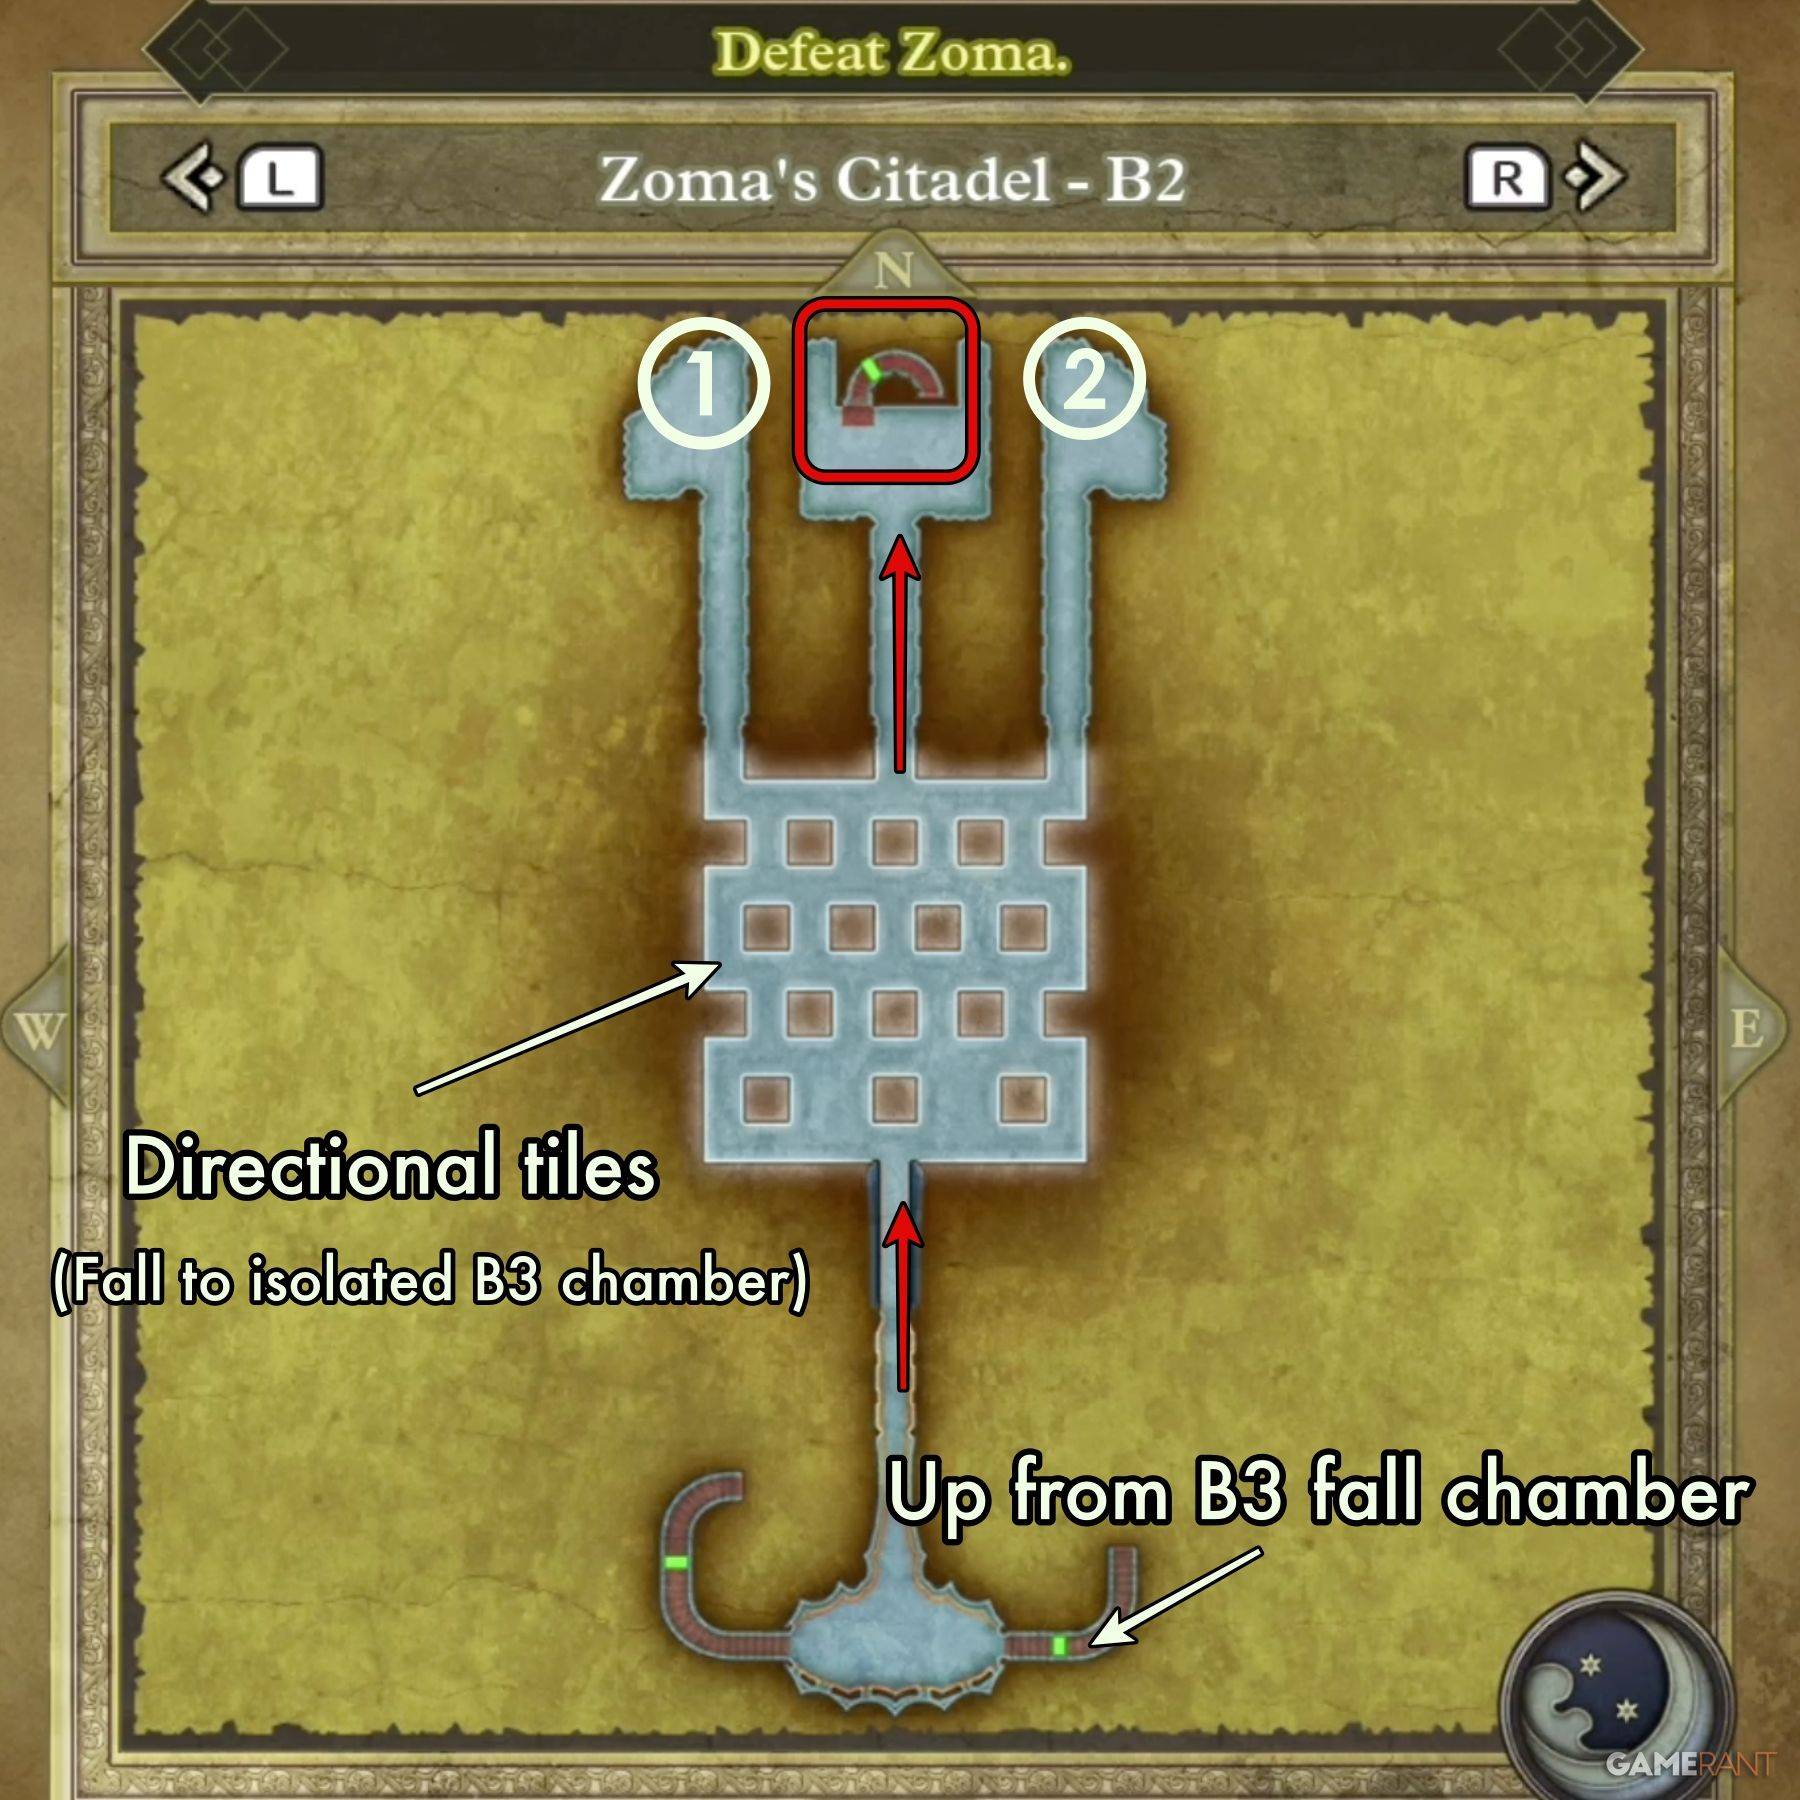 ### B2 Main Path:
Upon descending from B1, you'll arrive at B2. Here, you must navigate the directional tiles in the central section to reach the path directly opposite the entrance and proceed down the stairs. These tiles can be quite challenging, so we've dedicated a section to help you master them.
The directional tiles on level B2 can seem baffling at first, but there's a pattern to follow. If you're struggling, consider revisiting the Tower of Rubiss to practice. On the third floor's northwest corner, you'll find similar tiles designed for practice.
The tiles feature a diamond shape pointing east and west, with colors that change frequently. Pay close attention to these colors to determine your inputs.
For North or South movement, consider the diamond's halves as the left and right buttons on the D-Pad:
For East or West movement, treat the diamond as arrows pointing in each direction. Focus solely on the orange arrow:
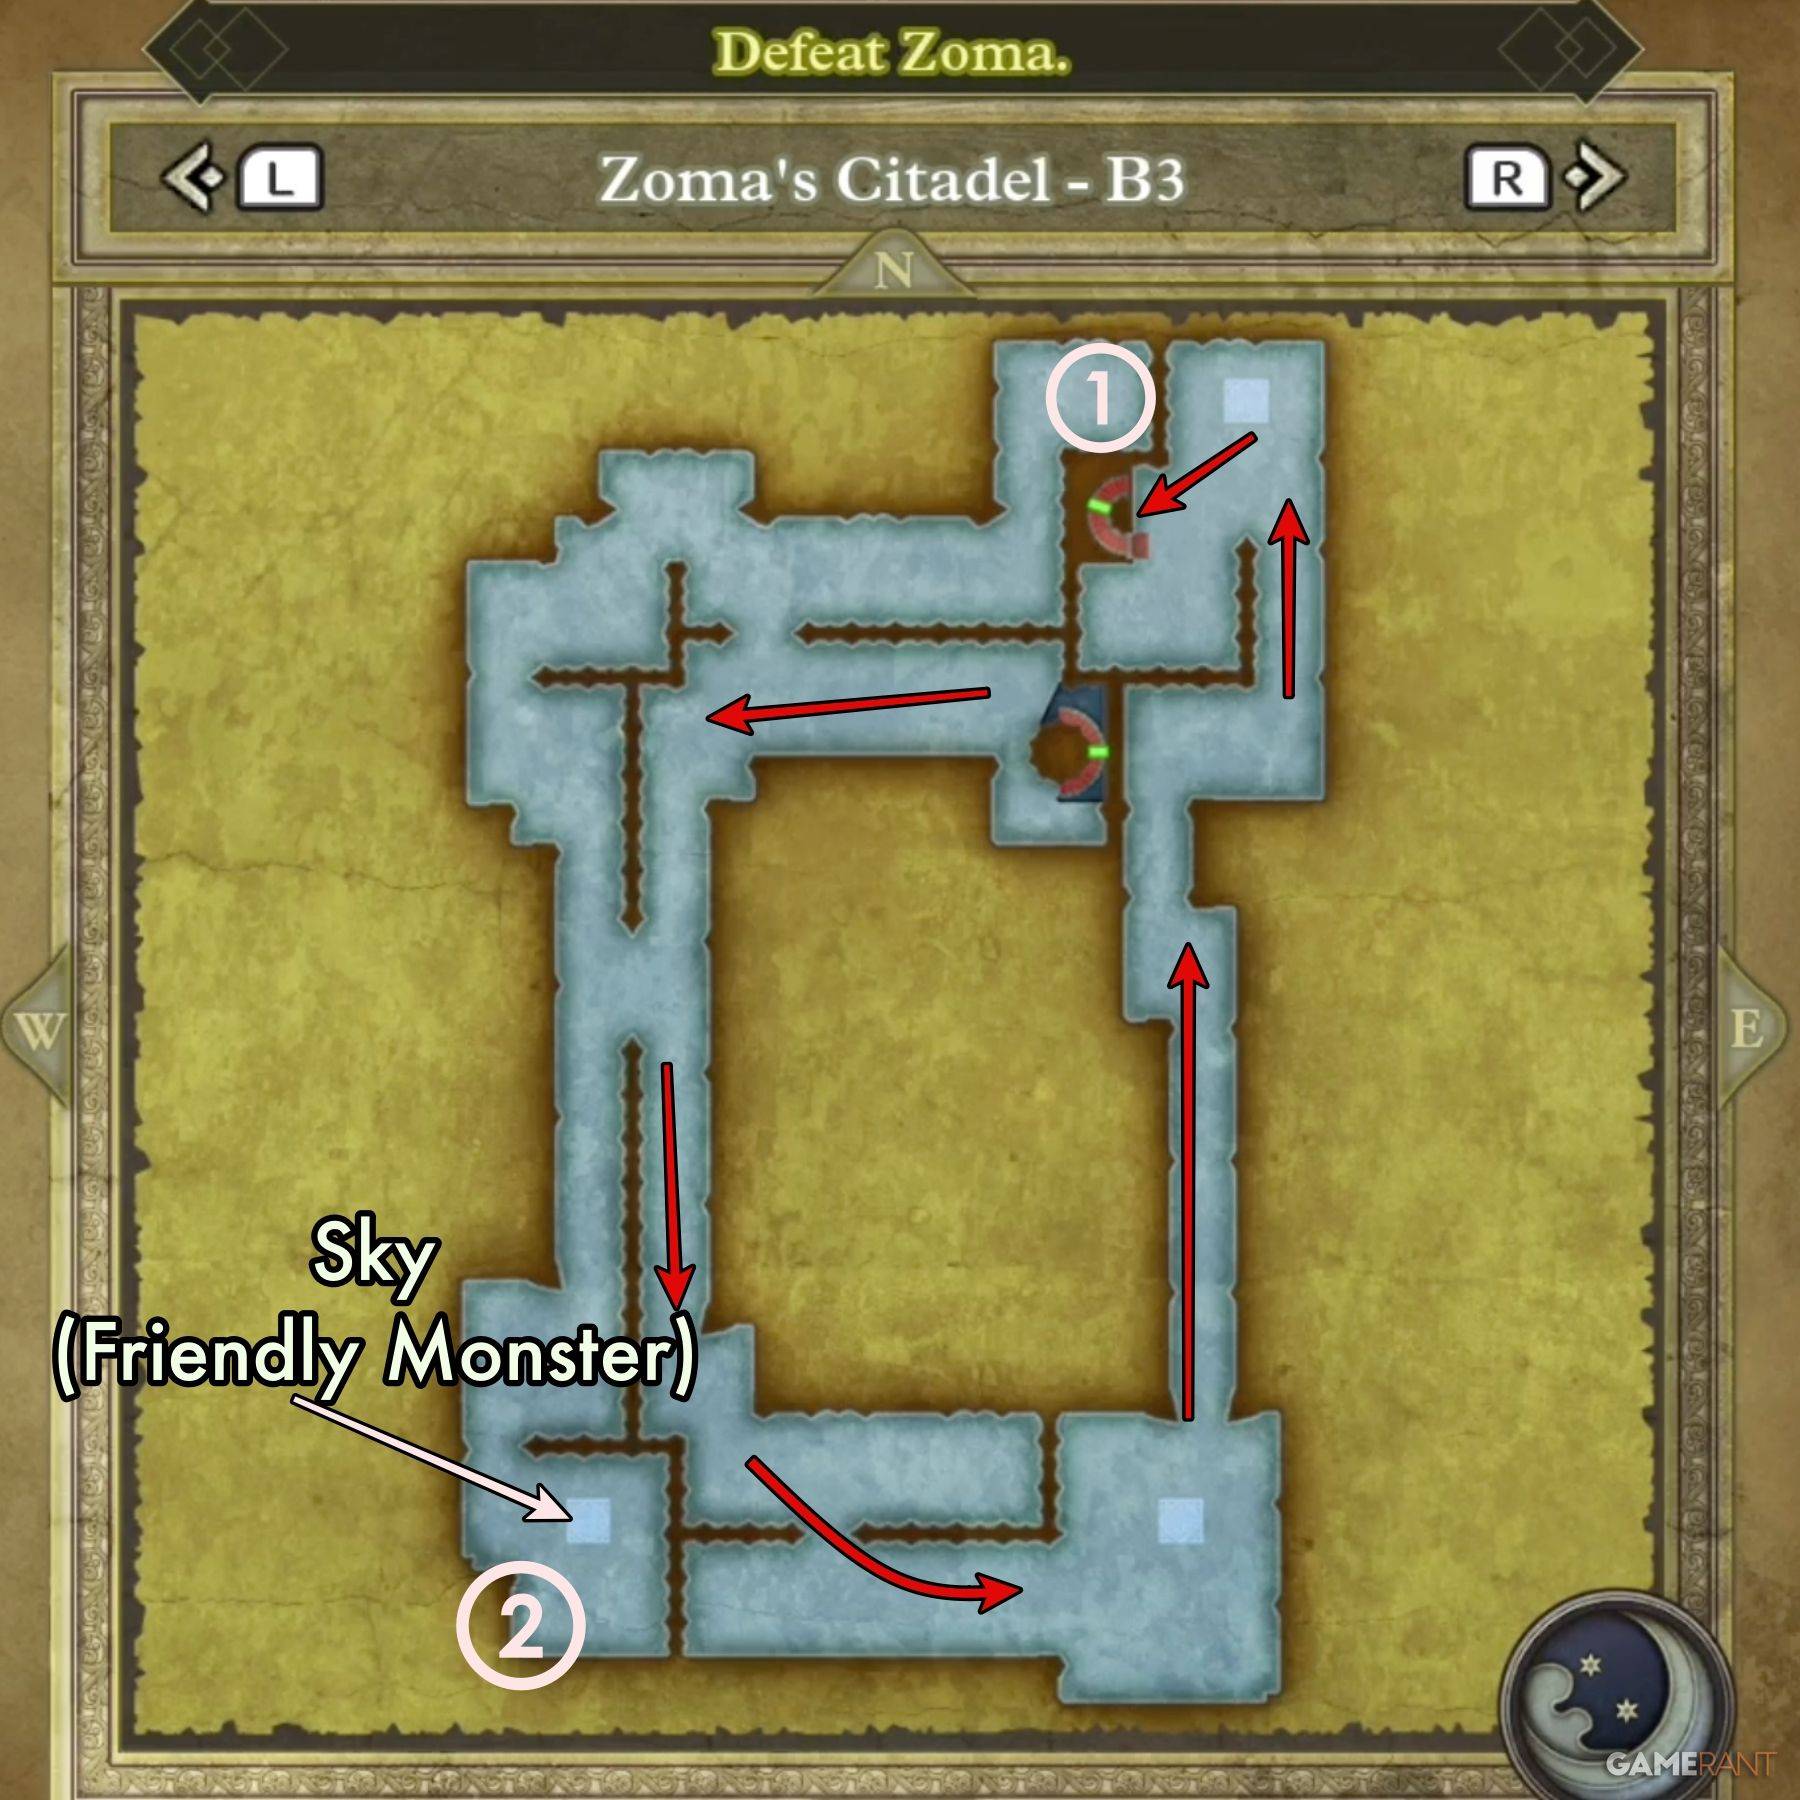 ### B3 Main Path:
Navigating the third basement level is straightforward, as the main route circles the outer edge of the square-shaped chamber. A slight detour to the southwest corner will lead you to Sky, a Soaring Scourger, and one of DQIII Remake's Friendly Monsters.
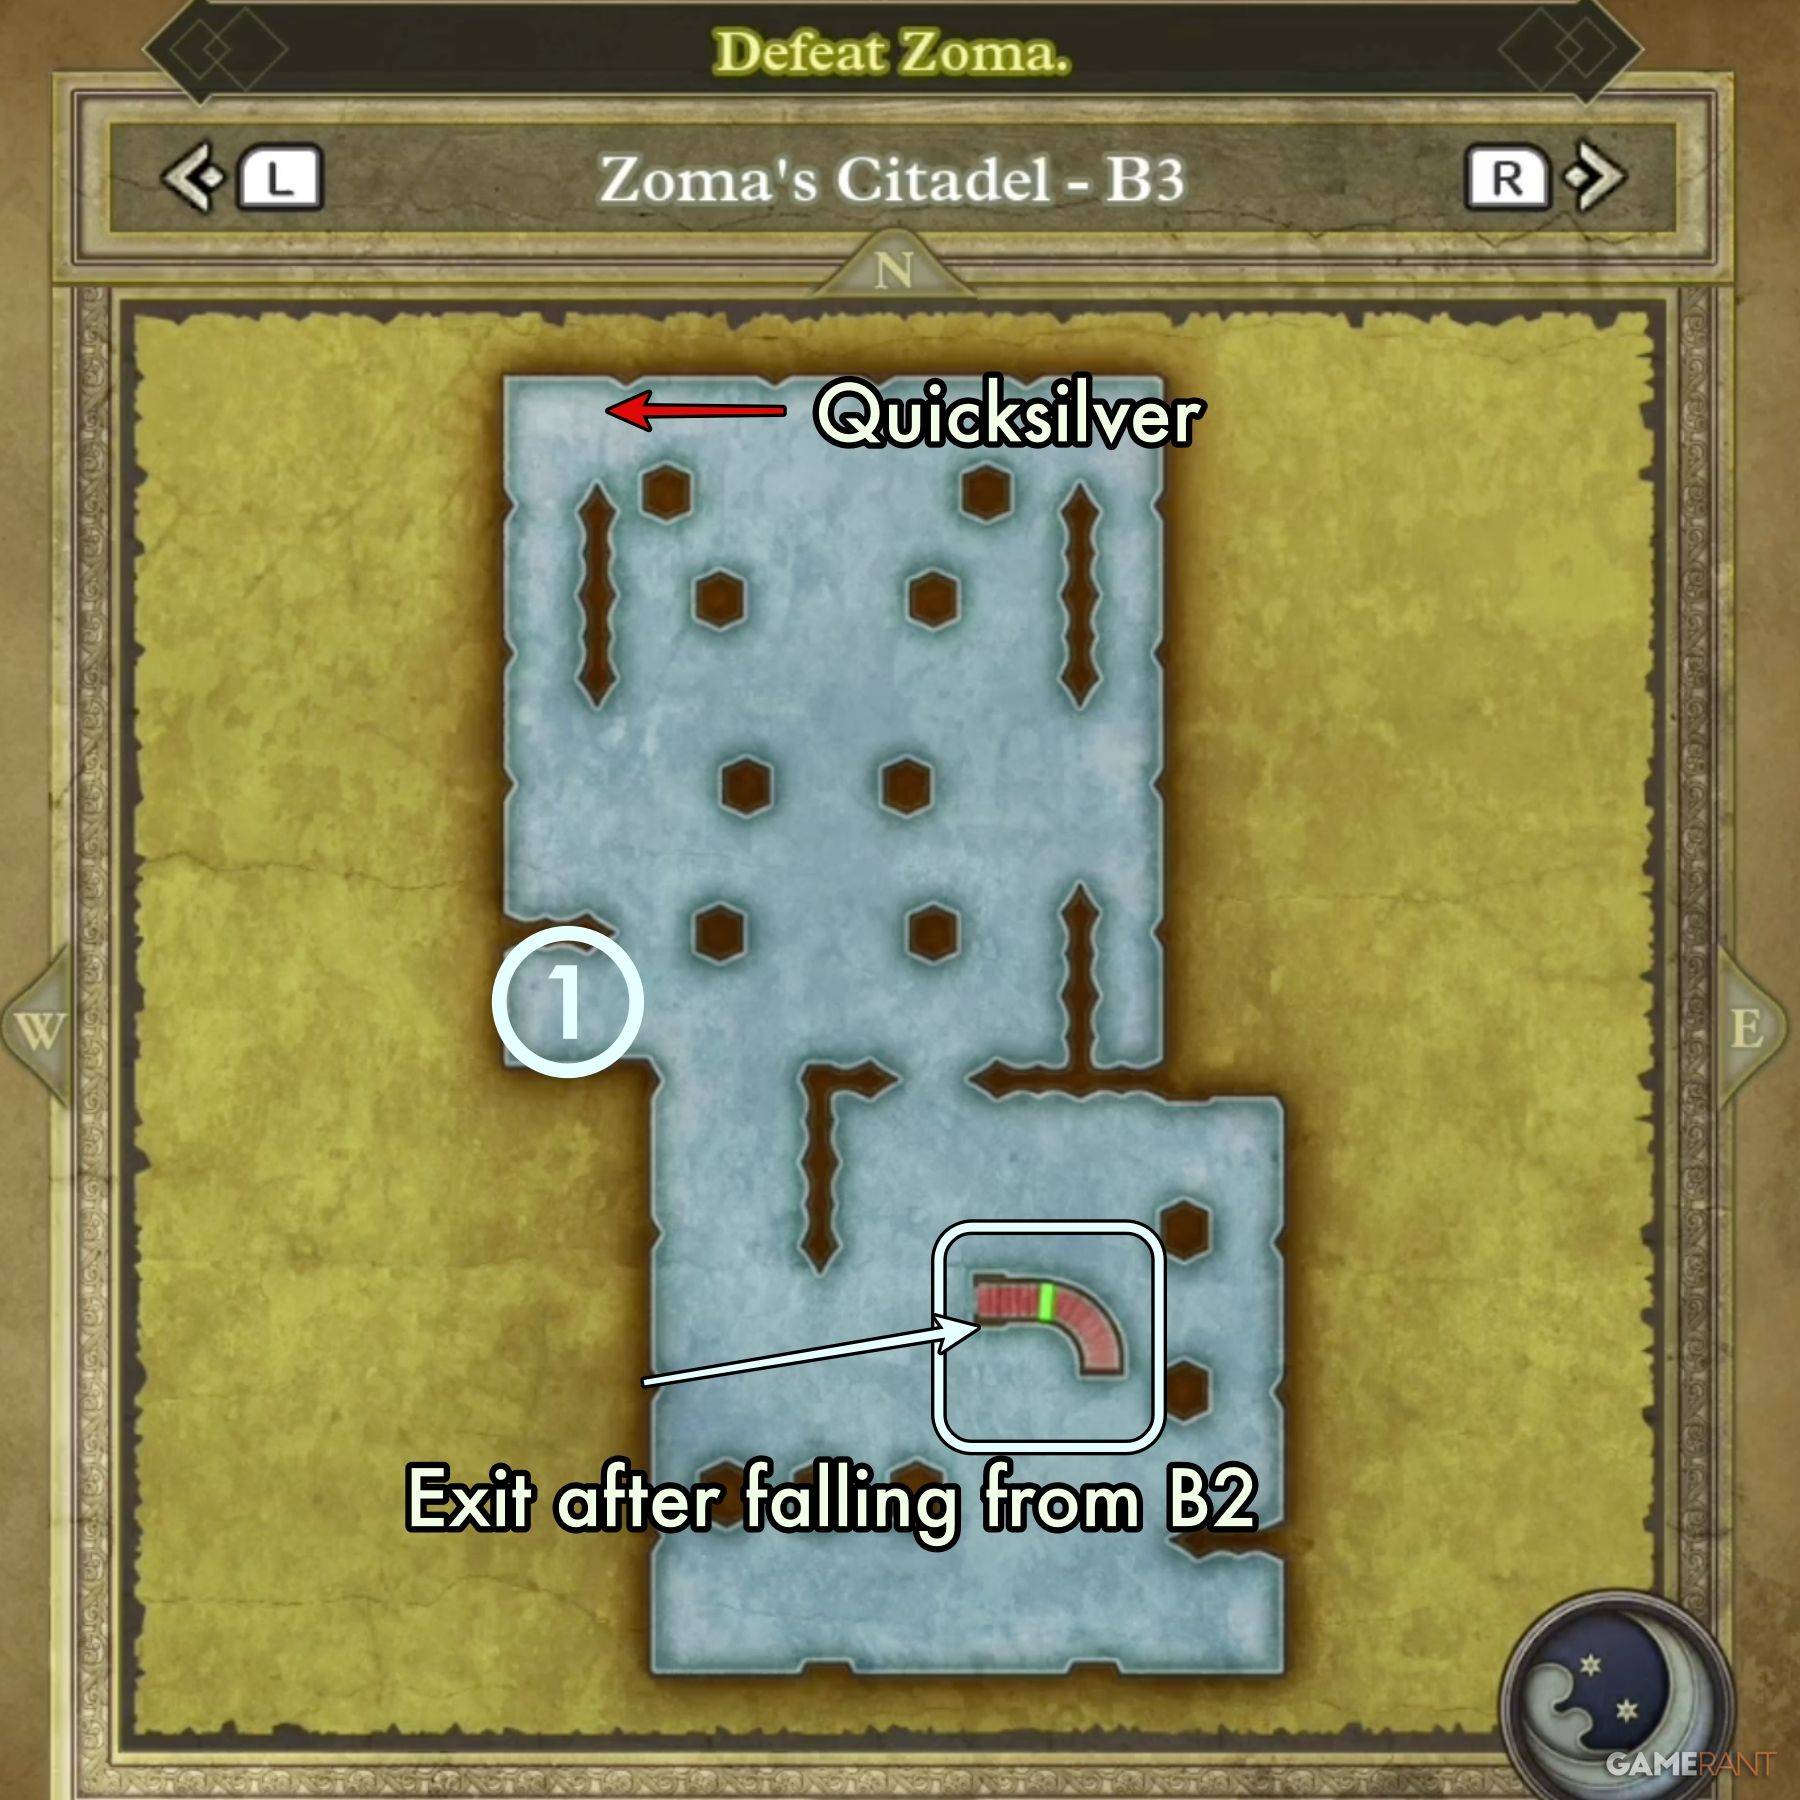 If you fall into one of the holes while crossing the directional tiles on B2, you'll end up in this isolated section of B3. Here, you'll find a friendly Liquid Metal Slime in the northwest corner. Exit via the only stairs on the eastern side of the room.
Main Chamber:
Isolated Chamber:
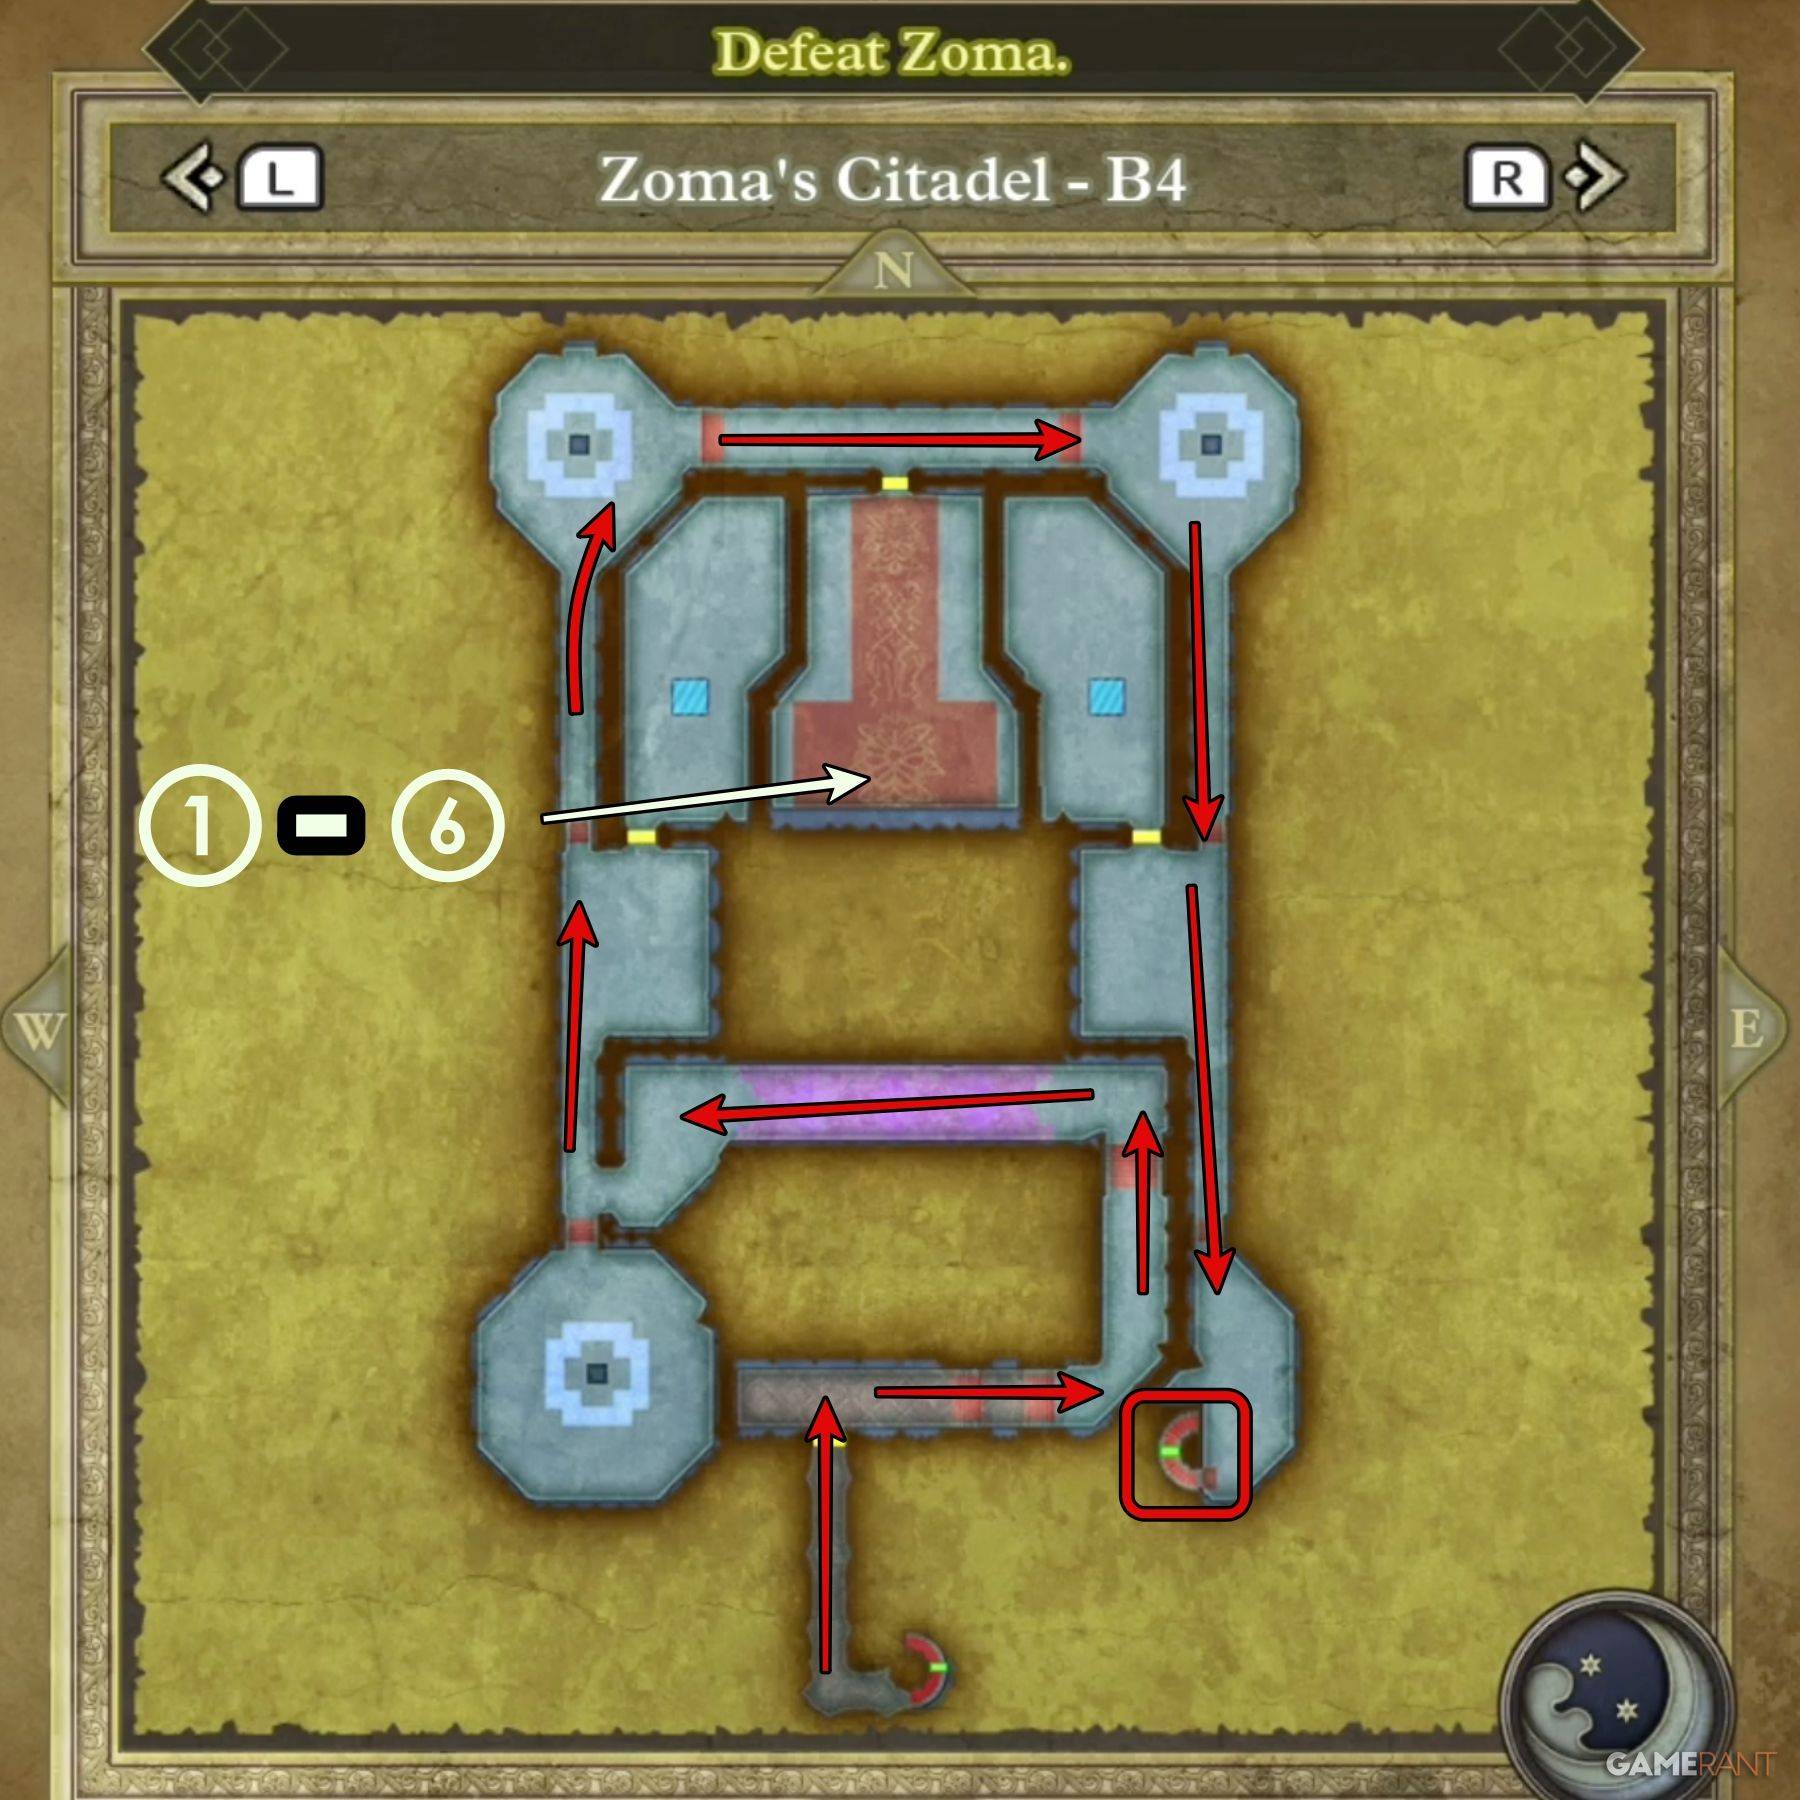 ### B4 Main Path:
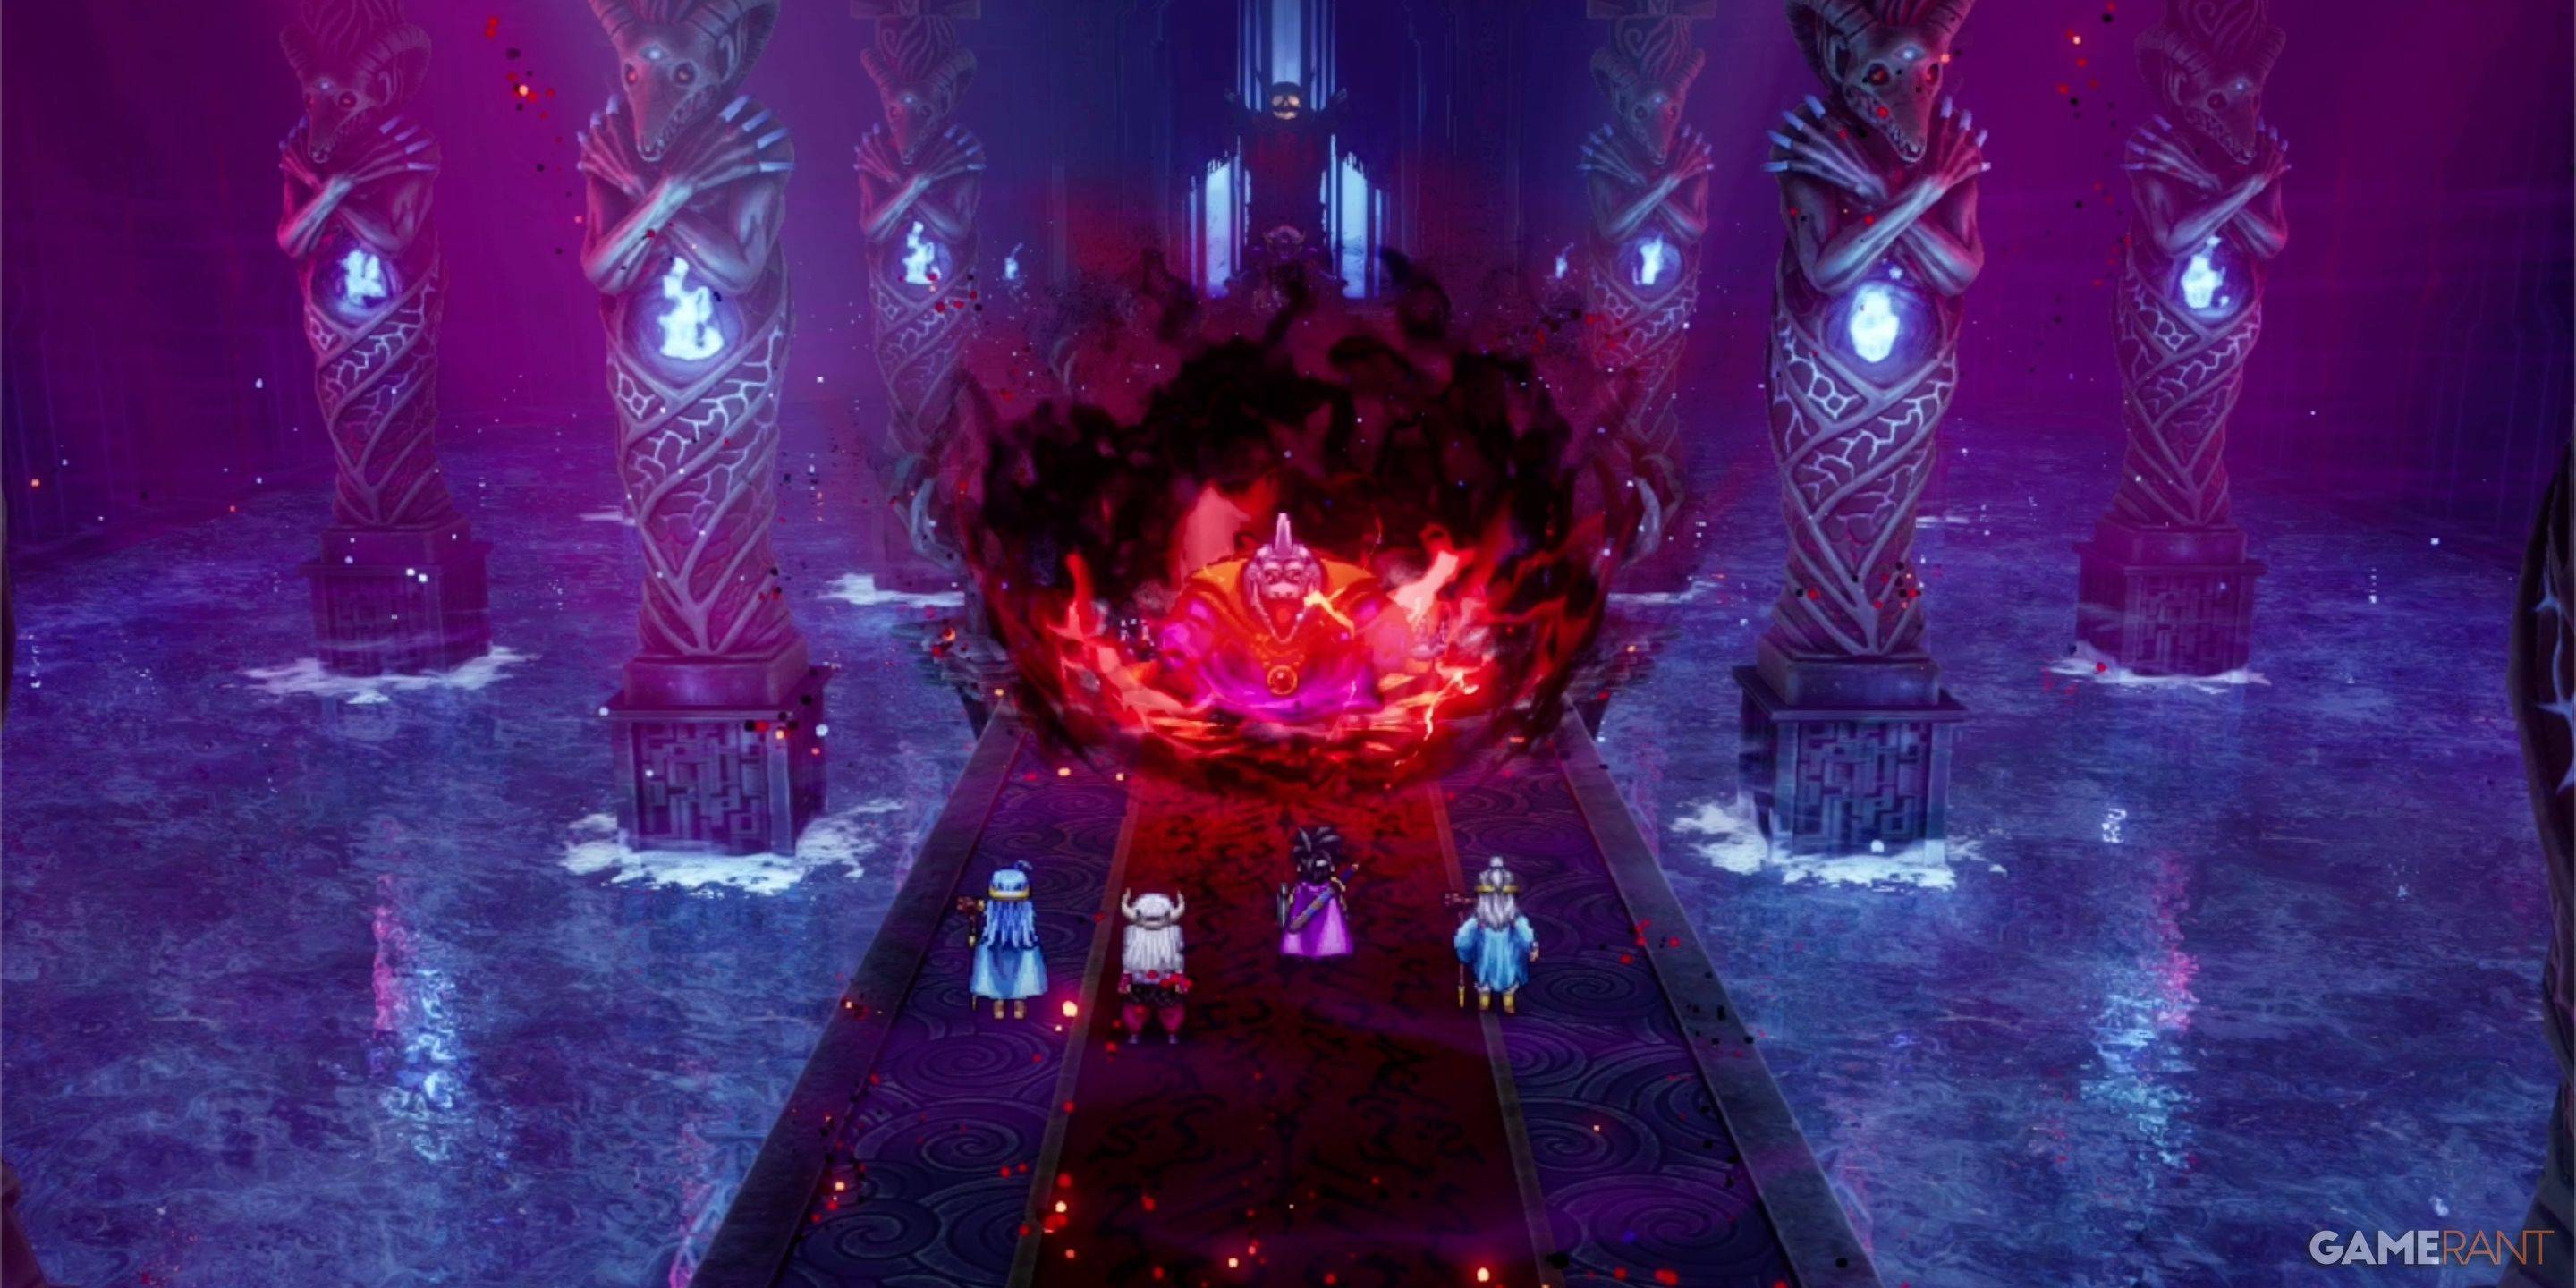
The fourth basement level is your final stop before confronting Zoma. Start from the right in the center of the southern area, navigate up and around, then head back down to the southeastern corner to reach the exit.
Don't miss the special cutscene that plays when you first enter B4; it's worth watching in full.
In one chamber, you'll find six chests arranged from right to left:
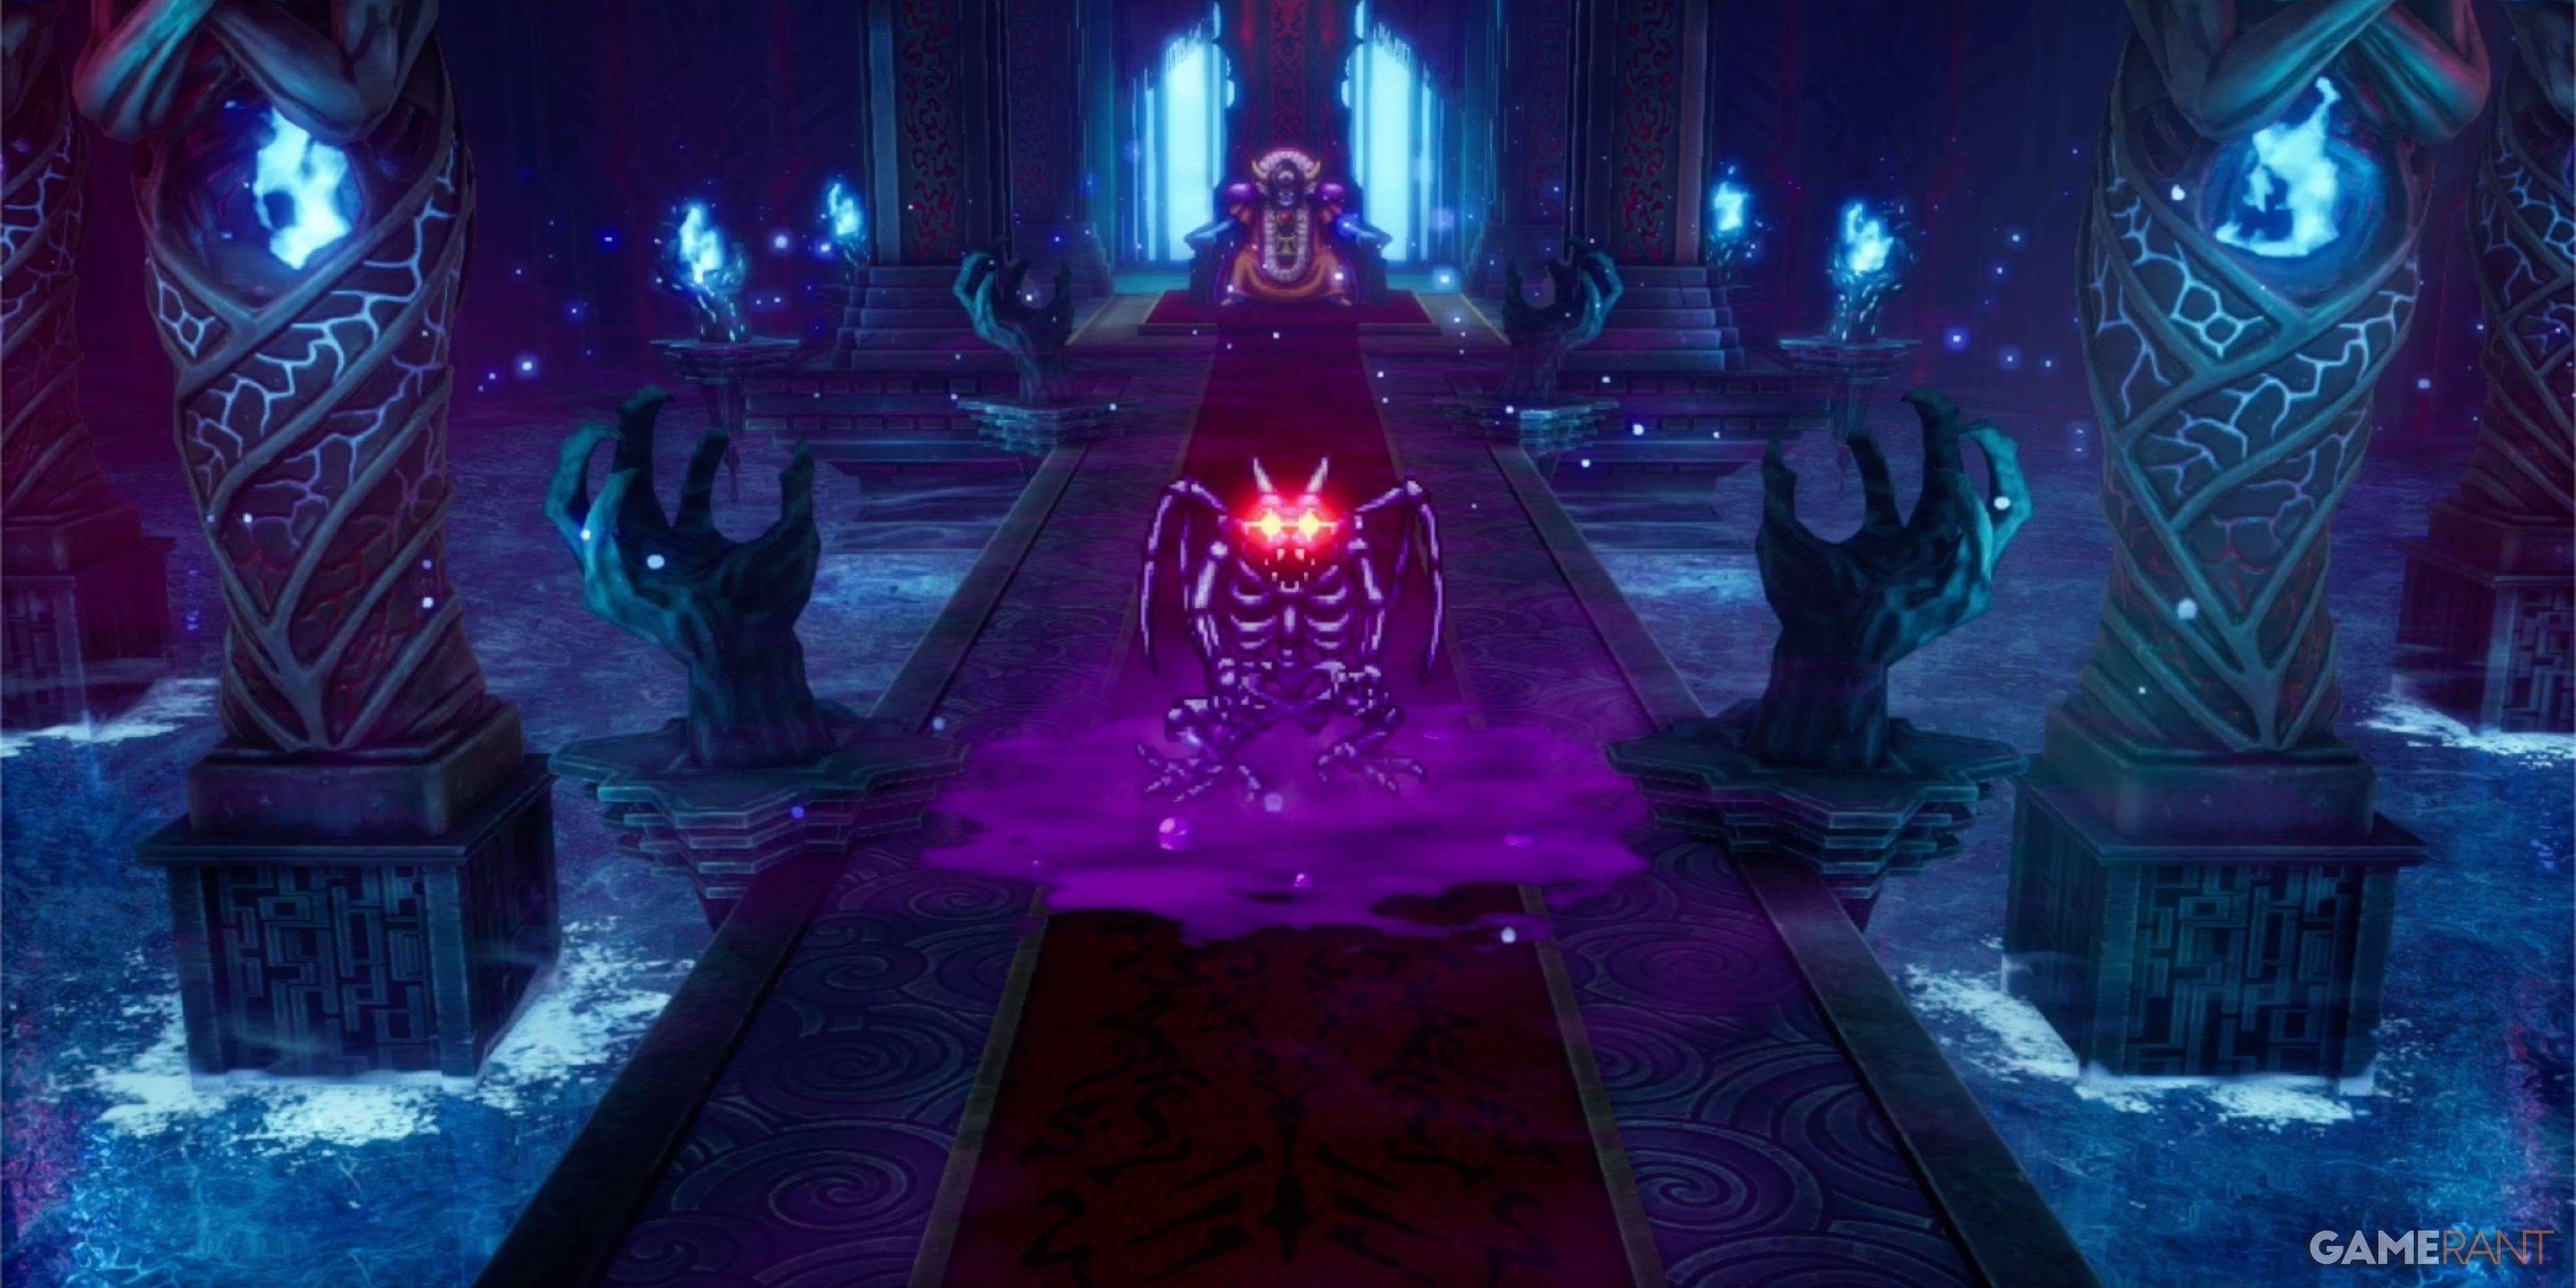
 Before facing Zoma, you'll need to navigate a gauntlet of bosses: the King Hydra, the Soul of Baramos, and the Bones of Baramos. Fortunately, you'll have time to use items from your bag between each fight, allowing you to manage your resources effectively.
 Comparable to a low-level main boss, the King Hydra doesn't have any red-damage weaknesses, but the Kazap spell proved highly effective, dealing over 400 damage per turn. Aggressiveness is key here, as the King Hydra heals for over 100 HP each round. Employing a standard boss strategy, we defeated it in one attempt without losing any party members. A Sage dedicated to healing can be beneficial, but any strategy that worked for other tough bosses should suffice.
 Having already faced the Soul of Baramos in the Tower of Rubiss, you should be familiar with the strategy. It's very weak to Zap damage, so have the Hero focus on using Kazap.
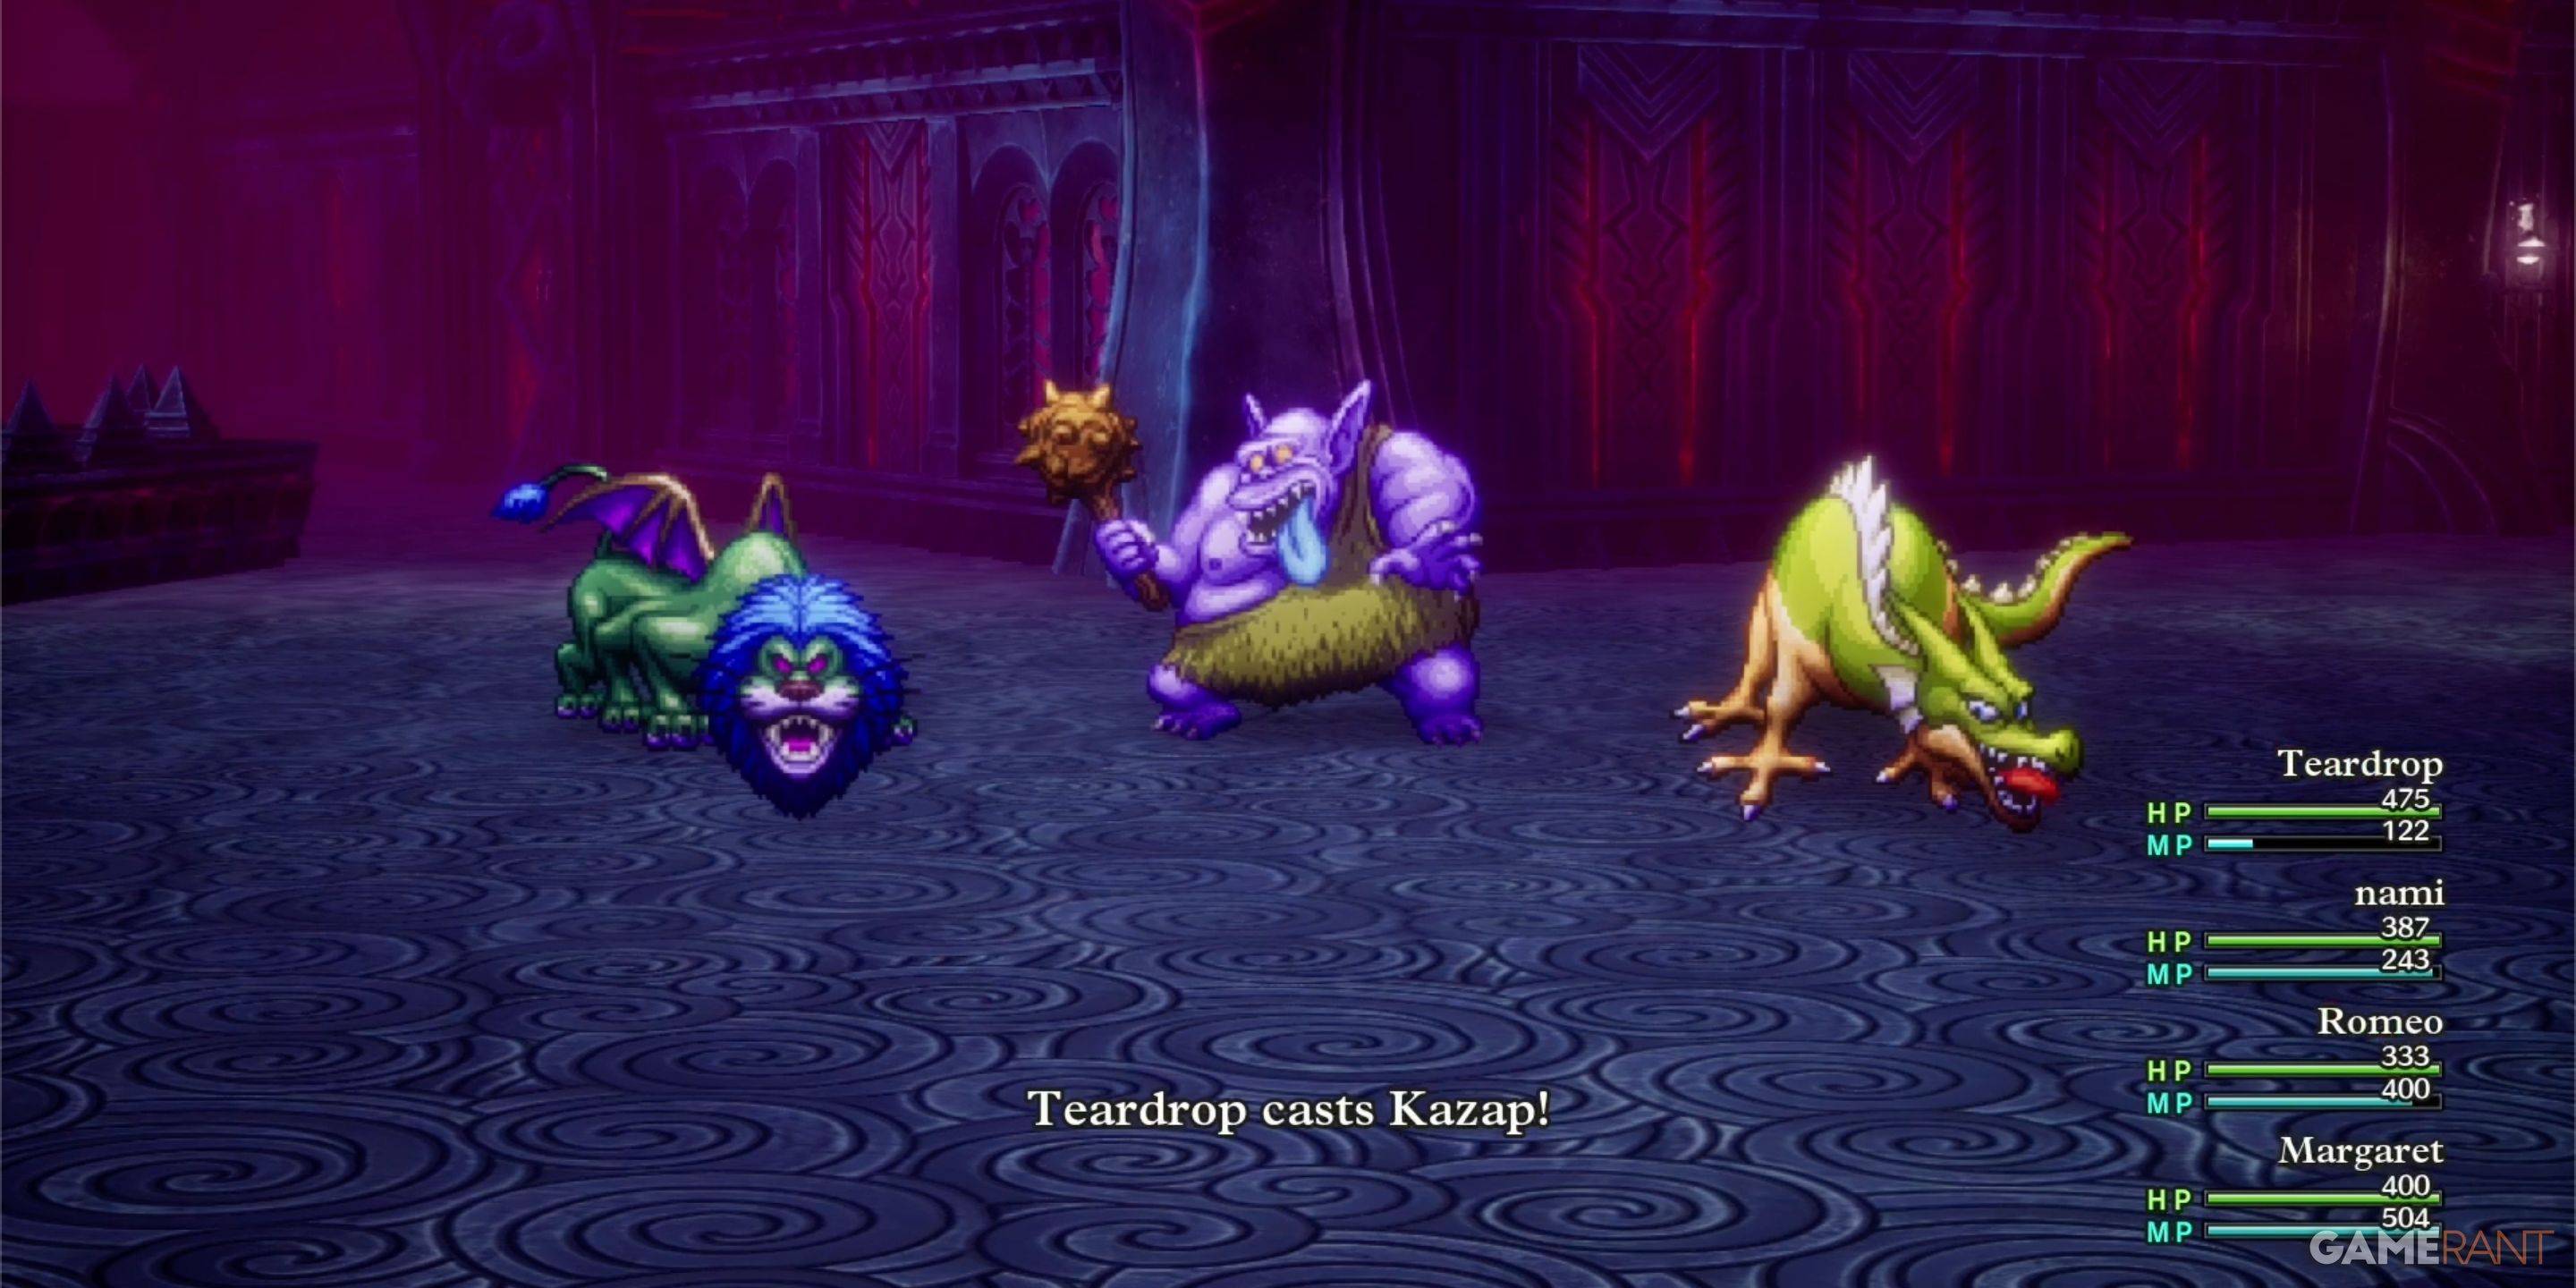
 Similar to its fleshy counterpart, the Bones of Baramos is vulnerable to Zap damage. We quickly defeated it using Kazap and the Monster Wrangler's Wild Side/Monster Pile-On combo. Be cautious, as the bones hit harder than the Soul of Baramos, but with proper health management, this fight should feel like an extension of the previous one.
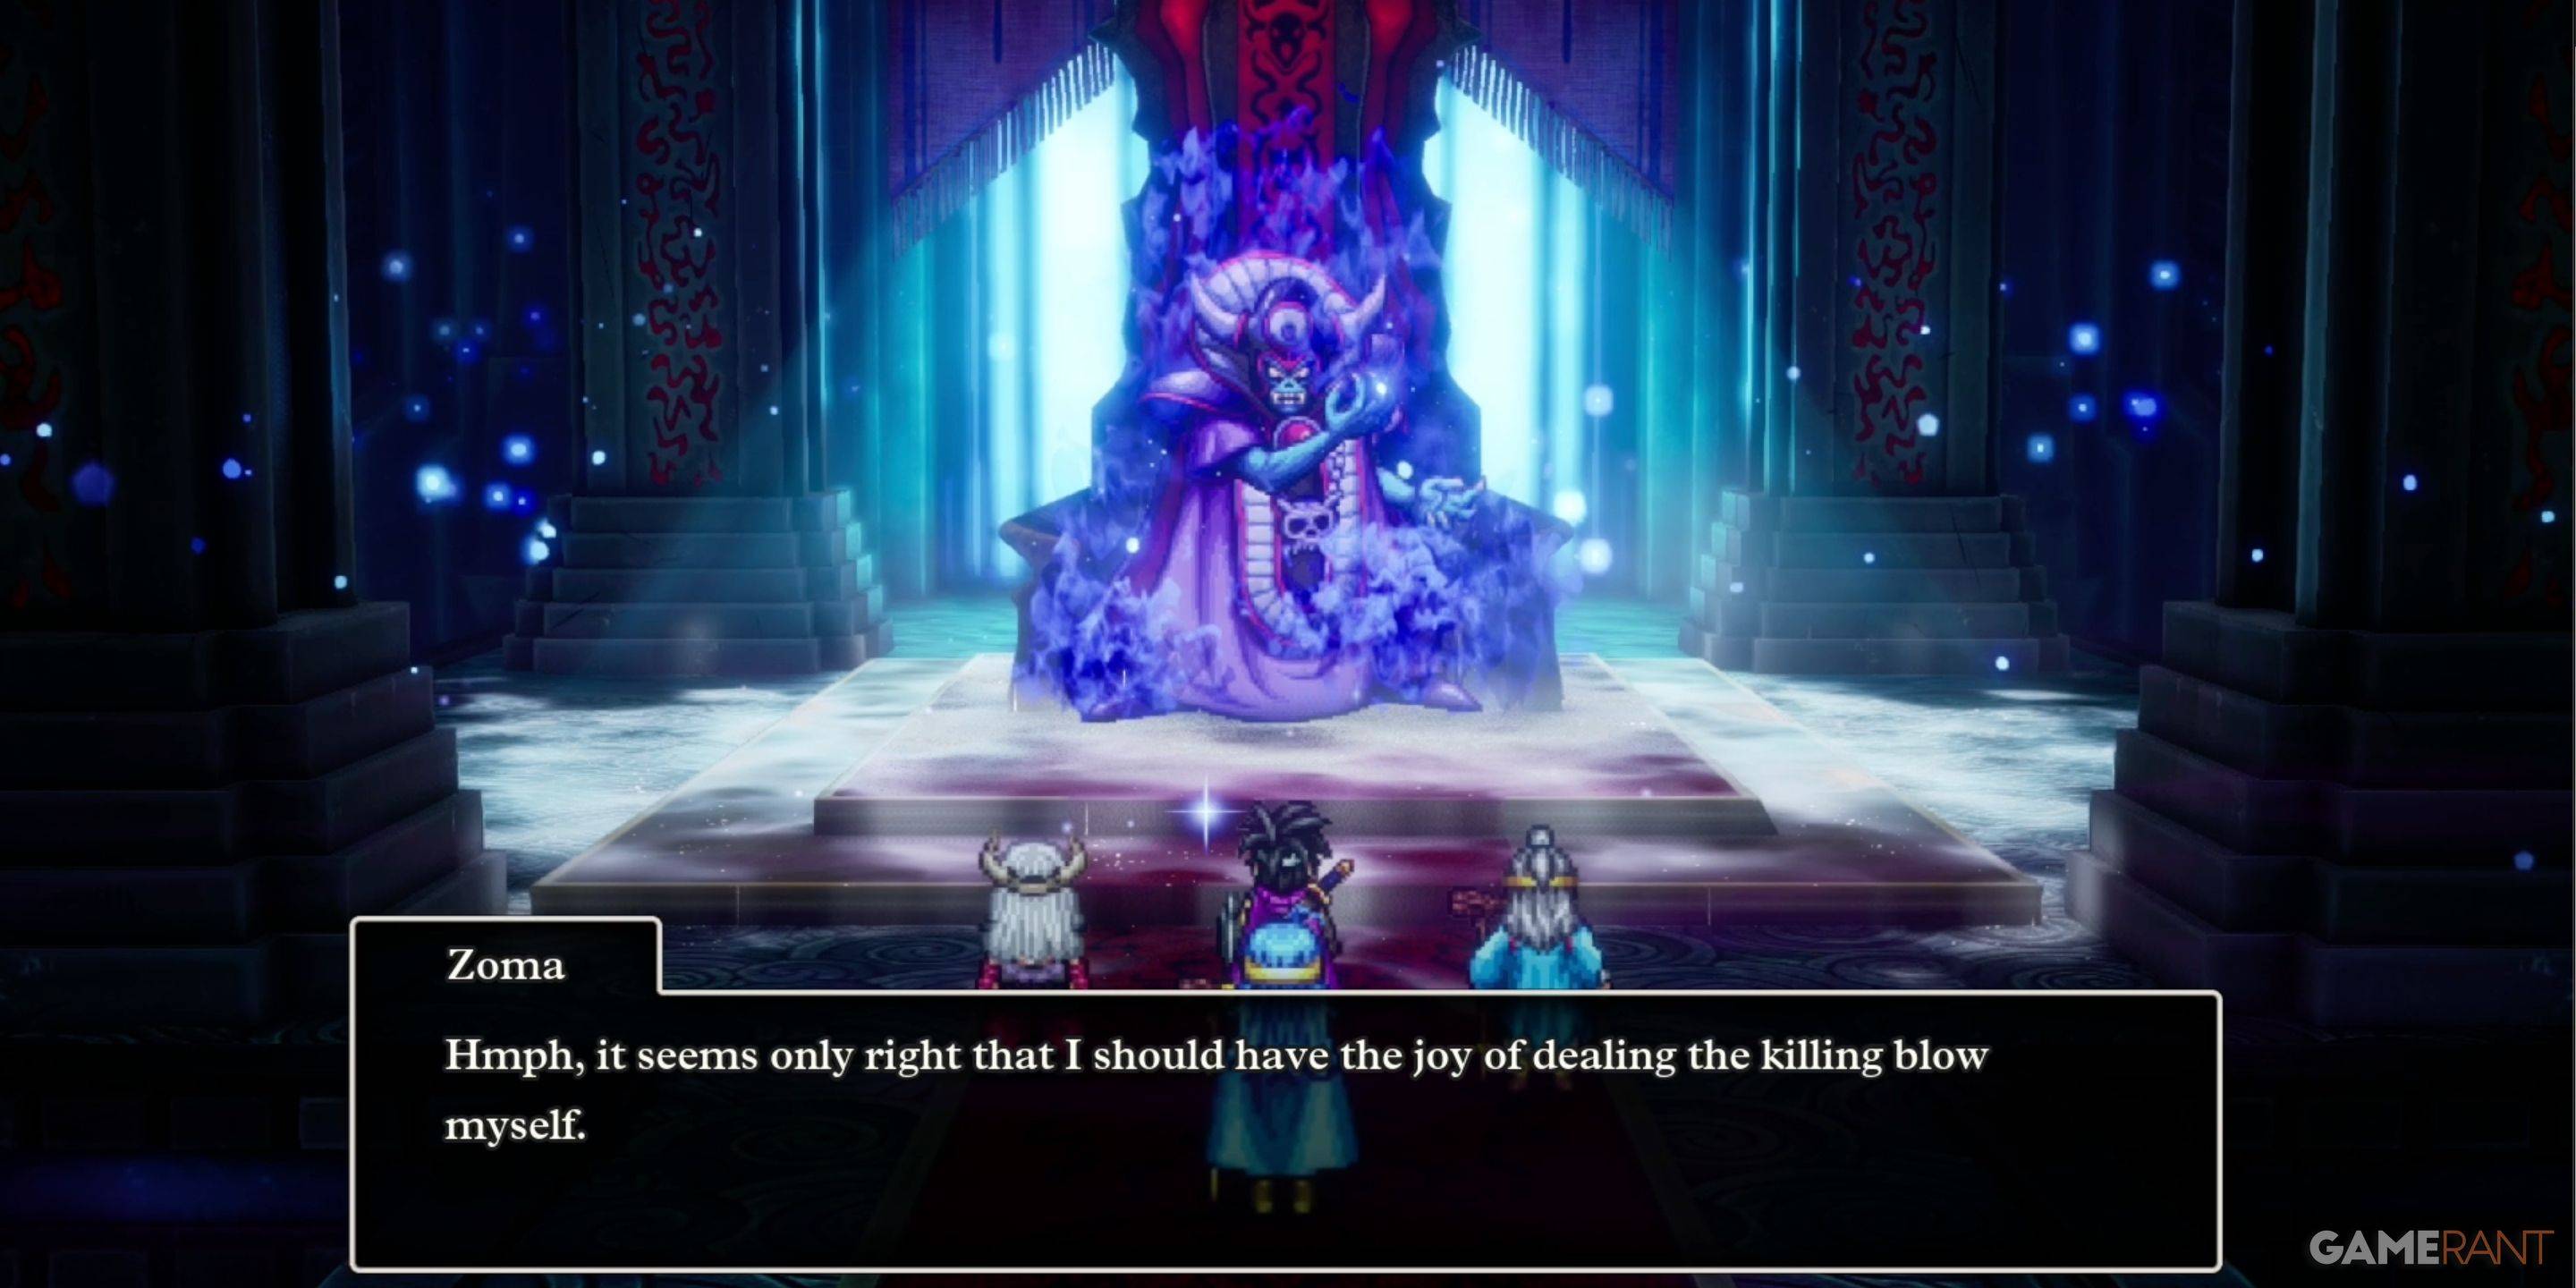
Zoma is the final boss of the main story, and the battle is as challenging as you'd expect. Avoid being overly aggressive; this fight demands strategy and patience to ensure all four party members survive.
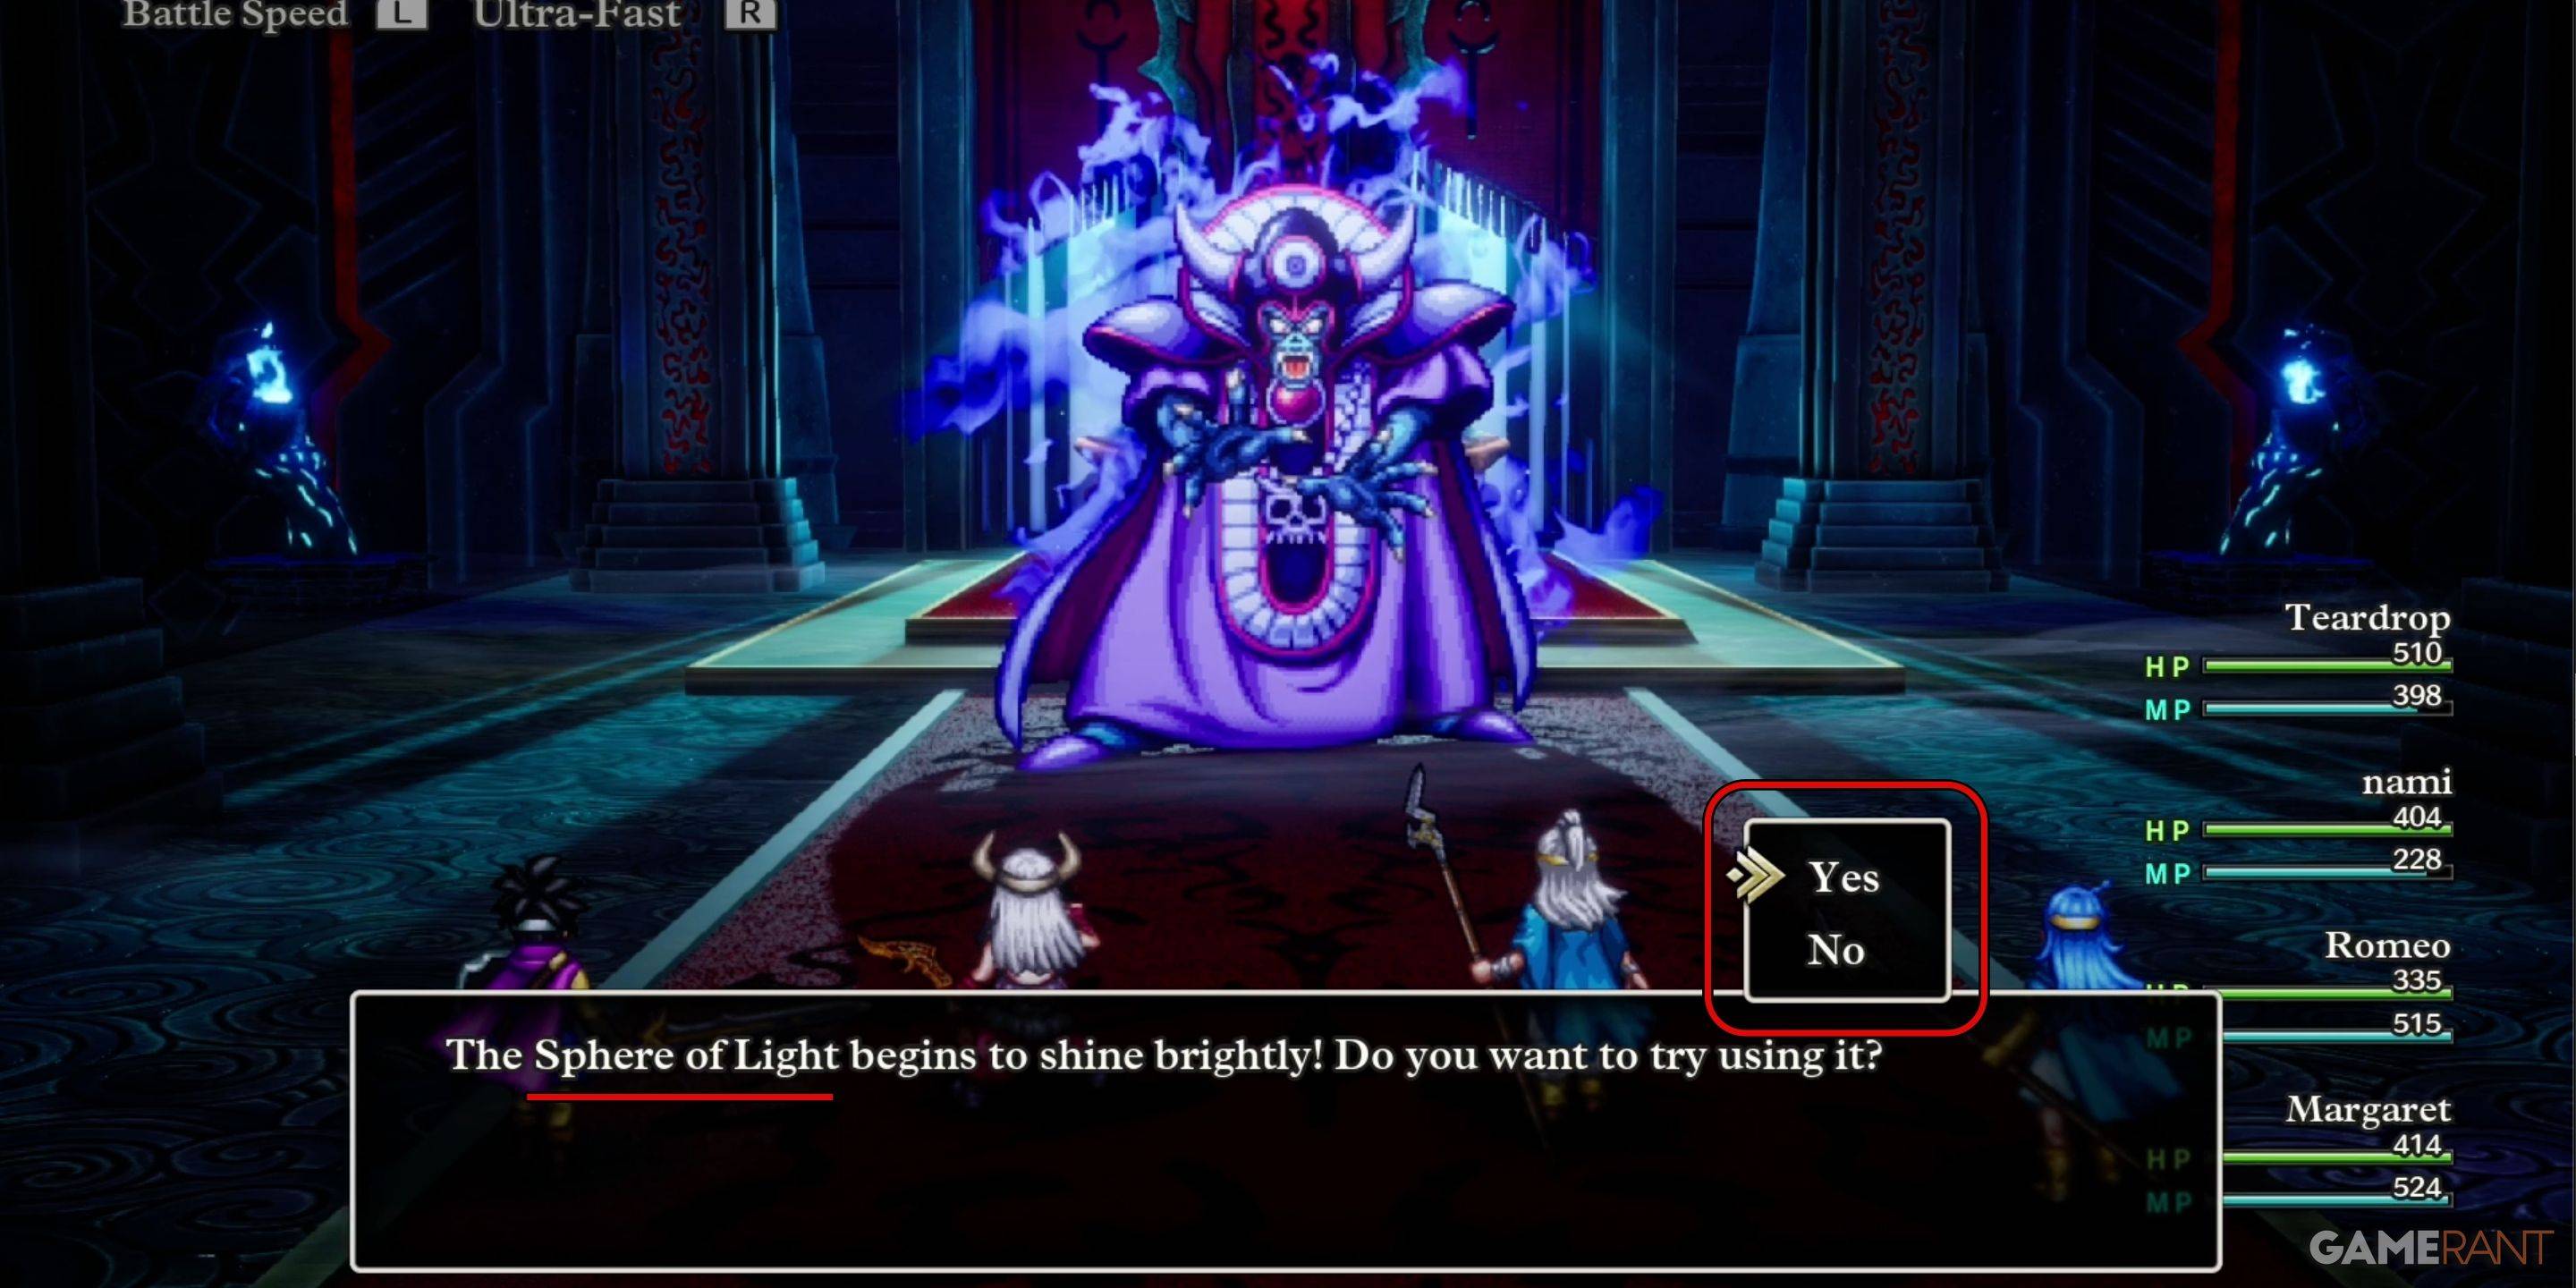 At the start, conserve your MP, as Zoma begins with a magic barrier that reduces the effectiveness of magic attacks. Wait for the prompt indicating the Sphere of Light is ready to be used, and select Yes to remove the barrier, making Zoma vulnerable to magic.
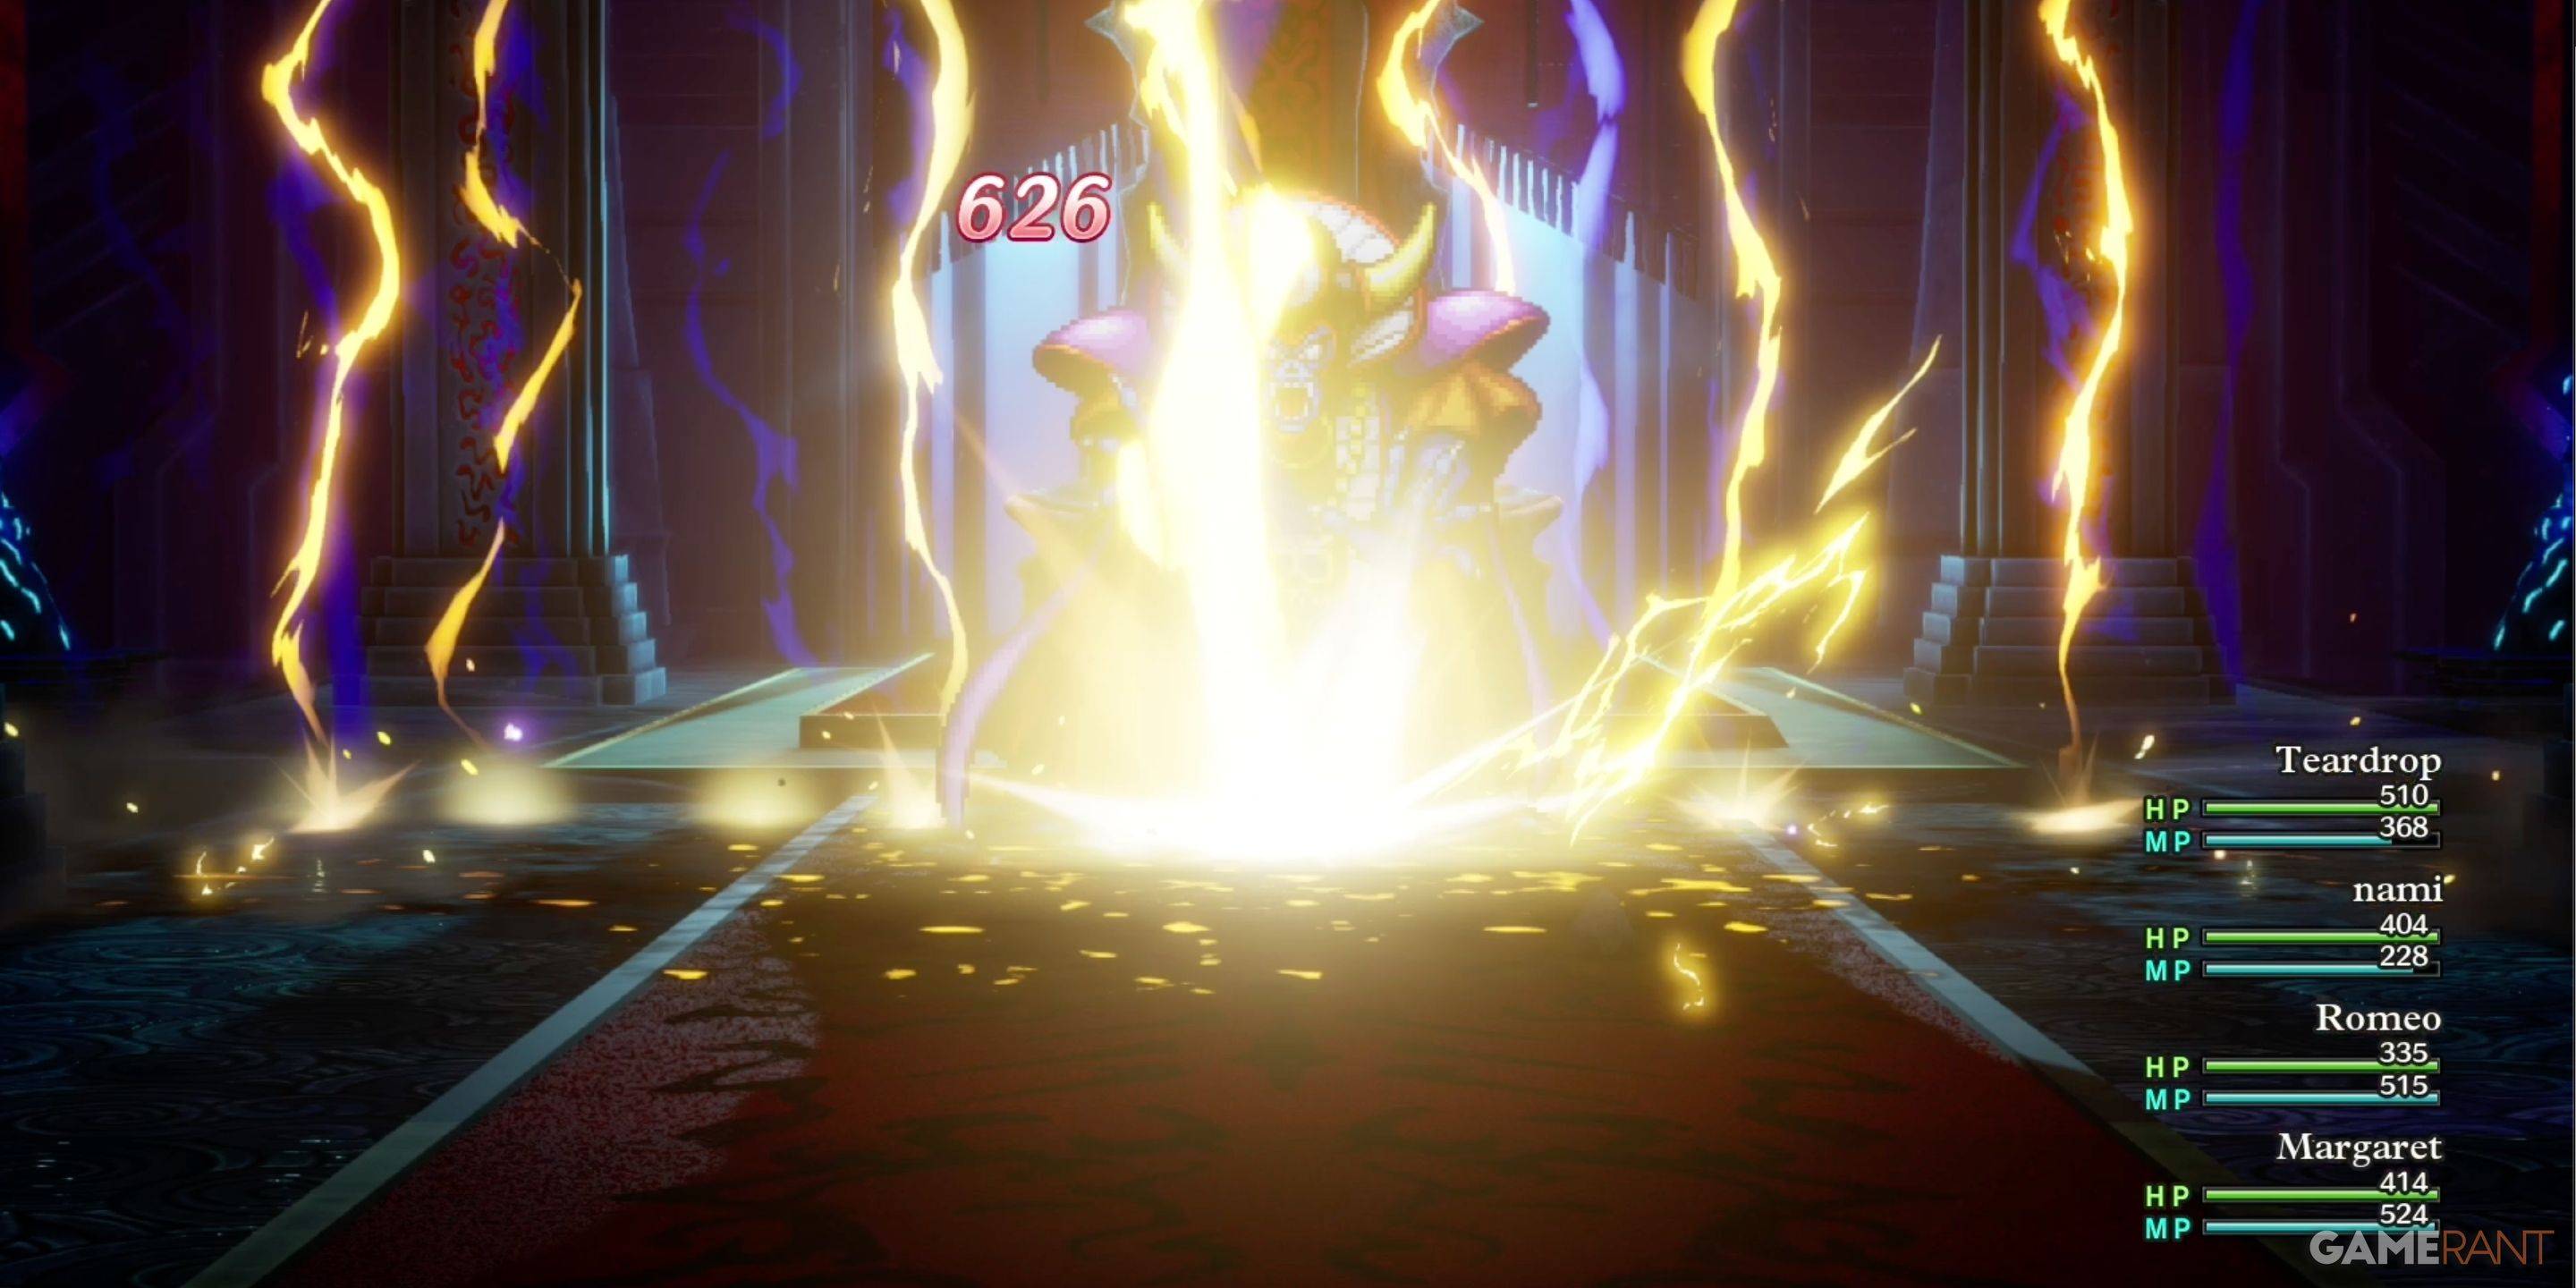 Once the barrier is down, Zoma is weak to Zap attacks. Our Kazap spell dealt over 650 damage per hit. The Kazap and Monster Wrangler combo is highly effective, allowing two other members to focus on healing and reviving. Be prepared to revive party members multiple times. Buffs, debuffs, and equipment that reflect damage can be crucial. The key is to take it slow, manage your HP carefully, and you'll eventually triumph.
| Monster Name | Weakness |
|---|---|
| Dragon Zombie | None |
| Franticore | None |
| Great Troll | Zap |
| Green Dragon | None |
| Hocus-Poker | None |
| Hydra | None |
| Infernal Serpent | None |
| One-Man Army | Zap |
| Soaring Scourger | Zap |
| Troobloovoodoo | Zap |
Zenless Zone Zero Update Cycle Leak Hints at Future Content cadence
Counterfeit Bank Simulator: Minting Solution for Economic Crises
All Mavuika Materials, Kit, and Constellations in Genshin Impact
Marvel Rivals: Season 1 Dracula Explained
Albion Online launches Paths to Glory update with new content, boosted spawn rates, and more
Roblox: Anime Auras RNG Codes (January 2025)
Best Xbox Game Pass Games For Kids (January 2025)
Solo Leveling: Global Tournament Draws Near
Video Game Consoles Are Selling for 12% More in the U.S. This Year Than Last Year
Mar 28,2026

Monster Hunter Wilds: Pre-Hunt Cooking Guide
Mar 25,2026
Facebook Sequel to Tackle Recent Controversies
Mar 24,2026

Soshiro Hoshina Joins Kaiju No. 8 Mobile Game
Mar 18,2026
Blizzard Story Team Votes to Unionize
Mar 16,2026
 Category